Armstrong VCT Flooring Installation Instructions: A Comprehensive Guide
Armstrong VCT flooring is a durable and versatile flooring option that is ideal for both residential and commercial spaces. Installing VCT flooring is a relatively simple process, but it is important to follow the manufacturer's instructions carefully to ensure a successful installation.
Before You Begin:
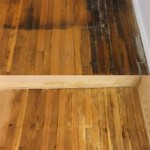
- Make sure the subfloor is smooth, level, and dry.
- If the subfloor is concrete, it must be cured for at least 28 days before installing VCT flooring.
- If the subfloor is wood, it must be at least 1 1/4 inches thick and have a moisture content of less than 12%.
- Gather all the necessary tools and materials, including:
- VCT tiles
- Adhesive
- Notched trowel
- Spreader
- Roller
- Utility knife
- Tape measure
- Chalk line
- Safety glasses
- Gloves
Installation Instructions:
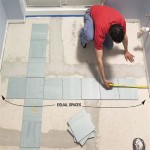
- Layout the tiles. Start by measuring the room and determining the center point. Snap a chalk line down the center of the room in both directions. This will help you to ensure that the tiles are installed straight.
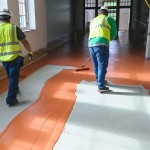
- Apply the adhesive. Using a notched trowel, spread the adhesive evenly over a small section of the subfloor. Work in small sections to prevent the adhesive from drying out.
- Install the tiles. Place the tiles onto the adhesive, pressing them down firmly. Use a roller to ensure that the tiles are securely bonded to the subfloor.
- Continue installing tiles. Continue installing tiles until the entire floor is covered. Be sure to stagger the joints between the tiles to create a stronger bond.
- Trim the tiles. Use a utility knife to trim the tiles around the edges of the room.
Finishing Up:
- Allow the adhesive to dry. The adhesive will need to dry for at least 24 hours before you can use the floor.
- Clean the floor. Use a damp mop to clean the floor and remove any dirt or debris.
- Apply a sealant. A sealant will help to protect the floor from wear and tear. Follow the manufacturer's instructions for applying the sealant.
Tips:
- Use a chalk line to ensure that the tiles are installed straight.
- Work in small sections to prevent the adhesive from drying out.
- Press the tiles down firmly to ensure that they are securely bonded to the subfloor.
- Stagger the joints between the tiles to create a stronger bond.
- Allow the adhesive to dry for at least 24 hours before using the floor.
- Clean the floor and apply a sealant to protect it from wear and tear.
By following these instructions, you can successfully install Armstrong VCT flooring in your home or business.

Installation Tips For Commercial Tile With Diamond 10 Technology Coating Armstrong Flooring Catalogs Documentation Brochures

Armstrong Floor Installation Diy

How To Install Vinyl Tile Grout Duraceramic Armstrong Right Daveblake Licesne Conttractor

How To Install Commercial Lvt

Flooring How To Install Luxury Vinyl Tiles

How To Install Vinyl Tile Grout Duraceramic Armstrong Right Daveblake Licesne Conttractor

How To Install Commercial Vinyl Tile Vct Flooring From Home Depot Step By

How To Install Luxury Vinyl Tile Flooring

How To Install Vinyl Composition Tile

Armstrong Vinyl Composition Tile Why It S A Great Choice
Related Posts