Essential Aspects of Trafficmaster Allure Vinyl Flooring Installation Instructions
Upgrading your flooring with Trafficmaster Allure vinyl is an excellent choice for both its style and durability. To ensure a successful installation, it's crucial to follow the installation instructions carefully. Here are the essential aspects to keep in mind:
1. Preparation:
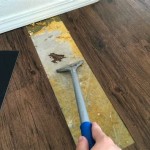
Before starting the installation, prepare the subfloor by removing any existing flooring and debris. Ensure the subfloor is level, dry, and smooth. Use a self-leveling compound if necessary to correct any unevenness.
2. Moisture Barrier:
Laying a moisture barrier is essential to prevent moisture from damaging the flooring. Use a polyethylene sheet that overlaps the subfloor by at least 6 inches on all sides.
3. Acclimation:
Allow the vinyl planks to acclimate to the temperature and humidity of the room for at least 24 hours before installation. This will prevent expansion or contraction after installation.
4. Layout:
Determine the starting point and layout of the planks. Measure and mark the center of the room and snap the first row of planks into place. Use spacers to ensure even gaps between the planks.
5. Cutting and Fitting:
Use a utility knife or a vinyl cutter to cut the planks to the desired size. Measure carefully and use a straight edge for precise cuts. Fit the cut planks around obstacles and corners.
6. Adhesive Application:
Apply the recommended adhesive to the subfloor according to the manufacturer's instructions. Ensure the adhesive is evenly distributed and avoid using too much adhesive.
7. Plank Placement:
Place the planks in the adhesive and press them down firmly with a roller or a rubber mallet. Ensure there are no gaps or ridges between the planks.
8. Expansion Gaps:
Leave an expansion gap of 1/4 inch around the perimeter of the room to allow for expansion and contraction. Install transition strips at doorways and other transitions.
9. Finishing:
After the adhesive has dried, remove the spacers and install baseboards or moldings to conceal the expansion gaps and provide a finished look.
10. Maintenance:
Regularly clean the flooring with a pH-neutral cleaner and a soft microfiber mop. Avoid using harsh chemicals or abrasive cleaners that can damage the flooring.
Following these installation guidelines will ensure a professional-looking and durable Trafficmaster Allure vinyl flooring installation. Remember to take your time, measure carefully, and follow the manufacturer's instructions precisely to achieve the best results.

Trafficmaster Allure Vinyl Plank Flooring Installation

How To Install Luxury Vinyl Plank Trafficmaster Allure

Installing Trafficmaster Allure In 4 Simple Steps All About Flooring

How To Install Allure Flooring

Allure By Traffic Master Flooring Install

Trafficmaster Allure Vinyl Plank Flooring Installation

Allure By Trafficmaster Flooring Install Grip Strip Planking

How To Install Trafficmaster Allure Gripstrip Installation Quick Start Sheet

Easy Floor Installation Using The Allure Gripstrip Vinyl Planks

Trafficmaster Allure Ultra Resilient Flooring Installation Review