Repairing Holes in Vinyl Flooring: A Comprehensive Guide
Vinyl flooring is a durable and versatile option that elevates the aesthetics of any space. However, accidents and wear and tear can lead to unsightly holes. Fortunately, fixing holes in vinyl flooring is a relatively straightforward task that can restore its pristine condition. Here's a comprehensive guide to guide you through the process:
Assess the Damage
The first step is to determine the extent of the damage. If the hole is small and superficial, you might be able to repair it with a vinyl repair kit. However, larger or deeper holes require a more involved approach involving patching or replacing the damaged section.
Gather Materials
Depending on the repair method you choose, you will need the following materials:
- Vinyl repair kit or replacement vinyl plank
- Utility knife
- Straight edge or ruler
- Adhesive designed for vinyl flooring
- Seam roller
Repairing Small Holes with a Vinyl Repair Kit
If the hole is small, a vinyl repair kit can quickly and easily fix it. Simply follow these steps:
1. Clean the area around the hole with a damp cloth. 2. Apply a small amount of adhesive to the back of the repair patch. 3. Press the patch over the hole and smooth it out with a roller. 4. Allow the adhesive to dry for the recommended time.Patching Larger Holes
For larger holes, patching is a suitable solution. Cut a piece of replacement vinyl plank to fit the damaged area.
1. Apply adhesive to both the patch and the damaged area. 2. Position the patch over the hole, ensuring it aligns with the surrounding planks. 3. Press the patch firmly into place and roll it with a seam roller. 4. Allow the adhesive to dry completely.Replacing Damaged Vinyl Plank
If the hole is too large to patch, you will need to replace the entire vinyl plank. This method requires more precision and may involve removing adjacent planks to access the damaged one.
1. Measure and mark the area to be replaced. 2. Carefully remove the damaged plank using a utility knife. 3. Cut a replacement plank to the same size as the removed one. 4. Apply adhesive to the bottom of the replacement plank and the surrounding area. 5. Insert the replacement plank into place and align it with the existing planks. 6. Press firmly and roll with a seam roller. 7. Allow the adhesive to dry completely before walking on the repaired area.Tips for a Seamless Repair
To ensure a seamless repair, follow these tips:
- Use an adhesive specifically designed for vinyl flooring.
- Apply adhesive evenly and avoid excess.
- Press the patch or replacement plank firmly into place.
- Roll the repair area with a seam roller to remove any air bubbles and ensure a strong bond.
- Allow the adhesive to dry completely before using the repaired area.
By following these steps and tips, you can effectively repair holes in your vinyl flooring, restoring its beauty and extending its lifespan.

How To Repair Vinyl Flooring Fixing Sc Bubbles More

Repairing Vinyl Flooring Diy Family Handyman

How To Repair Vinyl Flooring Fixing Sc Bubbles More

How To Repair Vinyl Flooring Fixing Sc Bubbles More

Repairing Vinyl Flooring Diy Family Handyman

Avoid Costly Mistakes Repairing Vinyl Plank Flooring Made Easy

How To Repair Vinyl Flooring Fixing Sc Bubbles More

Repair Vinyl Flooring Patch Damaged Diy

How To Repair Luxury Vinyl Plank Flooring The Palette Muse

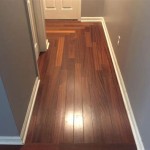
Repair Hole In Damaged Hardwood Floor Slaughterbeck Floors Inc
Related Posts