Bellawood Flooring Installation Instructions: Ensuring a Flawless Finish
Installing Bellawood flooring is a rewarding endeavor that can enhance the beauty and value of your home. By following these comprehensive installation instructions, you can achieve a professional-looking finish that will last for years to come.
1. Preparation
Before beginning the installation, ensure that the subfloor is level, dry, and free from debris. Install an underlayment to provide additional cushioning and soundproofing. Allow the flooring to acclimate to the room conditions for at least 48 hours before installation.
2. Layout and Cutting
Determine the starting point and layout the first row of planks. Use spacers to ensure consistent gaps between planks. Cut the planks to length using a power saw or miter saw. For walls and obstacles, measure and mark the planks before cutting.
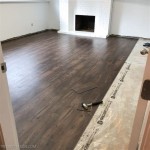
3. Installation
Begin installing the planks from the starting point and work inward. Use a tapping block to gently knock the planks into place. Offset the end joints of adjacent rows by at least 8 inches. Secure the planks to the subfloor using a nailer or flooring adhesive.
4. Expansion Gaps
Allow for expansion gaps around the perimeter of the room to prevent buckling during seasonal changes. Use spacers along walls and obstacles to maintain a consistent gap of approximately 1/4 inch.
5. Transitions and Trim
Install transition moldings between different flooring types or at doorways. Use quarter round or shoe molding to cover the expansion gap around the perimeter of the room. Secure the trim using nails or adhesive.
6. Care and Maintenance
To maintain the beauty of your Bellawood flooring, follow these care and maintenance tips: sweep or vacuum regularly, mop with a mild cleaning solution, avoid excessive moisture, protect from direct sunlight, and use furniture pads to prevent scratches.
Additional Tips
- Use a moisture barrier underlayment in areas with high humidity.
- Stagger the end joints of adjacent rows to increase strength.
- Check the manufacturer's recommendations for specific tools and materials.
- Allow ample time for acclimation and installation to minimize potential issues.
- If you encounter any difficulties, contact a professional flooring installer for assistance.

How To Install Prefinished Hardwood Floors Ll Flooring

How To Install Bellawood Prefinished Hardwood Floors Ll Flooring

Installing Bellawood Solid Hardwood Flooring Over Concrete Ll

Bellawood Installation Plaining Preparing Planing Floors Flat

How To Install Bellawood Prefinished Hardwood Floors Ll Flooring

Solid Hardwood Flooring

How To Install Hardwood Flooring Complete Instructions

Bellawood Artisan 3 4 In Bristol Tavern Hickory Solid Hardwood Flooring 5 Wide Ll

Brazilian Cherry Hardwood Flooring Ll Lumber Liquidators Sforce Commerce Cloud 4 1

Bellawood Review On The Job
Related Posts