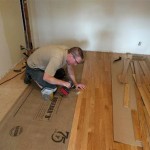
How to Install Vinyl Plank Flooring On Concrete
Vinyl plank flooring has become a popular choice for homeowners seeking a durable, attractive, and relatively easy-to-install flooring option. Its resilience to water, scratches, and general wear and tear makes it suitable for various areas, including basements, kitchens, and bathrooms. One of the most common subfloors for vinyl plank installations is concrete. This article provides a detailed guide on how to successfully install vinyl plank flooring over a concrete subfloor.
Prior to commencing any installation, proper preparation is paramount. This involves assessing the concrete subfloor, ensuring its suitability for vinyl plank flooring, and gathering the necessary tools and materials. Neglecting these preliminary steps can lead to flooring failures, aesthetic issues, and ultimately, wasted time and resources.
Preparation and Assessment of the Concrete Subfloor
The first and most crucial step is to thoroughly inspect the concrete subfloor. This involves checking for several critical factors, including levelness, moisture content, and the presence of cracks or other imperfections. A subfloor that is not properly prepared will compromise the integrity and longevity of the vinyl plank flooring.
Levelness: A concrete subfloor must be relatively level to ensure a smooth and even surface for the vinyl planks. Significant variations in height can cause the planks to flex, create uneven seams, and potentially lead to premature wear or damage. To assess levelness, a long, straight edge (at least 6 feet long) and a level are required. Place the straight edge on the concrete floor and use the level to identify any high or low spots. Minor variations (less than 3/16 inch over a 6-foot span) may be acceptable, but larger deviations need to be addressed. Self-leveling concrete compounds can be used to fill low spots and create a uniformly level surface. Grinding may be necessary to reduce high spots. Proper leveling is crucial for preventing rocking, flexing, and potential damage to the vinyl planks.
Moisture Content: Concrete is porous and can absorb moisture from the ground. High moisture levels can lead to mold growth, adhesive failure (if using glue-down planks), and warping of the vinyl planks. It is essential to test the moisture content of the concrete before installation. There are several methods for testing moisture levels, including the calcium chloride test (also known as the anhydrous calcium chloride test) and the use of an electronic moisture meter. The calcium chloride test involves placing a pre-weighed amount of calcium chloride under a sealed dome on the concrete surface for a specific period (typically 72 hours). The weight gain of the calcium chloride indicates the amount of moisture emitted by the concrete. Electronic moisture meters provide a more immediate reading of moisture content, but it's critical to use a meter calibrated for concrete. Reputable manufacturers of vinyl plank flooring typically specify the maximum acceptable moisture content for concrete subfloors. If the moisture level exceeds the specified limit, a moisture barrier must be installed. This barrier prevents moisture from migrating into the vinyl planks and causing damage.
Cracks and Imperfections: Any cracks, holes, or other imperfections in the concrete subfloor must be repaired before installing vinyl plank flooring. Even small cracks can telegraph through the flooring over time and become visible on the surface. Larger cracks can compromise the stability of the planks and lead to uneven wear. To repair cracks, use a concrete patching compound specifically designed for repairing concrete floors. Clean the crack thoroughly, apply the patching compound according to the manufacturer's instructions, and allow it to dry completely. For larger holes or significant damage, more extensive repairs may be necessary, potentially involving the application of a self-leveling concrete compound. Once repairs are complete, the entire surface should be cleaned to remove any dust, debris, or residual patching compound.
Cleaning: Thorough cleaning is essential to ensure proper adhesion, whether you're using a glue-down or a click-lock system (to avoid any unwanted movement in the latter). Sweep, vacuum, and then damp-mop the entire concrete surface. Allow the floor to dry completely before proceeding.
Tools and Materials Required
Having all the necessary tools and materials prepared beforehand streamlines the installation process and minimizes interruptions. Here is a list of essential items:
- Vinyl Plank Flooring: Calculate the square footage of the area to be covered and purchase approximately 10% extra to account for cuts and waste.
- Moisture Barrier (if needed): Based on the moisture test results, select and purchase an appropriate moisture barrier.
- Underlayment (optional but recommended): An underlayment adds cushioning, reduces noise, and can help to even out minor imperfections in the subfloor. Choose an underlayment specifically designed for vinyl plank flooring.
- Measuring Tape: For accurate measurements and layout planning.
- Pencil or Marker: For marking cut lines.
- Utility Knife: For scoring and cutting vinyl planks.
- Straight Edge: For guiding cuts.
- Tapping Block: Used to gently tap planks together without damaging them.
- Rubber Mallet: For gently tapping the tapping block.
- Spacers: To maintain a consistent expansion gap around the perimeter of the room.
- Saw (optional): While a utility knife is often sufficient for cutting, a circular saw or jigsaw can be helpful for more complex cuts or larger projects.
- Knee Pads: For comfort during installation.
- Safety Glasses: To protect eyes from debris.
- Dust Mask: To avoid inhaling dust particles, especially during subfloor preparation.
- Cleaning Supplies: Broom, vacuum, mop, and appropriate cleaning solution.
- Self-Leveling Compound (if needed): To address uneven areas on the concrete floor.
- Concrete Patching Compound (if needed): To repair cracks or holes in the concrete floor.
- Adhesive (if using glue-down planks): Select an adhesive specifically recommended for vinyl plank flooring and concrete subfloors.
Installation Process
Once the subfloor is properly prepared and all necessary tools and materials are gathered, the installation process can begin. The following steps outline the typical installation procedure for vinyl plank flooring over concrete.
1. Acclimation: Before installation, allow the vinyl planks to acclimate to the room's temperature and humidity for at least 48 to 72 hours. This helps the planks adjust to the environment and minimizes expansion or contraction after installation. Store the planks in the room where they will be installed, laying them flat and allowing air to circulate around them.
2. Moisture Barrier Installation (if required): If the moisture test indicated excessive moisture levels in the concrete, install a moisture barrier according to the manufacturer's instructions. Typically, this involves unrolling the barrier and overlapping the seams by the recommended amount. Use seam tape to seal the seams and prevent moisture from penetrating. Ensure the barrier is securely adhered to the concrete surface.
3. Underlayment Installation (optional): If using an underlayment, install it according to the manufacturer's instructions. Typically, this involves unrolling the underlayment and butting the seams together. Some underlayments have adhesive strips to secure the seams, while others may require seam tape. Ensure the underlayment is flat and smooth before proceeding.
4. Layout Planning: Before starting the installation, plan the layout of the vinyl planks. Start by determining which direction the planks will run. Generally, it's recommended to run the planks parallel to the longest wall of the room. This minimizes the number of cuts and creates a more visually appealing result. Determine the starting point for the first row of planks. It's often best to start along a straight wall, leaving a small expansion gap (typically ¼ to ⅜ inch) between the planks and the wall. Use spacers to maintain a consistent expansion gap around the perimeter of the room.
5. Installing the First Row: Begin installing the first row of vinyl planks, starting at the chosen starting point. For click-lock systems, engage the planks at an angle and then rotate them down until they lock into place. Use a tapping block and rubber mallet to gently tap the planks together to ensure a tight and secure fit. For glue-down systems, apply adhesive to the concrete subfloor according to the manufacturer's instructions. Position the first plank carefully and press it firmly into the adhesive. Use a roller to ensure full contact between the plank and the adhesive. Remove any excess adhesive immediately.
6. Continuing the Installation: Continue installing the vinyl planks row by row, following the same procedure as the first row. Stagger the end joints of adjacent rows to create a more visually appealing pattern and to add strength to the flooring. Use a utility knife and straight edge to cut planks to fit around obstacles or at the end of rows. For more complex cuts, a saw may be necessary. Maintain the expansion gap around the perimeter of the room as you proceed.
7. Final Row and Finishing Touches: When you reach the final row, you may need to cut the planks lengthwise to fit the remaining space. Measure the distance between the last row of planks and the wall, and cut the final row of planks accordingly. Install the final row of planks, ensuring the expansion gap is maintained. Once the installation is complete, remove the spacers and install baseboards or trim to cover the expansion gap and provide a finished look. Clean the floor thoroughly to remove any dust or debris.

How To Prepare A Concrete Floor For Vinyl Flooring Parrys

Easy Ways To Install Vinyl Plank Flooring On Concrete

10 Beginner Mistakes Installing Vinyl Plank Flooring

How To Install Vinyl Plank Flooring On Concrete Step By Guide

How To Install Vinyl Plank Flooring On Concrete Step By Tutorial

Tips And Tricks For Installing Vinyl Plank Over Concrete Floors Riverbend Interiors

Tips For Installing Vinyl Plank Over Concrete Floors Lemon Thistle

Laying Vinyl Planks The Right Way Expert Guide By Fantastic Handyman

How To Install Vinyl Or Laminate Floors In A Basement Over Concrete Slab

How To Install Vinyl Plank Flooring On Concrete Base
Related Posts


