How To Install Tile Flooring
Installing tile flooring is a rewarding project that can dramatically enhance the look and feel of any room. It is a durable and aesthetically pleasing choice that can withstand heavy foot traffic and add value to your home. While it may seem daunting, the process can be manageable with proper planning and execution.
1. Preparation and Planning
Proper preparation is crucial for a successful tile installation. This includes gathering the necessary tools and materials, carefully measuring the space, and ensuring the subfloor is level and ready to accept the tile.
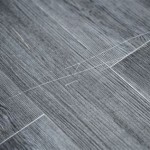
Begin by gathering the essential tools, which may include a tile cutter, grout float, trowel, level, tape measure, pencil, and safety gear like gloves and eye protection. Determine the exact area to be tiled and calculate the required tile quantity, accounting for waste and breakage. Factor in grout lines and ensure your tile selection is suitable for the intended area. For example, porcelain tiles are known for their durability and water resistance, making them ideal for kitchens and bathrooms.
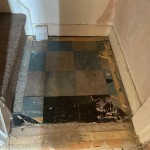
Next, carefully assess the subfloor. It must be level and free of cracks or dips. If necessary, address any imperfections by leveling with a self-leveling compound or plywood. Consider the type of adhesive you will need, as different tiles require specific adhesives. For instance, a thin-set mortar is often suitable for ceramic and porcelain tiles. Finally, choose grout that complements the tile color and is compatible with the type of tile you are installing.
2. Installation
Once the subfloor is prepared, you are ready to begin the installation process. This involves laying out the tiles, applying adhesive, and carefully setting the tiles in place.
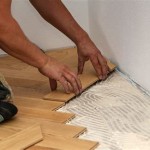
Start by laying out the tiles dry, without adhesive. This allows you to visualize the final layout and make any necessary adjustments, ensuring that the tiles are properly spaced and centered. Pay attention to the grout lines and make necessary adjustments to accommodate door openings or other architectural features. Once you are satisfied with the layout, begin applying the adhesive using a notched trowel. The size of the notch on the trowel influences the amount of adhesive applied and should be chosen based on the manufacturer's instructions and type of tile. Spread the adhesive evenly, covering the entire area where the tile will be placed.
Carefully place the first tile in position, pressing firmly into the adhesive. Ensure the tile is level and aligned with the rest of the layout. For larger areas, you may want to use tile spacers to maintain consistent grout lines. Continue placing the remaining tiles, following the same procedure. Make sure to use a rubber mallet to tap the tiles gently into place, ensuring that they are level and flush with each other. If necessary, adjust the tile positions to ensure a consistent and aesthetically pleasing look.
3. Grouting and Sealing
After the adhesive has set, it is time to grout the tile. This step fills the gaps between the tiles, creates a watertight seal, and adds to the overall aesthetic appeal of the flooring.
Wait for the adhesive to dry completely, following the manufacturer's instructions. Using a grout float, apply the grout to the spaces between the tiles, pressing it firmly into the gaps. Remove excess grout using a damp sponge, ensuring it doesn't smear onto the tile surface. Allow the grout to dry completely, following the manufacturer's recommendations. Once dried, you can clean the tile surface using a clean cloth to remove any residue.
For tiles in areas prone to water damage, such as bathrooms or kitchens, consider applying a sealant to enhance water resistance and protect against stains. Apply the sealant according to the manufacturer's instructions, allowing sufficient time for it to dry before walking on the tile surface. Proper sealing contributes to the longevity and beauty of your tile flooring.

How To Install A Tile Floor The Home Depot

Complete Guide On How To Install Ceramic Floor Tiles Rubi Blog Usa

Installing Tile Floor For The First Time How To Lay Crafted Work

How To Lay Tile Diy Floor Installation Lowe S

How To Install Tile Flooring Forbes Home

Complete Guide On How To Install Ceramic Floor Tiles Rubi Blog Usa

How To Lay Tile Diy Floor Installation Lowe S

For Great Tile Floors Layout Is Everything Fine Homebuilding

Tile Floor 101 Step By How To Install For The First Time

6 Tips For Laying Floor Tile With No Experience
Related Posts