Trafficmaster Flooring Installation Instructions: A Comprehensive Guide for Professionals and Homeowners
Transforming your home with Trafficmaster flooring is an excellent choice, and ensuring a flawless installation is crucial for its longevity and aesthetics. Here's a comprehensive guide to navigate the installation process seamlessly, providing essential instructions for both professionals and DIY enthusiasts.
1. Preparation of the Subfloor
The foundation of a successful flooring installation lies in a well-prepared subfloor. Ensure your subfloor is level, dry, and free of any irregularities. Leveling compounds or plywood may be necessary to create a uniform surface. Additionally, check for any moisture issues and address them promptly to prevent future flooring problems.
2. Acclimation of the Flooring
Before beginning the installation, it's essential to acclimate the flooring to your indoor environment. Unpack the flooring planks and lay them flat in the installation area for at least 48 hours. This allows the flooring to adjust to your room's humidity and temperature, reducing the risk of buckling or cracking after installation.
3. Layout and Cutting
Plan out the layout of your flooring to minimize waste and ensure a seamless transition. Measure and mark the starting point and begin laying the planks, alternating the direction of each row. Use a circular saw or utility knife to cut the planks to fit around obstacles or to create straight edges.
4. Adhesive Application
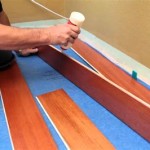
Trafficmaster flooring requires a specific adhesive for proper bonding. Apply the adhesive evenly to the subfloor, following the manufacturer's instructions. Use a notched trowel to create ribs in the adhesive to improve adhesion. Ensure the adhesive does not extend beyond the edges of the planks to avoid unsightly gaps.
5. Planking Placement and Locking
Carefully lay the flooring planks onto the adhesive, aligning them with the previous row and ensuring a tight fit. Use a tapping block and hammer to firmly seat the planks and engage the locking systems. Interlocking planks should snap together with ease, creating a solid and durable floor.
6. Transitioning and Moldings
Where different types of flooring or surfaces meet, transitions are necessary to provide a smooth transition. Install transition strips or moldings to cover the joints and create a professional finish. Use the appropriate fasteners or adhesives to secure the transitions.
7. Final Touches
Once the flooring installation is complete, remove any excess adhesive or debris and clean the surface. Use a damp mop or microfiber cloth to wipe down the floor and remove any dust or dirt. If desired, apply a sealant or protective coating to protect the flooring from wear and tear.
Tips for Professional Installers:
- Use a laser level to ensure perfect leveling of the subfloor.
- Invest in a high-quality flooring cutter for precise cuts.
- Always follow the manufacturer's specific instructions for adhesive application and flooring installation.
Reminders for Homeowners:
- Allow ample time for flooring acclimation to avoid future issues.
- Be patient and take care during the installation process to ensure a flawless finish.
- Regularly clean and maintain your Trafficmaster flooring to enhance its appearance and longevity.

Home Depot Traffic Master Water Resistant Laminate Installation

Home Depot Traffic Master 5g Installation

Trafficmaster Grey Wood Parquet 3 Mil X 12 In W L And Stick Water Resistant Vinyl Tile Flooring 30 Sqft Case A4265051 The Home Depot

Trafficmaster Ceramica 12 X 24 Vinyl Tile Floor Installation

Home Depot Traffic Master Water Resistant Laminate Installation

Trafficmaster Napa River Oak 7 Mm T X 5 In W Laminate Wood Flooring 26 8 Sqft Case Tm33 The Home Depot

Trafficmaster Ardenmore Oak 6 Mil X 7 In W 48 L Waterproof Lock Vinyl Plank Flooring 23 8 Sq Ft Case Vtrhdardoak7x48 The Home Depot

129 Trafficmaster Flooring Reviews Consumer

Trafficmaster Floor Installation Budget Friendly Home Remodeling

129 Trafficmaster Flooring Reviews Consumer
Related Posts


