Installing Laminate Flooring Around Door Thresholds: A Comprehensive Guide
Installing laminate flooring presents a cost-effective and aesthetically pleasing way to upgrade the interior of a home. While laying the main expanse of the floor can be relatively straightforward, navigating the areas around door thresholds often requires careful planning and execution. A well-executed installation around these areas not only enhances the visual appeal of the floor but also ensures its longevity and functionality. This article provides a detailed guide to installing laminate flooring around door thresholds, covering essential considerations, preparation steps, step-by-step installation techniques, and common pitfalls to avoid.
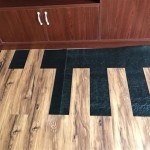
The threshold, also sometimes called a saddle, serves as a transition piece between two different flooring types or different levels of flooring within the same room. It often bridges the gap beneath a door, providing a smooth and safe transition while effectively sealing the doorway against drafts and debris. When installing laminate flooring, careful attention must be paid to how the laminate planks abut the threshold to ensure a seamless and professional-looking finish. Failure to address this detail can lead to unsightly gaps, uneven surfaces, and potential damage to the flooring.
Key Considerations Before Installation
Before commencing the installation process, several crucial factors need to be assessed. These considerations will influence the choice of materials, the methods employed, and the overall success of the project.
1. Threshold Type and Material: Door thresholds come in various materials, including wood, metal, stone, and vinyl. Each material necessitates different installation techniques. For example, a wooden threshold may be easier to trim and contour than a metal one. The existing threshold might be flush with the subfloor, or it may protrude above the subfloor. This height difference will affect how the laminate planks need to be installed to create a smooth transition.
2. Expansion Gap: Laminate flooring, like most flooring materials, expands and contracts with changes in temperature and humidity. An expansion gap must be left around the perimeter of the room, including around door thresholds. This gap allows the flooring to move without buckling or warping. The size of the required expansion gap is typically specified by the laminate flooring manufacturer and is crucial for the long-term performance of the floor.
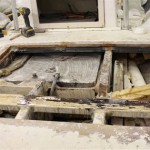
3. Subfloor Preparation: The subfloor must be clean, level, and dry before installing the laminate flooring. Any imperfections in the subfloor, such as cracks or unevenness, must be addressed to prevent problems with the laminate flooring later. Inspect the subfloor around the door threshold carefully. Minor imperfections can be filled with leveling compound. More significant issues may require more extensive repairs.
4. Door Clearance: The added height of the laminate flooring, including the underlayment, will reduce the clearance between the bottom of the door and the floor. It is essential to check this clearance before installation. If the clearance is insufficient, the door may need to be trimmed or raised to allow it to swing freely over the new flooring.
Step-by-Step Installation Guide
Following a systematic approach to the installation process will ensure a professional-looking and durable result. The following steps outline a recommended procedure for installing laminate flooring around door thresholds.
Step 1: Preparation and Measurement: Begin by thoroughly cleaning the subfloor around the door threshold. Remove any debris, nails, or screws that could interfere with the installation. Measure the width of the doorway and the distance from the threshold to the nearest wall. These measurements will determine the size and number of laminate planks needed for the first row of flooring.
Step 2: Underlayment Installation: Install the underlayment according to the manufacturer's instructions. The underlayment provides cushioning, sound insulation, and moisture protection. Cut the underlayment to fit snugly around the door frame and threshold, leaving a small gap for expansion.
Step 3: Dry Laying the First Row: Before applying any adhesive or clicking the planks together, dry-lay the first row of laminate flooring along the threshold. This step allows for fine-tuning and adjustments to ensure a perfect fit. Place spacers between the planks and the wall to maintain the expansion gap. At the door threshold, carefully measure and mark the planks to be cut. Use a saw to make precise cuts, ensuring that the cut edges are clean and straight.
Step 4: Cutting the Laminate to Fit Around the Threshold: This is often the most challenging part of the installation. Two primary methods are commonly used:
Method A: Direct Cutting: This method is suitable for simpler threshold shapes. Use a measuring tape and a combination square to accurately transfer the shape of the threshold onto the laminate plank. A jigsaw is typically the best tool for making these cuts. For complex shapes, consider creating a template using cardboard or paper. Trace the threshold's outline onto the template and then transfer the template to the laminate plank. After cutting, test the fit of the plank against the threshold. Trim or sand as needed to achieve a snug fit.
Method B: Using a Contour Gauge: A contour gauge is a tool that allows you to precisely match irregular shapes. Press the contour gauge against the threshold, allowing the pins to conform to its shape. Then, transfer the shape from the contour gauge to the laminate plank and cut along the traced line.
Step 5: Installing the First Row: Once the planks are cut to fit snugly around the threshold, apply adhesive (if required by the manufacturer) and click the planks together according to the manufacturer's instructions. Ensure that the expansion gap is maintained around the perimeter of the room. Secure the first row of planks in place using wedges or shims.
Step 6: Installing Subsequent Rows: Continue installing the remaining rows of laminate flooring, staggering the end joints for a more visually appealing and structurally sound floor. Maintain the expansion gap throughout the installation. When approaching the door frame on the opposite side of the room, repeat the process of measuring, cutting, and fitting the planks around the frame.
Step 7: Finishing Touches: After the flooring is installed, remove the wedges or shims. Install baseboards or quarter-round molding along the perimeter of the room to cover the expansion gap. At the door threshold, consider using a transition strip to cover the gap between the laminate flooring and the existing floor or threshold. Transition strips are available in various materials and styles to match the laminate flooring and the existing decor. Secure the transition strip to the subfloor using adhesive or screws.
Addressing Specific Threshold Scenarios
Different threshold configurations require tailored approaches. Understanding these nuances will improve the quality of the final installation.
1. Thresholds Flush with the Subfloor: In this scenario, the laminate flooring should be installed to meet the edge of the threshold. A transition strip is then used to cover the joint and create a smooth transition. Ensure that the transition strip is securely fastened to the subfloor to prevent it from shifting or becoming a tripping hazard.
2. Thresholds Higher Than the Laminate: If the existing threshold is significantly higher than the laminate flooring, a sloped transition strip is needed to bridge the height difference. These strips are designed to gradually transition from the lower level of the laminate to the higher level of the threshold. Carefully measure the height difference to select the appropriate transition strip.
3. Thresholds Lower Than the Laminate: This situation is less common but can occur if the laminate flooring is particularly thick or if the existing threshold is worn down. In this case, the threshold may need to be raised by adding shims or a layer of leveling compound before installing the laminate flooring. Alternatively, a custom-made transition strip can be fabricated to accommodate the height difference.
Common Pitfalls and How to Avoid Them
Even with careful planning, certain pitfalls can occur during the installation process. Being aware of these potential problems and taking proactive measures to avoid them will contribute to a successful outcome.
1. Neglecting the Expansion Gap: Failing to leave an adequate expansion gap is a common mistake that can lead to buckling or warping of the laminate flooring. Always refer to the manufacturer's instructions for the recommended expansion gap size and use spacers to maintain the gap throughout the installation.
2. Improper Subfloor Preparation: An uneven or unstable subfloor can cause the laminate flooring to flex and creak. Thoroughly inspect and prepare the subfloor before installation, addressing any imperfections with leveling compound or shims.
3. Inaccurate Cutting: Inaccurate cuts around the door threshold can result in unsightly gaps or uneven surfaces. Take precise measurements and use sharp tools to make clean, straight cuts. Consider practicing on scrap pieces of laminate before cutting the actual planks.
4. Using the Wrong Tools: Using the wrong tools can make the installation process more difficult and increase the risk of errors. Invest in quality tools, such as a laminate cutter, a jigsaw, a combination square, and a contour gauge. These tools will help to achieve professional-looking results.
5. Ignoring Manufacturer's Instructions: Laminate flooring installation methods can vary depending on the manufacturer and the type of flooring. Always read and follow the manufacturer's instructions carefully to ensure a proper and warranty-compliant installation.
By carefully considering the factors outlined in this guide and following the recommended installation steps, homeowners can successfully install laminate flooring around door thresholds and achieve a beautiful, durable, and professional-looking floor. Paying close attention to detail and taking the time to address any potential challenges will ensure a long-lasting and satisfying result. Remember to prioritize safety throughout the installation process by wearing appropriate protective gear, such as safety glasses and gloves.

Laminate Flooring Installation Undercutting Door Frames Airbase Carpet And Tile

How To Install Laminate Flooring Around Doors And Cabinets

How To Install Laminate Flooring Around Doors And Cabinets

Laminate Transitions At Sliding Doors

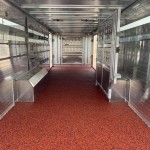
Installing Last Row Of Laminate Flooring In Hallways

How To Install Flooring Threshold Bars In 4 Simple Steps Esb

Laminate Transitions At Sliding Doors

How To Install Laminate Flooring Around Doors And Cabinets

Installing Floating Floor Meets Exterior Door Threshold 1 800 Remodel

How To Undercut A Door Frame Tutorial
Related Posts