How To Install Vinyl Plank Flooring Around A Toilet
Installing vinyl plank flooring around a toilet can seem like a daunting task, but it's actually quite simple with the right tools and materials. By following these step-by-step instructions, you can achieve a professional-looking finish that will enhance the beauty and functionality of your bathroom.
Step 1: Gather Your Tools and Materials
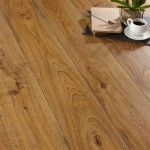
- Vinyl plank flooring
- Measuring tape
- Utility knife
- T-square or straightedge
- Spacers
- Miter saw (optional)
- Vinyl glue (optional)
Step 2: Measure and Cut the Planks
Measure the distance from the toilet base to the edge of the flooring. Cut a plank to this length using the utility knife and a straightedge. You may need to make multiple cuts if the distance is longer than the length of a single plank.
Step 3: Remove the Toilet
Turn off the water supply to the toilet and flush the toilet to empty the tank. Disconnect the water supply line and unbolt the toilet from the floor. Carefully lift the toilet off the floor and set it aside.
Step 4: Install the First Plank
Place the first plank behind the toilet flange and align it with the edge of the flooring. Use spacers to ensure that there is an even gap between the plank and the wall.
Step 5: Continue Installing Planks
Continue installing planks around the toilet flange, working your way around the perimeter. Use spacers to maintain an even gap between the planks. When you reach a corner, use a miter saw to cut a 45-degree angle on the ends of the planks and fit them together.
Step 6: Reinstall the Toilet
Once all the planks are installed, carefully reposition the toilet over the flange. Bolt the toilet to the floor and reconnect the water supply line. Turn on the water supply and check for leaks.
Step 7: Apply Vinyl Glue (Optional)
For added durability, you can apply a thin layer of vinyl glue to the seams between the planks. Use a small brush or roller to apply the glue and allow it to dry completely.
Additional Tips:
- Use a sharp utility knife to ensure clean cuts.
- Take your time and measure carefully to avoid mistakes.
- If you make a mistake, don't panic. Vinyl plank flooring is easy to remove and replace.
- Seal the edges of the flooring with a waterproof sealant to prevent moisture damage.
With a little patience and attention to detail, you can successfully install vinyl plank flooring around a toilet and create a beautiful and functional bathroom.

How To Install Vinyl Plank Flooring In A Bathroom Fixthisbuildthat

How To Easily Install Vinyl Flooring Around A Toilet

How To Install Vinyl Plank Flooring In A Bathroom Fixthisbuildthat

How To Cut Flooring Around A Toilet Luxury Vinyl Plank Bathroom Installation Calibamboo

How To Install Vinyl Plank Flooring In A Bathroom Fixthisbuildthat

How To Install Vinyl Plank Flooring In A Bathroom

How To Install Vinyl Plank Flooring In A Bathroom Fixthisbuildthat

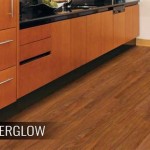
How To Install Vinyl Plank Flooring Around Bathroom Toilet Bowl P Installing Lifeproof

Awkward Areas 30 Second Guide

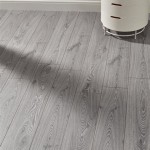
Installing Vinyl Plank Flooring Lifeproof Waterproof Rigid Core Sustain My Craft Habit