Wood Plank Flooring DIY: Essential Aspects for a Seamless Installation
Installing wood plank flooring is a rewarding home improvement project that adds beauty, value, and durability to any space. While DIYing wood plank flooring may seem daunting, it's entirely possible with adequate preparation and attention to detail.
To ensure a successful wood plank flooring installation, follow these essential steps:
1. Preparation
Before starting, remove all existing flooring, baseboards, and trim. Level the subfloor using self-leveling compound or plywood underlayment. Allow ample drying time before moving forward.
2. Acclimation
Wood planks need to acclimate to the temperature and humidity of the room where they'll be installed. Place planks in the room for several days before installation to allow them to adjust and prevent warping or buckling.
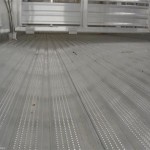
3. Underlayment Installation
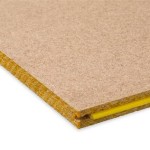
Install a moisture barrier, such as polythene sheeting, over the subfloor. Add an underlayment, such as foam or cork, to provide cushioning and sound dampening.
4. Plank Layout
Determine the starting point and direction of your plank installation. Stagger plank joints by at least 6 inches to enhance strength and prevent joint failures. Dry-fit the first few rows to ensure proper alignment.
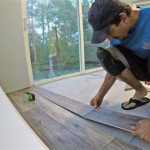
5. Plank Installation
Starting at the corner, secure the first row using a nail gun or flooring stapler. Use spacers to maintain consistent gaps between planks. Continue installing rows by tapping or nailing each plank into place.
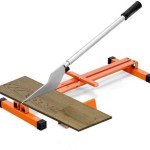
6. Trimming
Trim planks to fit around walls, doorways, and other obstacles using a circular saw or miter saw. Use a pry bar to gently lift and secure planks in tight spaces.
7. Thresholds and Transitions
Install thresholds or transition strips at doorways and flooring transitions to provide a smooth and professional-looking finish.
8. Finishing
Once the flooring is installed, apply a protective finish, such as polyurethane or oil, to protect it from scratches, stains, and moisture.
Tips for Success
- Use a moisture meter to check the subfloor for any residual moisture before installing the flooring.
- Rent or borrow professional flooring installation tools for a more efficient and accurate installation.
- Take your time and don't rush the process. Patience and precision will result in a better-looking and more durable floor.
- Don't be afraid to seek professional advice or assistance if needed.
By following these essential steps and using the tips provided, you can successfully install a beautiful and durable wood plank floor that will enhance the aesthetic appeal and value of your home.

Make Your Own Plank Flooring Using 1 X 12 Lumber Hallstrom Home

Make Your Own Plank Flooring Using 1 X 12 Lumber Hallstrom Home

Diy Wide Plank Pine Floors Part 1 Installation The Roots Of Home

Diy Wide Plank Pine Floors Part 1 Installation The Roots Of Home

Make Your Own Plank Flooring Using 1 X 12 Lumber Hallstrom Home

Low Budget Diy Plywood Plank Floors Diydork Com

Wide Plank Floor Diy Rough Cut To Tongue And Groove 10 Steps With S Instructables

Diy Wood Floors Flooring

Diy Rustic Wide Plank Plywood Flooring Our Project Ideas

Diy Rustic Wide Plank Plywood Flooring Our Project Ideas
Related Posts