Plank Flooring DIY: A Comprehensive Guide to Transform Your Home
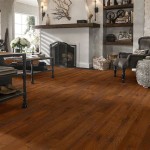
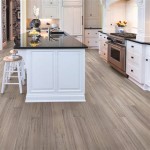
Transforming your floors with plank flooring can elevate the aesthetics and functionality of your home. While professional installation is often preferred, undertaking a plank flooring DIY project can yield significant savings and a sense of personal accomplishment. Here's a detailed guide to help you embark on this rewarding endeavor:
Materials and Tools
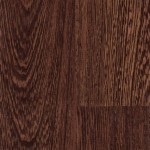
Before starting, gather the necessary materials and tools: - Plank flooring (engineered hardwood, laminate, vinyl) - Underlayment - Adhesive or floating planks - Measuring tape - Table saw or miter saw - Pry bar - Flooring nailer or stapler - Tapping block - Spacer blocks
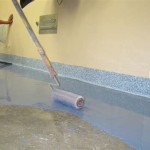
Preparing the Subfloor
Proper subfloor preparation ensures a stable and durable flooring surface. Remove existing flooring, nails, and debris. Address any unevenness or damage by leveling the subfloor using self-leveling compound or plywood sheets.
Installing the Underlayment
Underlayment provides cushioning, noise reduction, and moisture protection. Roll out the underlayment perpendicular to the direction of the planks. If multiple rolls are needed, seal the seams with tape.
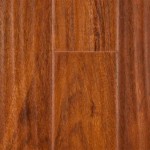
Laying the Planks
Plank flooring can be installed using glue-down or floating floor methods. For glue-down planks, apply adhesive to the subfloor and carefully place the planks in sequence. For floating planks, simply click them together using the manufacturer's instructions.
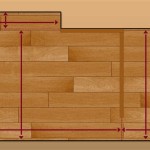
Cutting and Fitting
Precision cutting is essential for a seamless finish. Use a table saw or miter saw to cut planks to length and angles. Measure and mark cut lines accurately, and always cut on the waste side.
Trimming and Edging
Once the planks are laid, trim them around walls, doorways, and other obstacles. Use a pry bar to remove excess planks and a tapping block to gently tap in the trimmed pieces. Spacer blocks will help maintain consistent gaps between planks.
Finishing Touches
After installation, install moldings or transition strips around the edges. These will conceal gaps and enhance the overall look. Clean the floor thoroughly to remove any debris or residue.
Tips for Plank Flooring DIY Success
- Plan carefully and measure twice before cutting. - Use a chalk line or laser level for straight cuts and alignment. - Allow ample curing time for adhesives before walking on the floor. - Protect the floor from heavy foot traffic or furniture until fully cured. - Regular cleaning and maintenance will extend the life of your plank flooring.
Remember, tackling a plank flooring DIY project requires patience, precision, and attention to detail. By following these comprehensive guidelines, you can confidently achieve a professional-looking floor that adds warmth, style, and value to your home.
Make Your Own Plank Flooring Using 1 X 12 Lumber Hallstrom Home

Diy Wide Plank Pine Floors Part 1 Installation The Roots Of Home

Diy Wide Plank Pine Floors Part 1 Installation The Roots Of Home

Low Budget Diy Plywood Plank Floors Diydork Com

Make Your Own Plank Flooring Using 1 X 12 Lumber Hallstrom Home

Simple Diy Duravana Plank Flooring Installation

Wide Plank Floor Diy Rough Cut To Tongue And Groove 10 Steps With S Instructables

Wide Plank Plywood Flooring An Economical Solution Remodelando La Casa

Diy Wood Floors Flooring

Installing Vinyl Plank Flooring For Beginners Anika S Diy Life
Related Posts