Laying Vinyl Plank Flooring: A Comprehensive Guide
Vinyl plank flooring has gained immense popularity due to its durability, versatility, and ease of installation. Whether you're a seasoned DIY enthusiast or a first-time homeowner, laying vinyl plank flooring can be a rewarding project with the right preparation and execution. Here's a comprehensive guide to help you navigate the process seamlessly.
1. Preparation: Measure, Acclimate, and Equipment
Before laying your vinyl planks, it's crucial to measure your room accurately and determine the amount of flooring you'll need. Allow the vinyl planks to acclimate to the room temperature for at least 48 hours to prevent buckling or warping later on. Gather essential tools like a measuring tape, utility knife, spacers, and a flooring hammer or tapping block.
2. Substrate Preparation: Ensure a Level and Dry Surface
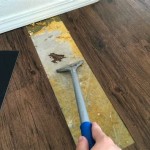
A smooth and level substrate is essential for successful vinyl plank installation. Remove any existing flooring, inspect the subfloor, and rectify any unevenness or imperfections using self-leveling compound or plywood underlayment. Ensure the subfloor is clean, dry, and free of debris or moisture.
3. Installing the Underlayment: Moisture Barrier and Acoustic Benefits
Laying an underlayment over the prepared subfloor provides a moisture barrier, reduces noise, and enhances underfoot comfort. Roll out the underlayment and tape the seams together to prevent any gaps or movement. Trim any excess underlayment around the edges of the room.
4. Starting Point and Plank Placement: Precision and Alignment
Determine the starting point for your vinyl plank installation, typically the longest wall in the room. Use spacers to maintain equal gaps around the perimeter of the room. Start laying the planks from the starting point and stagger the joints between rows to avoid a repetitive pattern.
5. Cutting and Shaping Planks: Angles, Edges, and Special Shapes
You'll encounter obstacles like walls, doorways, and corners during the installation process. Use a utility knife and a straight edge to cut the planks to the desired size and shape. For intricate cuts and angles, a power saw or miter saw may be more convenient. Ensure all cuts are precise to maintain a seamless appearance.
6. Locking and Tightening: Clicks or Adhesives
Vinyl planks typically feature a locking mechanism that allows them to be attached to each other. Align the planks correctly and apply pressure to lock them together. If you're using self-adhesive vinyl planks, peel off the backing and carefully press the planks into place. Avoid using excessive force, as it could damage the planks.
7. Expanding and Trimming: Perimeter Gaps and Completion
Leave a small expansion gap around the perimeter of the room to allow for movement due to temperature or moisture fluctuations. Use a utility knife or a flooring cutter to trim the planks around any obstacles or fixtures. Once all the planks are in place, remove the spacers and install baseboards or moldings to conceal the gaps and complete the installation.
8. Maintenance and Care: Prolonging Beauty and Durability
To maintain the beauty and longevity of your vinyl plank flooring, regular cleaning and care are essential. Sweep or vacuum frequently to remove dirt and debris. Use a slightly damp mop and a vinyl-specific cleaning solution for deeper cleaning. Avoid using harsh chemicals or abrasive materials that could damage the surface.

Laying Vinyl Planks The Right Way Expert Guide By Fantastic Handyman

How To Install Vinyl Plank Flooring As A Beginner Home Renovation

How To Install Vinyl Flooring Planks

Installing Vinyl Plank Flooring How To Fixthisbuildthat

How To Install Vinyl Plank Flooring The Home Depot

What Are The Advantages Of Loose Lay Vinyl Plank Impression Floors

How To Install Vinyl Plank Flooring As A Beginner Home Renovation

How To Install Vinyl Plank Flooring In A Bathroom Fixthisbuildthat

A Beginner S Guide To Installing Vinyl Plank Flooring Dumpsters Com

How To Install Luxury Vinyl Plank Flooring Wood Installing
Related Posts


