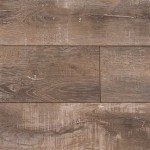
Engineered Wood Flooring Installation: A Comprehensive Guide
Engineered wood flooring, renowned for its durability and aesthetic appeal, has gained immense popularity in home improvement projects. However, ensuring a successful installation requires meticulous preparation and proper techniques. This guide will delve into the essential aspects of engineered wood flooring installation, providing a comprehensive overview for DIY enthusiasts and professional contractors alike.
1. Subfloor Preparation
A sound subfloor forms the foundation for a flawless engineered wood flooring installation. It should be level, dry, and free of imperfections. Inspect the subfloor thoroughly for any damage or irregularities, addressing them promptly to ensure a smooth surface. In the case of uneven subfloors, leveling compounds or self-leveling underlayments can be employed to create a level base.
2. Moisture Control
Moisture plays a crucial role in wood flooring stability. Before installation, it is imperative to check the moisture content of both the subfloor and the engineered wood planks. The recommended moisture content for engineered wood flooring is typically between 6% and 9%. Utilize a moisture meter to accurately determine moisture levels. If moisture levels exceed the recommended range, it is advisable to address the source of the moisture before proceeding with the installation.
3. Underlayment Installation
Underlayment serves multiple purposes, including providing a moisture barrier, reducing noise, and enhancing comfort underfoot. Various types of underlayment are available, each with its unique characteristics. Choose an underlayment compatible with the engineered wood flooring and the specific requirements of the installation. Ensure that the underlayment is properly installed, adhering to the manufacturer's guidelines to maximize its effectiveness.
4. Planning the Layout
A well-planned layout is pivotal for an aesthetically pleasing and seamless installation. Determine the starting point and direction of the planks, taking into account the natural light source and the flow of traffic in the room. Dry-fit the planks before securing them in place to visualize the final layout and make any necessary adjustments. Stagger the end joints of adjacent planks by at least 6 inches to enhance the overall strength and stability of the flooring.
5. Installation Techniques
Engineered wood flooring can be installed using various methods, including nailing, stapling, or gluing. The preferred method depends on the type of flooring and the subfloor material. Follow the manufacturer's instructions meticulously to ensure proper installation. Use a flooring nailer or stapler for maximum efficiency and precision. When gluing, apply an even layer of adhesive to the subfloor according to the manufacturer's specifications.
6. Expansion Gaps
Allowing for adequate expansion gaps is crucial to prevent buckling or warping due to seasonal fluctuations in temperature and humidity. Leave a gap of approximately 1/4 inch around the perimeter of the room and between any fixed objects, such as walls or columns. Utilize expansion strips or spacers to maintain the gaps during installation.
7. Finishing Touches
Once the engineered wood flooring is installed, complete the project with the appropriate finishing touches. Trim the edges around the perimeter of the room using a miter saw or a power miter box. Install baseboards and moldings to conceal the expansion gaps and enhance the overall aesthetics of the flooring. Finally, add a protective finish, such as polyurethane or wax, to shield the flooring from wear and tear.
Conclusion
The successful installation of engineered wood flooring requires a combination of proper preparation, meticulous attention to detail, and the use of appropriate techniques. By adhering to these essential aspects, you can achieve a durable, aesthetically pleasing, and long-lasting floor that will enhance the ambiance and comfort of your living space.

How To Install Lock Engineered Hardwood Flooring

How To Install An Engineered Hardwood Floor

Engineered Wood Floor Laying Flooring Installation Method

Installing Engineered Hardwood On Concrete Twenty Oak

How To Install Lock Engineered Hardwood Flooring

How To Install Lock Engineered Hardwood Flooring

How To Install Engineered Hardwood Floors 4 Easy Installation Options

How Much Does It Cost To Install Engineered Hardwood Floors Floorings

How To Install Hardwood Flooring Step By Forbes Home

Engineered Hardwood Flooring Installation Errors And How To Avoid Them Reallyfloors America S Est


