Can You Whitewash Hardwood Floors Without Sanding?
Whitewashing hardwood floors offers a way to brighten a room, achieve a rustic aesthetic, or update a space without the expense and disruption of a full refinishing project. The traditional method involves sanding the floors down to bare wood, applying a whitewash stain, and then sealing the surface. However, the labor and dust associated with sanding make it an undesirable option for many homeowners. This article will explore the possibility of whitewashing hardwood floors without sanding, outlining the process, potential challenges, and providing a comprehensive guide to achieving satisfactory results.
Whitewashing without sanding relies on properly preparing the existing finish to accept the whitewash stain. The goal is to create a surface that the stain can adhere to and penetrate slightly, allowing the desired effect to be achieved without completely removing the original coating. This approach is generally suitable for floors that are in relatively good condition, without significant damage, deep scratches, or peeling finish. Severely damaged floors will likely require sanding for optimal results.
Surface Preparation is Paramount
The success of whitewashing hardwood floors without sanding hinges on meticulously preparing the surface. This involves cleaning, deglossing, and potentially priming the existing finish. The initial step is a thorough cleaning to remove all dirt, dust, grease, and other contaminants. Use a mild detergent specifically designed for wood floors, following the manufacturer's instructions carefully. Avoid harsh chemicals or abrasive cleaners that could damage the existing finish.
After cleaning, the floor needs to be deglossed. The existing finish, whether it's polyurethane, varnish, or another type of sealant, is likely to be quite glossy. This glossiness will prevent the whitewash stain from adhering properly. Deglossing involves reducing the sheen of the finish to create a more porous surface. This can be achieved using a liquid deglosser or a chemical etching product. These products work by slightly softening the surface of the finish, creating microscopic imperfections that allow the stain to grip.
Apply the deglosser according to the manufacturer's instructions, typically using a clean rag or mop. Ensure even coverage and avoid over-saturating the floor. Allow the deglosser to dwell for the recommended time, and then remove any residue with a damp cloth. It is crucial to test the deglosser in an inconspicuous area first to ensure it does not damage or discolor the existing finish. After deglossing, the floor should appear duller and feel slightly rougher to the touch.
In some cases, priming may be necessary to further enhance adhesion and create a uniform base for the whitewash stain. This is particularly important if the existing finish is uneven in color or has areas of wear. Choose a primer that is specifically designed for use on wood and compatible with the type of stain you plan to use. Apply the primer in thin, even coats, following the manufacturer's instructions. Allow the primer to dry completely before proceeding to the next step.
Selecting the Right Whitewash Stain
Choosing the appropriate whitewash stain is crucial for achieving the desired aesthetic. Several types of whitewash stains are available, each with its own characteristics and application requirements. Water-based stains are generally considered easier to work with, as they are low in odor, easy to clean up, and dry relatively quickly. Oil-based stains, on the other hand, tend to penetrate deeper and offer greater durability, but they require more ventilation and can be more difficult to clean.
The opacity of the stain is another important consideration. A more opaque stain will provide a more solid whitewash effect, while a more transparent stain will allow more of the underlying wood grain to show through. Experiment with different stains on a test area to determine the desired level of opacity. Consider the existing color of the hardwood floor when selecting the stain. Darker woods may require multiple coats of stain to achieve the desired level of lightness.
Tinted whitewash stains are also available, offering the opportunity to add subtle color nuances to the floor. For example, a grey-tinted stain can create a weathered, driftwood effect, while a blue-tinted stain can add a cool, coastal vibe. When using a tinted stain, it is particularly important to test it on a sample area to ensure the color complements the existing décor and desired aesthetic.
Before applying the stain to the entire floor, it is essential to test it in an inconspicuous area, such as a closet or under a piece of furniture. This will allow you to assess the color, opacity, and adhesion of the stain, and make any necessary adjustments before proceeding. Apply the stain to the test area, allow it to dwell for the recommended time, and then wipe off the excess. Observe the results carefully and make any necessary adjustments to the stain or application technique.
Application Techniques and Sealing
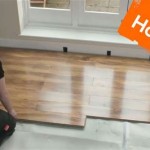
The application of the whitewash stain is a critical step in achieving the desired results. Apply the stain in thin, even coats, using a brush, roller, or rag. The choice of application method will depend on the type of stain and the desired effect. A brush is best for applying stain to detailed areas or edges, while a roller is more efficient for covering large surfaces. A rag can be used to create a more textured, distressed look.
After applying the stain, allow it to dwell for the recommended time, as specified by the manufacturer. The dwell time will affect the intensity of the whitewash effect. A shorter dwell time will result in a more subtle effect, while a longer dwell time will create a more pronounced look. Experiment with different dwell times on the test area to determine the optimal duration.
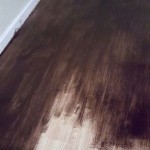
Once the stain has dwelled for the desired time, wipe off the excess with a clean, lint-free rag. Wipe in the direction of the wood grain to avoid streaks. Apply even pressure to ensure consistent removal of the stain. If the whitewash effect is not strong enough, apply a second coat of stain and repeat the process. If the effect is too strong, wipe off more of the stain with a damp rag.
After the stain has dried completely, it is essential to seal the floor to protect the finish and enhance its durability. Choose a clear, water-based or oil-based sealant that is compatible with the stain you used. Apply the sealant in thin, even coats, following the manufacturer's instructions. Allow each coat to dry completely before applying the next.
Several types of sealants are available, each with its own characteristics and advantages. Polyurethane is a durable and water-resistant option, making it ideal for high-traffic areas. Acrylic sealants are less durable than polyurethane but offer better UV resistance, preventing the floor from yellowing over time. Wax sealants provide a natural, matte finish but require more frequent maintenance.
Apply at least two coats of sealant to ensure adequate protection. Lightly sand the floor between coats to create a smooth, even surface. Use a fine-grit sandpaper and be careful not to sand through the stain. After sanding, remove all dust with a tack cloth before applying the next coat. Allow the final coat of sealant to cure completely before walking on the floor or replacing furniture.
Consider the room's usage when choosing the appropriate sealant. High traffic areas like hallways and kitchens will benefit from a more durable sealant. Bathrooms and laundry rooms will require moisture-resistant sealants.
While this method offers a less intrusive alternative to traditional sanding, the longevity and durability of the finish will depend on the quality of the preparation, the materials used, and the amount of traffic the floor endures. Periodic maintenance, such as cleaning and reapplication of sealant, may be necessary to preserve the whitewashed appearance and protect the underlying finish.

Paint Whitewash Hardwood Floors Without Sanding

Wood Floor Refinishing And Whitewashing The Honeycomb Home

Sanding And Whitewashing Wood Floors

How To Whitewash Hardwood Floors The Right Way Flooring Girl
:strip_icc()/10194750920whitewash20floors20step202-99eae86a2dd746d9b89b35a639a0973a.jpg?strip=all "How To Whitewash Hardwood Flooring For A Fresher Aesthetic")
How To Whitewash Hardwood Flooring For A Fresher Aesthetic

Wood Floor Refinishing And Whitewashing The Honeycomb Home

Nostalgiecat How To Whitewash Wooden Flooring

How To Refinish Wood Floors Easy Diy Whitewash Lauren Stewart

Whitewash Hardwood Floors Wood Flooring La

They Nailed It Or Maybe Stained Addison S Wonderland
Related Posts