How To Replace a Horse Trailer Floor
Replacing a horse trailer floor is a significant undertaking requiring careful planning and execution. A sound floor is crucial for equine safety and the trailer's longevity. This process involves several steps, from assessing the damage to installing the new flooring material.
Assessing the Damage and Gathering Materials
The first step is to thoroughly assess the extent of the damage to the existing floor. This involves removing any mats, bedding, and other materials to expose the floorboards. Inspect for rot, soft spots, cracks, and any other signs of deterioration. Once the damage is assessed, accurate measurements of the trailer's interior are necessary to determine the amount of replacement material needed.
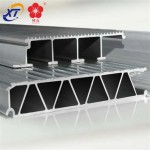
Choosing the right flooring material is essential. Common options include pressure-treated wood and aluminum planks. Pressure-treated wood is a cost-effective choice but requires regular maintenance. Aluminum planks offer greater durability and resistance to rot but come at a higher cost. Gather all necessary tools, including safety glasses, gloves, a circular saw or jigsaw, a drill, screws, a pry bar, and a measuring tape. Having everything on hand before beginning the project will streamline the process.
Removing the Old Floor
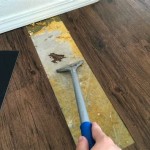
Removing the old floor requires careful dismantling to avoid damaging the trailer's frame. Begin by removing any screws or bolts securing the floorboards to the frame. A pry bar can be helpful in lifting and removing the boards. Care should be taken to avoid damaging the underlying supports. If the floor is glued down, additional effort may be required to separate it from the frame. Dispose of the old flooring material appropriately.
Preparing the Trailer Frame
Once the old floor is removed, inspect the trailer frame for any damage or rust. Any rusted or damaged areas should be repaired or reinforced before installing the new floor. This may involve welding or replacing sections of the frame. A wire brush can be used to remove any loose rust or debris. Applying a rust-preventative coating to the frame is recommended to protect it from future corrosion.
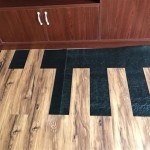
Installing the New Floor
Begin installing the new floor by cutting the chosen material to the correct dimensions. Ensure the boards fit snugly within the trailer frame. If using wood, pre-drill holes to prevent splitting the wood when screwing it into the frame. Secure the new flooring material to the frame using screws placed at regular intervals, ensuring a firm and even surface. If using aluminum planks, follow the manufacturer’s instructions for proper installation. Leave a small gap between boards to allow for expansion and contraction due to temperature changes.
Sealing and Finishing
Once the new floor is installed, seal all seams and edges with a waterproof sealant to prevent moisture from seeping in and causing rot or corrosion. This is particularly important with wooden floors. Consider applying a protective coating to the floor to further enhance its durability and resistance to wear and tear. This could include a rubber mat or a specialized trailer floor coating. Allow ample drying time for any sealants or coatings before using the trailer.
Safety Considerations
Throughout the entire process, prioritize safety. Wear appropriate safety gear, including gloves and eye protection. Use power tools with caution and follow manufacturer’s instructions. Ensure adequate ventilation when working with sealants or coatings. Dispose of old materials responsibly. If welding is required, take necessary precautions to prevent fire hazards and ensure proper ventilation.
Maintenance of the New Floor
Regular maintenance will prolong the life of the new trailer floor. Sweep and clean the floor after each use. Inspect for any signs of damage or wear and address them promptly. Reapply sealant or protective coatings as needed. For wooden floors, periodic treatments with a wood preservative can help prevent rot and insect damage. Regularly inspect and tighten screws to ensure the floor remains securely fastened to the frame.
Professional Assistance
While replacing a horse trailer floor can be a DIY project, complex repairs or extensive damage may require professional assistance. Consulting a qualified trailer repair specialist is recommended if there is significant frame damage, structural concerns, or if specialized welding is needed. Professional expertise can ensure the repair is done correctly and safely, protecting both the horse and the trailer’s integrity.

Do It Yourself Replace Your Trailer S Tack Room Flooring Diy Horse Ownership

How To Replace The Floor Of A Horse Trailer North Ina S

Horse Trailer Repair Floor Boards

Repairing Rotten Floor In Livestock Trailer

Horse And Livestock Trailer Purchasing 101 Part 4 Red Gate Farm

Utility Trailer Floor Replacement

Diy Do It Yourself Replace Your Trailer Tack Room Flooring Horse Trailers Living Quarters Organization

Horse And Livestock Trailer Purchasing 101 Part 4 Red Gate Farm

Do It Yourself Replace Your Trailer S Tack Room Flooring

Why We Don T Recommend Werm Polylast Or Rhino Lining For Your Horse Trailer Floor
Related Posts