How to Install Laminate Wood Flooring on Concrete Slab Floors
Laminate flooring offers an attractive, durable, and cost-effective alternative to traditional hardwood. Installing laminate flooring on a concrete slab foundation requires specific preparation and techniques to ensure a successful and long-lasting result. This article provides a comprehensive guide to installing laminate wood flooring directly over concrete.
Assessing the Concrete Slab
Before beginning the installation process, the concrete slab must be thoroughly assessed. This assessment is critical for determining the suitability of the slab for laminate flooring and identifying any potential issues that need addressing.
- Moisture Testing: A crucial step is testing the concrete for moisture. Excess moisture can cause warping, buckling, and mold growth. Utilize a calcium chloride test or a concrete moisture meter to accurately measure moisture levels. Acceptable moisture levels will vary depending on the manufacturer's specifications for the chosen laminate flooring.
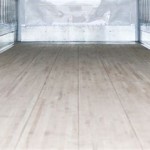
- Levelness: The concrete slab should be level. Minor imperfections can often be addressed with a self-leveling compound. Significant unevenness may require professional grinding or other interventions.
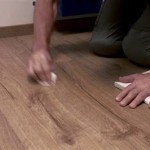
- Cleanliness: The concrete surface must be clean, dry, and free of dust, debris, paint splatters, and old adhesive residue. Thorough cleaning ensures proper adhesion of the underlayment.
- Cracks and Imperfections: Any significant cracks or imperfections in the slab should be repaired before installation. Use a concrete patching compound to fill these areas and allow ample drying time.
Gathering Necessary Materials and Tools
Having all the necessary materials and tools readily available before starting the project will streamline the installation process.
- Laminate Flooring: Calculate the square footage of the area to determine the required amount of flooring. It's recommended to purchase an extra 10% to account for cuts and waste.
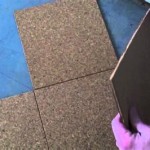
- Underlayment: Choose an underlayment specifically designed for concrete subfloors. This provides a moisture barrier, sound insulation, and cushioning.
- Moisture Barrier (if needed): If moisture testing reveals elevated levels, a separate moisture barrier, such as 6-mil polyethylene sheeting, should be installed over the concrete before the underlayment.
- Tapping Block: A tapping block is essential for ensuring tight seams between planks without damaging the laminate.
- Pull Bar: A pull bar is helpful for tightening the last row of planks.
- Spacers: Spacers maintain the proper expansion gap around the perimeter of the room.
- Measuring Tape and Pencil: Accurate measurements are essential for cutting planks to the correct size.
- Saw: A miter saw, table saw, or circular saw can be used for cutting laminate planks. A jigsaw is helpful for intricate cuts.
- Safety Glasses and Gloves: Always prioritize safety by wearing appropriate protective gear.
Installing the Underlayment
The underlayment is a critical component of the installation, providing several essential functions.
- Moisture Barrier Installation (if applicable): If using a separate moisture barrier, roll it out over the concrete slab, overlapping seams by several inches and taping them securely.
- Underlayment Installation: Roll out the underlayment, ensuring seams butt tightly together and are taped. Do not overlap underlayment seams.
Laying the Laminate Flooring
With the underlayment in place, the process of laying the laminate flooring can begin.
- Starting the First Row: Begin laying the first row of planks along the longest wall, ensuring the tongue side faces the wall. Use spacers to maintain the expansion gap.
- Connecting Planks: Connect planks end-to-end and side-to-side according to the manufacturer's instructions. Use a tapping block to ensure tight seams.
- Staggering Joints: Stagger the end joints of adjacent rows by at least 12 inches to create a more visually appealing and structurally sound floor.
- Cutting Planks: Measure and cut planks as needed to fit around door frames, corners, and other obstacles.
- Installing the Last Row: Use a pull bar to tighten the final row of planks against the wall, maintaining the expansion gap.
Finishing Touches
Once the laminate flooring is installed, a few finishing touches complete the project.
- Removing Spacers: Remove all spacers around the perimeter of the room.
- Installing Transition Molding: Install transition molding between the laminate flooring and other flooring surfaces, such as carpet or tile. This creates a smooth and professional transition.
- Installing Baseboards (Optional): Baseboards provide a decorative finish and cover the expansion gap around the perimeter of the room.
By following these steps and paying close attention to detail, a successful and durable laminate flooring installation on a concrete slab floor can be achieved. Always refer to the manufacturer’s specific instructions for the chosen laminate flooring product.

How To Install Laminate Over Concrete Day 1

Installing Laminate Flooring Over Concrete The Ultimate Guide Aa Floors

Laminate Flooring On Concrete Basement Floors Expert Installation Guide Csg Renovation

How To Install A Glue Down Floor Diy Flooring

A Complete Guide On How To Install Laminate Flooring Concrete

How To Install Laminate Flooring On Concrete In The Kitchen Mryoucandoityourself

How To Install Tongue Groove Hardwood Floors Over Concrete

How To Install Laminate Flooring For Beginners

Our Step By Guide For Laying Laminate Flooring

Your Essential Guide To Using And Choosing Concrete Moisture Meters Floor Trends Installation
Related Posts