Vinyl Plank Flooring On Walls: A Comprehensive Guide
Vinyl plank flooring, traditionally designed for horizontal surfaces, has increasingly found its way onto vertical spaces. This transition from floor to wall is driven by a combination of aesthetic appeal, durability, and relative ease of installation. Exploring the reasons behind this trend, the practical considerations involved, and the diverse applications where vinyl plank flooring excels as a wall covering is crucial for understanding its growing popularity.
The shift towards incorporating vinyl plank on walls is not merely a stylistic fad. It represents a practical choice for homeowners and designers seeking cost-effective and visually engaging solutions for interior spaces. When considering the suitability of vinyl plank for wall applications, several factors come into play, including the type of vinyl plank, the preparation of the wall surface, and the chosen method of installation. Ignoring these factors can lead to unsatisfactory results or potential long-term issues with the installation.
Aesthetic and Practical Advantages of Vinyl Plank Walls
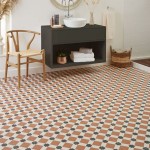
The primary allure of using vinyl plank flooring on walls lies in its aesthetic versatility. Vinyl plank is available in a vast array of colors, patterns, and textures, mimicking natural materials like wood and stone with remarkable accuracy. This allows for the creation of visually stunning accent walls, rustic-looking backsplashes, or even full-wall coverings that complement various interior design styles. From modern minimalist designs to farmhouse-inspired aesthetics, vinyl plank provides an adaptable and aesthetically pleasing solution.
Beyond aesthetics, vinyl plank offers significant practical advantages for wall applications. Its inherent water resistance makes it an ideal choice for bathrooms, kitchens, and laundry rooms, where moisture is a constant concern. Unlike traditional wood or wallpaper, vinyl plank is less susceptible to water damage, mold growth, and staining. This resistance translates to lower maintenance requirements and increased longevity, making it a cost-effective solution in the long run.
Durability is another key benefit. Vinyl plank is designed to withstand heavy foot traffic, making it resistant to scratches, dents, and abrasions. This durability extends to wall applications, providing a protective layer against everyday wear and tear, such as accidental bumps and scrapes. This is particularly beneficial in high-traffic areas like hallways, entryways, and children's rooms.
Furthermore, the relatively lightweight nature of vinyl plank compared to heavier alternatives like stone or ceramic tile simplifies the installation process. This reduced weight minimizes the strain on the wall structure and makes it easier to handle during installation, potentially lowering labor costs. Combined with its ease of cleaning and maintenance, these factors contribute to the growing appeal of vinyl plank as a wall covering.
Preparation and Installation Considerations
Proper preparation of the wall surface is paramount for a successful vinyl plank wall installation. The wall must be clean, dry, and free of any imperfections, such as loose paint, wallpaper residue, or dust. Failure to adequately prepare the surface can compromise the adhesion of the vinyl plank, leading to peeling, bubbling, or eventual failure of the installation.
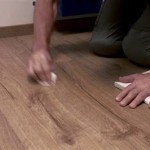
Begin by thoroughly cleaning the wall with a mild detergent and water solution. Rinse the wall thoroughly and allow it to dry completely. If the wall is painted, assess the condition of the paint. Loose or peeling paint should be scraped away and the surface lightly sanded to create a smooth, even base. For walls covered in wallpaper, complete removal of the wallpaper and any residual adhesive is crucial. A wallpaper steamer or chemical wallpaper remover can aid in this process. After removing the wallpaper, wash the wall to remove any remaining adhesive residue.
Once the wall is clean and dry, inspect it for any imperfections, such as cracks or holes. Fill these imperfections with a suitable patching compound and allow it to dry completely. Sand the patched areas smooth to create a seamless surface. In some cases, it may be necessary to apply a primer to the wall before installing the vinyl plank. Primer helps to improve the adhesion of the adhesive and provides a uniform surface for installation.
Several methods can be used to install vinyl plank on walls, each with its own advantages and disadvantages. The most common methods include using construction adhesive, peel-and-stick adhesive, or a combination of both. Construction adhesive provides a strong and permanent bond, making it suitable for areas with high moisture levels or heavy use. Peel-and-stick adhesive offers a simpler and faster installation process, but it may not be as durable or water-resistant as construction adhesive. When using construction adhesive, apply a generous amount to the back of each plank, following the manufacturer's instructions. Press the plank firmly against the wall and hold it in place for a few seconds to allow the adhesive to grab. Use spacers to maintain consistent spacing between the planks.
For peel-and-stick vinyl plank, simply peel off the backing and press the plank against the wall. Ensure that the planks are aligned properly and that there are no gaps between them. Use a roller to apply even pressure and ensure a strong bond. Some installers opt to use both construction adhesive and peel-and-stick adhesive for maximum adhesion and durability. In this case, apply a small amount of construction adhesive in addition to the peel-and-stick backing.
Regardless of the chosen method, it is essential to start the installation from a level and plumb line. Use a level to draw a horizontal line along the bottom of the wall and a plumb line to ensure that the first row of planks is straight. This will serve as a guide for the rest of the installation. When cutting vinyl plank to fit around corners or obstacles, use a utility knife and a straight edge. Score the plank several times before snapping it along the scored line. This will ensure a clean and accurate cut.
Applications and Design Ideas for Vinyl Plank Walls
The versatility of vinyl plank flooring allows for a wide range of applications on walls. In bathrooms, it can be used as a backsplash behind the sink or as a full wall covering in the shower area. Its water resistance and durability make it an ideal choice for these moisture-prone environments. In kitchens, vinyl plank can create a stylish and functional backsplash behind the stove or countertops. Its resistance to grease and stains makes it easy to clean and maintain.
In living rooms and bedrooms, vinyl plank can be used to create accent walls that add visual interest and texture to the space. A wood-look vinyl plank wall can create a warm and inviting atmosphere, while a stone-look vinyl plank wall can add a touch of sophistication and elegance. In hallways and entryways, vinyl plank can provide a durable and stylish wall covering that withstands heavy traffic and everyday wear and tear.
Beyond these functional applications, vinyl plank can also be used to create unique and creative design features. For example, it can be installed in a herringbone pattern to create a visually striking accent wall. It can also be combined with other materials, such as wood trim or metal accents, to create a custom and personalized look. Installing floating shelves onto a vinyl plank wall can add functionality and style to the space. Use anchors that are designed for the wall type to ensure that the shelves are securely mounted.
Consider the scale and proportion of the vinyl plank when designing a wall. Smaller planks may be better suited for smaller spaces, while larger planks can work well in larger rooms. Pay attention to the color and pattern of the vinyl plank and how it complements the existing décor. Choose colors and patterns that create the desired mood and atmosphere in the space.
Lighting plays a crucial role in enhancing the appearance of a vinyl plank wall. Proper lighting can highlight the texture and pattern of the vinyl plank and create a warm and inviting ambiance. Consider using recessed lighting, track lighting, or wall sconces to illuminate the vinyl plank wall.
Ultimately, the possibilities for using vinyl plank flooring on walls are limited only by one's imagination. Its versatility, durability, and aesthetic appeal make it a compelling choice for homeowners and designers seeking to create unique and visually stunning interior spaces. By carefully considering the preparation, installation, and design aspects, one can successfully transform ordinary walls into extraordinary features.

Going Up The Wall Installing Flooring Vertically Floor Trends Installation

Diy Wood Accent Wall Using Vinyl Planks Love Renovations

Vinyl Planks On Wall Flooring Kitchen Walls

Tips On Installing Vinyl Flooring Walls Ll Lumber Liquidators

Can You Install Vinyl Flooring On Walls L Antic Colonial

Diy L And Stick Vinyl Plank Accent Wall Hometalk

The Easiest Way To Diy Wood Plank Ship Lap Accent Wall With Vinyl Flooring Walls Bedroom On

Nance Carpet And Rug E Z Wall Assorted 6 Mil X 4 In W 36 L Stick Waterproof Luxury Vinyl Plank Flooring 20 Sqft Case 16632 The Home Depot

Diy L And Stick Vinyl Plank Accent Wall Flooring On Walls Bedroom

How To Install Duradecor L And Stick Vinyl Planks On The Wall
Related Posts