How To Install Laminate Flooring Transition Strip
Installing laminate flooring transition strips is a crucial step in completing your flooring project. Transition strips provide a smooth and seamless transition between different types of flooring, preventing tripping hazards and enhancing the overall aesthetics of your space. Here's a step-by-step guide to help you install laminate flooring transition strips like a pro:
Step 1: Gather Your Tools and Materials
Before getting started, make sure you have the necessary tools and materials:
- Laminate flooring transition strips
- Measuring tape
- Pencil or marking tool
- Circular saw or miter saw
- Construction adhesive or flooring adhesive
- Hammer or nail gun
- Trim nails or screws
- Spacer blocks
- Caulk gun and caulk
Step 2: Measure and Cut the Strips
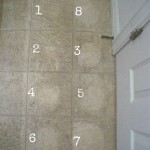
Measure the length of the opening where the transition strip needs to be installed and transfer the measurements to the transition strip. Use a circular saw or miter saw to cut the strip to the appropriate length. For a clean and precise cut, ensure that the saw blade is sharp and the cut is made perpendicular to the length of the strip.
Step 3: Apply Construction Adhesive
Apply a thin layer of construction adhesive to the underside of the transition strip. Use a notched trowel to spread the adhesive evenly over the entire surface. Avoid applying too much adhesive, as it can squeeze out from under the strip during installation.
Step 4: Set the Transition Strip in Place
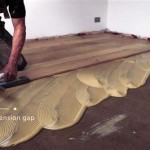
Carefully position the transition strip in the opening and firmly press it into place. Use spacer blocks along the edges of the strip to ensure it is level and aligned with the adjacent flooring. Tap the strip gently with a hammer or nail gun to secure it.
Step 5: Secure with Nails or Screws
Once the transition strip is in place, secure it with trim nails or screws. Space the fasteners evenly along the length of the strip, driving them in at a slight angle. Countersink the fasteners slightly below the surface of the strip using a nail set or a drill bit.
Step 6: Fill the Gaps
Use caulk to fill any gaps between the transition strip and the adjacent flooring. Apply the caulk using a caulk gun and smooth it out with a finger or a putty knife. Allow the caulk to dry completely before walking on the transition strip.
Step 7: Clean Up
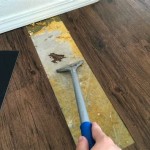
Remove any excess adhesive or caulk from the surface of the transition strip and surrounding areas. Use a damp cloth to wipe down the strip and restore its original appearance.

How To Install Vinyl Flooring Transition Strip Lvp Moulding

Installing Laminate Flooring Finishing Trim And Choosing Transition Strips

How To Install A Transition Strip

Installing Laminate Transitions Step By Instructions

Installing Laminate Transitions Step By Instructions

Installing Laminate Flooring Finishing Trim And Choosing Transition Strips

Say Goodbye To Uneven Floors With This Easy Transition Trick

Installing Laminate Transitions Step By Instructions

Installing Laminate Flooring Finishing Trim And Choosing Transition Strips

How To Install Transition Strip Up 1 Inch Tall On Tile Vinyl Lvp Laminate And Wood Flooring
Related Posts