How to Install Engineered Hardwood Flooring: A Comprehensive Guide
Engineered hardwood flooring combines the timeless elegance of natural wood with the durability and practicality of modern construction. Installing it requires precision and attention to detail, but it's a rewarding project that can add value and beauty to your home. Here's a comprehensive guide to help you achieve a professional-looking finish:
1. Preparation:
Before you begin, acclimate the flooring material to the installation environment for at least 72 hours. This allows it to adjust to the temperature and humidity levels of the room.
2. Substrate:
Your flooring will be installed over a substrate, which should be level, flat, and free of moisture. Ensure the subfloor meets these requirements by inspecting it and making any necessary repairs.
3. Underlayment:
An underlayment layer provides cushioning, moisture resistance, and sound insulation. Choose a high-quality underlayment suitable for your flooring and substrate.
4. Expansion Gap:
Allow a small expansion gap around the perimeter of the room to prevent the flooring from buckling due to moisture fluctuations. Use spacers to maintain the gap during installation.
5. Installation:
Engineered hardwood flooring can be installed using various methods, including floating, glue-down, and nail-down. Follow the manufacturer's instructions carefully for the specific method you choose.
6. Floating Installation:
This method involves locking the planks together without gluing or nailing them to the substrate. Ensure the planks are firmly interlocked and use a tapping block to secure them in place.
7. Glue-Down Installation:
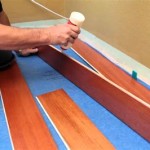
This method requires applying a thin layer of adhesive to the subfloor. Carefully align the planks and press them firmly into place to ensure a strong bond.
8. Nail-Down Installation:
In this method, the planks are nailed directly to the subfloor. Use a nail gun or hammer and nails specifically designed for hardwood flooring.
9. Finishing Touches:
Once the flooring is installed, remove the spacers and install molding around the perimeter to conceal the expansion gap. Caulk any gaps to prevent moisture and debris from penetrating.
10. Care and Maintenance:
Regular cleaning and maintenance are crucial for preserving the beauty and longevity of your engineered hardwood flooring. Use a broom or vacuum cleaner with a soft brush attachment, and avoid using harsh chemicals or abrasive cleaners.
Conclusion:
Installing engineered hardwood flooring requires skill and meticulous attention to detail. By following these guidelines, you can create a stunning and durable floor that will enhance the value and aesthetic appeal of your home for years to come.

How To Lay Engineered Wood Flooring A Diy Guide For Everyone

How To Install An Engineered Hardwood Floor

How To Install Hardwood Flooring For Beginners

How To Install Lock Engineered Hardwood Flooring

Tips For Installing An Engineered Hardwood Floor From The Forest Llc

How To Install Engineered Wood Flooring On Concrete

How To Install Lock Engineered Hardwood Flooring

How To Install Glue Down Hardwood Flooring Builddirect

Installation Methods For Wooden Floor Craftedforlife

How To Glue Down Engineered Wood Flooring Direct
Related Posts


