How to Install Flooring Trim: A Comprehensive Guide
Installing flooring trim may seem daunting, but it is a manageable task with the right tools, materials, and approach. In this guide, we will cover every essential step to help you achieve a professional-looking finish for your flooring project.
Materials Required
- Flooring trim (baseboards, quarter rounds, or moldings)
- Miter saw
- Brad nailer
- Carpenter's level
- Measuring tape
- Caulk
- Caulk gun
- Paint or stain (optional)
Step 1: Preparation
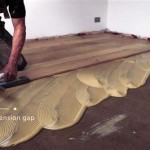
Before installing the trim, it is crucial to prepare the area thoroughly. Remove any existing trim, clean the walls and floor, and fill any gaps or holes. Ensure that the floor is level and the walls are straight.
Step 2: Measuring and Cutting
Measure the length of each wall and cut the trim accordingly. Use a miter saw to cut 45-degree angles at the ends of each piece. For inside corners, cut both pieces at a 45-degree angle facing each other. For outside corners, cut one piece at a 45-degree angle facing inward and the other at a 45-degree angle facing outward.
Step 3: Installing the Trim
Start by installing the baseboards or quarter rounds first. Position them against the wall, level them, and nail them in place with a brad nailer. Use a caulk gun to fill any gaps between the trim and the wall or floor.
Step 4: Cutting and Installing Moldings
If you are installing moldings, such as crown moldings or door casings, the process is similar. Cut the pieces to length and cut 45-degree angles at the ends. Install the moldings by nailing them in place and filling any gaps with caulk.
Step 5: Finishing
Once the trim is installed, you can apply paint or stain if desired. Allow the paint or stain to dry completely before using the room. If there are any nails that are protruding, countersink them slightly with a nail set.
Tips for Success
- Use a level to ensure that the trim is installed straight.
- Countersink any nails slightly to avoid creating a tripping hazard.
- Apply plenty of caulk to fill gaps and prevent moisture from penetrating.
- If the walls or floor are uneven, use shims to level the trim before nailing it in place.
- Take your time and be patient. Installing trim requires precision and attention to detail.
By following these steps and tips, you can install flooring trim with confidence and achieve a beautiful, professional-looking finish that will enhance the appearance of your flooring for years to come.

How To Install Brecon Trims Wood Flooring

How To Install Vinyl Flooring Transition Strip Lvp Moulding

How To Install Laminate Flooring Beading

Installing Vinyl Plank Flooring How To Fixthisbuildthat
How To Add Floor Trim Transitions And Reducers Young House Love

How To Install Engineered Hardwood Flooring Trim Diy

How To Install Baseboards In 4 Steps Bc Best Flooring

How To Install Transition Strips In Doorways

How To Transition Between Uneven Laminate Floors

Transition Mouldings Installing A T Bar Threshold
Related Posts