Rubber Tile Flooring Installation Instructions
Rubber tile flooring is a great choice for many commercial and residential applications. It is durable, easy to clean, and provides excellent sound absorption. If you are planning to install rubber tile flooring, it is important to follow the manufacturer's instructions carefully. Here are some general guidelines to help you get started:
Step 1: Prepare the Subfloor
The first step is to prepare the subfloor. The subfloor should be smooth, level, and dry. If the subfloor is not level, you will need to level it using a self-leveling compound. You will also need to make sure that the subfloor is clean and free of any debris.
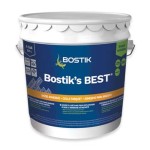
Step 2: Apply the Adhesive
Once the subfloor is prepared, you can start applying the adhesive. The type of adhesive you use will depend on the type of rubber tile you are installing. Be sure to follow the manufacturer's instructions for applying the adhesive.
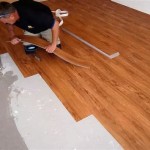
Step 3: Install the Rubber Tiles
Once the adhesive is applied, you can start installing the rubber tiles. Start by laying out the tiles in a dry fit to make sure that they fit together properly. Once you are satisfied with the layout, you can start gluing the tiles down. Be sure to press the tiles firmly into the adhesive.
Step 4: Allow the Adhesive to Dry
Once the tiles are installed, you will need to allow the adhesive to dry. The drying time will vary depending on the type of adhesive you used. Be sure to follow the manufacturer's instructions for drying time.
Step 5: Finish the Installation
Once the adhesive is dry, you can finish the installation by trimming any excess tiles and sealing the seams. You can use a utility knife to trim the tiles. To seal the seams, you can use a silicone caulk. Be sure to follow the manufacturer's instructions for sealing the seams.
Tips for Installing Rubber Tile Flooring
Here are a few tips to help you install rubber tile flooring successfully:

How To Install Rubber Flooring 11 Tips Know

How To Install Rubber Flooring 11 Tips Know

Installation Care Industrial Floor Covering Install Nora

How To Install Rubber Flooring Step By Guide Full Tutorial

Gym Flooring Installation How To Easily Install Rubber Rolls Or Mats

Poured Rubber Floor Installation How To Quickly Install In Place Granules

How To Install Rubber Flooring Tiles For Your Gym

How To Install Gym Rubber Flooring

How To Lay Rubber Pavers The Home Depot

Installation Care Industrial Floor Covering Install Nora
Related Posts