Stick-On Wood Flooring: A Comprehensive Guide
Stick-on wood flooring, an innovative and practical flooring solution, has gained immense popularity for its ease of installation and budget-friendliness. Unlike traditional wood flooring, which requires professional installation and adhesive, stick-on wood planks feature a self-adhesive backing that simplifies the DIY process. This article explores the essential aspects of stick-on wood flooring, empowering you to make an informed decision.
Benefits of Stick-On Wood Flooring
Effortless Installation: The self-adhesive backing eliminates the need for nails, glue, or professional assistance. Simply peel off the backing and stick the planks to a clean, level subfloor.
Cost-Effective: Stick-on wood flooring is significantly cheaper than traditional wood flooring, making it an affordable option for DIY enthusiasts and budget-conscious homeowners.
Wide Range of Designs: Stick-on wood flooring comes in various colors, textures, and wood species, offering ample choices to complement any décor style.
Choosing the Right Stick-On Wood Flooring
Plank Size: Stick-on wood planks typically range in length from 12 to 36 inches. Choose a size that suits the dimensions of your room.
Finish: Opt for a finish that meets your durability and aesthetic preferences. Some finishes resist scratches and stains, while others offer a more natural look.
Thickness: Thicker planks provide increased durability and stability, but they may be more expensive.
Underlayment: Consider installing an underlayment beneath the stick-on wood flooring to enhance sound absorption and insulation.
Installation Process
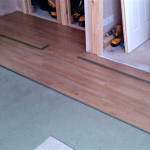
Prepare the Subfloor: Ensure the subfloor is clean, level, and free of debris. Remove any existing flooring or carpet.
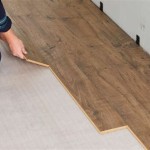
Peel and Stick: Peel off a small section of the backing and carefully align the plank with the edge of the subfloor or an earlier installed plank.
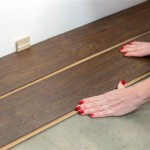
Interlock and Press: Interlock the planks by connecting the tongue-and-groove edges. Apply pressure throughout the length of the plank to ensure a secure fit.
Trim and Finish: Use a utility knife to trim the edges of the planks if necessary. Install baseboards or molding to complete the installation.
Maintenance and Care
Stick-on wood flooring requires minimal maintenance compared to traditional wood flooring. Regular sweeping or vacuuming removes dust and debris.
For deeper cleaning, use a damp mop with a manufacturer-approved cleaner. Avoid using harsh chemicals or excessive water, as these may damage the adhesive bond.
Conclusion
Stick-on wood flooring offers a practical and affordable solution for homeowners seeking a quick and easy way to enhance their living spaces. With its ease of installation, cost-effectiveness, and wide range of design options, stick-on wood flooring continues to be a popular choice for DIY enthusiasts and budget-conscious homeowners.

7 Things To Know About L And Stick Flooring

Wood Flooring L Stick Tiles Covering Easy Install Temu

Livelynine 4pcs L And Stick Floor Tile Cherry Wood 6in X 3ft Red Vinyl Plank Flooring Adhesive Tiles Waterproof Laminate For Bathroom Kitchen Walls

Wood Flooring L Stick Tiles Covering Easy Install Temu

Vinyl Floor Planks 10 Pack Sticky Flooring Luxury Like Real Wood L Stick Tile

Decotalk L And Stick Floor Tile Wood Flooring Planks 6 X36 Vinyl Self Adhesive Brown Tiles Waterproof Laminate 3pcs Bathroom Look

How To Install L And Stick Vinyl Plank Flooring The Nifty Nester

L And Stick Vinyl Plank Flooring 101 Floorings

Wood Adhesive L And Stick Vinyl Floor Covering Pvc Flooring China Tile Made In Com

Art3d Old Wood 12mil 36in L X 6in W Waterproof And Stick Vinyl Flooring 54sq Ft Box A43hd204 The Home Depot
Related Posts

