DIY Hardwood Flooring: Essential Aspects to Consider
Installing hardwood flooring in your home can add warmth, elegance, and value to your property. However, it's important to approach this project with proper preparation and knowledge to ensure a successful outcome. Here are some essential aspects to consider when embarking on a DIY hardwood flooring installation:
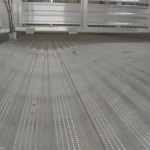
1. Subfloor Preparation:
Your subfloor must be level, flat, and stable to provide a solid foundation for the hardwood flooring. Inspect the subfloor for any uneven areas, squeaks, or damage that needs repair. If necessary, install appropriate underlayment or self-leveling compound to ensure a smooth surface.
2. Moisture Control:
Hardwood is susceptible to moisture damage, so it's crucial to control moisture levels before and during installation. Use a moisture meter to verify that the subfloor has a moisture content below 12%. Install a vapor barrier to prevent moisture from rising from the concrete or crawlspace.
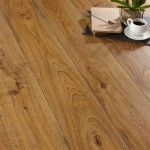
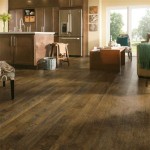
3. Type of Flooring:
There are various types of hardwood flooring available, each with its own characteristics. Solid hardwood is made from a single piece of wood and is the most durable option. Engineered hardwood consists of a veneer of real wood over a core of plywood or HDF, offering more moisture resistance than solid hardwood.
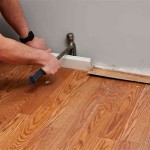
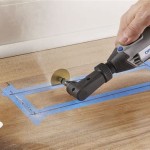
4. Installation Methods:
Hardwood flooring can be installed using different methods, including nailing, stapling, or glue-down. Nailing is the most traditional method and requires a nail gun or hammer. Stapling uses a pneumatic stapler to secure the planks to the subfloor. Glue-down involves applying adhesive to the subfloor and bonding the planks to it.
5. Acclimation:
Before installing hardwood flooring, it's essential to acclimate it to the temperature and humidity of your home. Unpack the flooring and let it sit in the room for several days (usually 3-5 days). This allows the wood to adjust to the environment and reduces the risk of expansion or contraction issues after installation.
6. Expansion Gaps:
Wood is a natural material that expands and contracts with changes in temperature and humidity. To accommodate these movements, leave approximately 1/4" to 1/2" of expansion space around the perimeter of the room and around any obstructions.
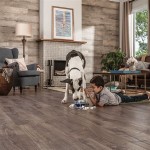
7. Finishing and Protection:
Once the hardwood flooring is installed, it needs to be finished and protected. Sanding removes any imperfections from the surface, and staining or polyurethane coats enhance the color and protect against wear and tear. Ensure proper ventilation during application and allow ample drying time to achieve a durable finish.
By carefully considering these essential aspects, you can successfully install hardwood flooring in your home. Remember to use the appropriate tools, follow the manufacturer's instructions, and take the necessary precautions to ensure a long-lasting and visually appealing result.

Make Your Own Plank Flooring Using 1 X 12 Lumber Hallstrom Home

Diy Hardwood Floors Under 1 50 Sq Ft The Harper House

Tips For Diy Hardwood Floors Installation She Wears Many Hats

Inexpensive Wood Floor That Looks Like A Million Dollars

Make Your Own Plank Flooring Using 1 X 12 Lumber Hallstrom Home

Diy Wood Floors Flooring

Creating A Diy Pallet Wood Floor With Free 9 Steps S Instructables

How To Install Beautiful Wood Floors Using Basic Unfinished Lumber The Creek Line House

Inexpensive Wood Floor That Looks Like A Million Dollars

Tips For Diy Hardwood Floors Installation She Wears Many Hats
Related Posts