What Tools Do You Need to Lay Laminate Flooring?
Laying laminate flooring can significantly enhance the aesthetic appeal and functionality of a living space. While the process is often considered a manageable DIY project, its success hinges significantly on having the right tools readily available. Incorrect tools or improvisations can lead to installation errors, compromised flooring integrity, and ultimately, a disappointing final result. Therefore, a comprehensive understanding of the necessary tools and their respective purposes is crucial before embarking on a laminate flooring installation.
The list of required tools can vary slightly depending on the specific type of laminate being installed and the room's unique characteristics. However, a core set of essential tools remains consistent across most projects. These tools ensure accurate measurements, precise cuts, secure fitting, and a professional-looking finish. Neglecting any of these elements can compromise the durability and longevity of the newly installed floor.
Essential Measuring and Marking Tools
Accurate measurements and clear markings are paramount to a successful laminate flooring installation. These steps lay the groundwork for precise cuts and proper alignment, preventing unsightly gaps or misaligned boards.
Measuring Tape: A high-quality measuring tape, preferably one that extends at least 25 feet, is indispensable. It is used to determine the room's dimensions, measure individual boards, and mark cutting lines. Look for a tape measure with a sturdy casing and a clear, easy-to-read scale. A lockable blade is also beneficial for maintaining accuracy during long measurements.
Pencil: A standard pencil is used for marking cutting lines on the laminate boards. A carpenter's pencil, with its thicker lead, can be advantageous for marking rough surfaces and ensuring visibility. Always keep the pencil sharp for precise markings.
Square: A square, typically a speed square or a combination square, is used to ensure that cuts are perpendicular to the board's edge. This is particularly important for achieving straight lines and preventing gaps at the wall or in between boards. A combination square allows for adjusting the angle, which might be needed for irregular room shapes.
T-Bevel/Sliding Bevel: This tool is used to transfer angles from walls and corners to the laminate boards. This is exceptionally useful for rooms that aren't perfectly square, or when fitting around curved or irregular shapes. The T-bevel allows you to accurately replicate the angle for a seamless fit.
Cutting and Shaping Tools
The ability to accurately and cleanly cut laminate boards is crucial for achieving a professional-looking installation. Choosing the right cutting tool depends on the thickness of the laminate and the complexity of the cuts required.
Laminate Flooring Cutter (Optional but Recommended): This specialized tool is designed specifically for cutting laminate flooring. It provides a clean, precise cut without producing excessive dust or noise. It’s a practical option if you have a large area to cover. It operates using a shearing motion, which is faster and cleaner than sawing for straight cuts.
Circular Saw: A circular saw is a powerful tool for making straight cuts in laminate flooring. It is essential to use a blade specifically designed for cutting laminate, such as a fine-tooth carbide-tipped blade, to prevent chipping and splintering. Always wear safety glasses when using a circular saw.
Jigsaw: A jigsaw is indispensable for making curved or intricate cuts around obstacles like pipes, doorways, or irregular wall shapes. Again, use a fine-tooth blade designed for laminate to minimize chipping. Controlling the speed of the jigsaw is crucial for accuracy and preventing damage to the laminate.
Utility Knife: A utility knife is useful for scoring laminate boards before snapping them. This technique can be effective for thinner laminate planks and helps to create a cleaner break along the score line. Always use a sharp blade and wear safety gloves when using a utility knife.
Hole Saw: When working around pipes or other circular obstructions, a hole saw attached to a drill can create perfectly sized openings in the laminate. Choose a hole saw that matches the diameter of the pipe or object you are working around.
Installation and Securing Tools
Once the laminate boards are cut to size, the installation process involves fitting them together and securing them in place. These tools facilitate a tight, even, and durable floor surface.
Tapping Block: A tapping block is a small, typically plastic or wooden block that is used to gently tap the laminate boards together without damaging the edges. It distributes the force evenly and prevents chipping or splintering. It’s an essential tool for achieving a tight, seamless fit between the boards.
Pull Bar: A pull bar is a metal tool designed to pull the last row of laminate boards into place against the wall. It has a hooked end that grips the board and allows you to apply leverage to close the gap. It’s especially useful in tight spaces where a tapping block cannot be easily used.
Spacers: Spacers are small, consistent blocks of plastic or wood used to maintain an expansion gap between the laminate flooring and the wall. This gap allows the floor to expand and contract with changes in temperature and humidity, preventing buckling or warping. The recommended width of the expansion gap is typically specified by the laminate manufacturer.
Rubber Mallet: A rubber mallet can be used in conjunction with the tapping block to gently persuade stubborn boards into place. The rubber head prevents damage to the laminate's surface compared to a metal hammer.
Preparation and Cleaning Tools
Preparing the subfloor and cleaning up after the installation are crucial steps in ensuring a long-lasting and aesthetically pleasing result. These tools help to create a smooth, clean, and level surface for the laminate flooring.
Broom or Vacuum Cleaner: Thoroughly cleaning the subfloor before installing the laminate is essential. Remove any dust, debris, or loose particles that could interfere with the underlayment or the laminate boards. A broom and vacuum cleaner are typically used to achieve this level of cleanliness.
Level: A level, preferably a long one (4 feet or more), is used to check the subfloor for unevenness. Any significant dips or bumps should be addressed before installing the underlayment. Self-leveling compound can be used to correct minor imperfections in the subfloor.
Underlayment Tape: Underlayment tape is used to seal the seams between the rolls of underlayment. This prevents moisture from seeping through and damaging the laminate flooring. It also helps to create a more stable and consistent surface.
Safety Glasses: Protecting your eyes from dust and flying debris is crucial during the laminate flooring installation process. Safety glasses should be worn at all times when cutting, sawing, or hammering.
Knee Pads: Laying laminate flooring involves spending a significant amount of time on your knees. Knee pads provide cushioning and support, reducing strain and discomfort.
Optional but Helpful Tools
While not strictly essential, certain tools can significantly streamline the laminate flooring installation process and improve the final result.
Moisture Meter: A moisture meter is used to measure the moisture content of the subfloor before installing the laminate. High moisture levels can damage the laminate over time. If the moisture content is too high, it may be necessary to delay the installation or take steps to dry the subfloor.
Undercutting Saw: This specialized saw is designed to undercut door casings and baseboards, allowing the laminate flooring to slide neatly underneath. This creates a clean, professional-looking finish without having to remove and reinstall the trim.
Chalk Line: A chalk line is used to create long, straight lines on the subfloor for aligning the first row of laminate boards. This ensures that the floor is installed straight and true.
Investing in the appropriate tools for laying laminate flooring is an investment in the quality and longevity of the finished project. While some tools can be substituted or improvised, having the right equipment on hand will significantly simplify the installation process, reduce errors, and produce a professional-looking result. It is advisable to choose high-quality tools that are durable and reliable, as they will likely be used for future projects as well.

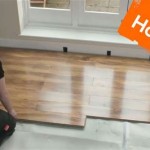
How To Install Laminate Flooring On Your Own Diy Hq Longwood Fl

Guide To Fitting Laminate Free Samples

See Which Laminate Flooring Tools And Cutters I Have In My Kit

How To Lay Laminate Flooring 2024 Step By Guide Esb

The Laminate Flooring Tools Needed For Installing This

Laminate Flooring Tools For Installing

8 Essential Tools For Laminate Flooring Installations The Family Handyman

Tools Needed To Install Laminate Flooring Find The Home Pros

The Essential Tools For Laying Laminate Flooring Carpet Underlay

Wolfcraft Essentials Tool Set For Laying Laminate And Designing Flooring Vidaxl Co
Related Posts