Gluing Down Cork Flooring: A Comprehensive Guide
Cork flooring is a popular choice for homeowners due to its durability, comfort, and eco-friendly nature. It is a natural material with a wide range of benefits, including sound insulation, thermal insulation, and cushioning underfoot. While cork flooring can be installed using a floating method, gluing it down provides a more secure and stable installation, particularly in high-traffic areas or where moisture is a concern. This article will delve into the process of gluing down cork flooring, providing a comprehensive guide for homeowners and DIY enthusiasts.
Key Considerations Before Gluing Down Cork Flooring
Before embarking on the installation process, it is crucial to consider several factors that will influence the outcome of the project. These include:
- Subfloor Preparation: The subfloor needs to be level, smooth, and free of any debris or imperfections. A smooth subfloor ensures even adhesion of the cork tiles, minimizing unevenness and potential problems in the future. This may involve sanding, patching, or leveling the subfloor as needed.
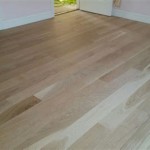
- Cork Flooring Type: There are various types of cork flooring available, including tiles, planks, and sheets. The installation process may vary depending on the type of cork flooring chosen. It is essential to consult the manufacturer's instructions for specific installation guidelines.
- Moisture Content: Cork is susceptible to moisture damage, so it is crucial to ensure that the subfloor and the environment are sufficiently dry. The moisture content of the subfloor should ideally be below 12%.
- Adhesive Selection: Choosing the right adhesive is vital for a successful installation. Contact adhesive is often used for gluing down cork flooring. Other options include polyurethane, epoxy, and water-based adhesives. Consult the manufacturer's instructions to select the appropriate adhesive for your specific cork flooring type and subfloor.
Steps for Gluing Down Cork Flooring
Once the necessary preparations are complete, the following steps can be followed to glue down cork flooring:
- Prepare the Subfloor: Thoroughly clean the subfloor to remove any dirt, dust, or debris. If necessary, sand the subfloor to create a smooth, even surface. Use a primer to enhance adhesion if required.
- Apply Adhesive: Spread a thin, even layer of contact adhesive to the subfloor using a notched trowel. Follow the manufacturer's instructions for the recommended application rate and drying time. Do not apply adhesive to the entire floor at once, as it can dry out before the cork tiles are installed.
- Install Cork Tiles: Once the adhesive is tacky, start laying the cork tiles, ensuring they are firmly pressed into the adhesive. Use spacers to maintain even gaps between tiles. Use a roller to firmly press the tiles into the adhesive, ensuring proper adhesion.
- Continue Installation: Work your way across the floor, laying the tiles in a staggered pattern to create a more visually appealing and durable installation. Use a utility knife to cut the tiles to fit around obstructions.
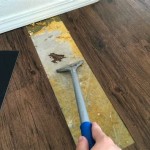
- Cleanup and Finishing Touches: Clean up any excess adhesive immediately. Allow the adhesive to cure completely before applying grout or sealant. This can take several days or even weeks, depending on the adhesive used. Once cured, you can apply grout to the gaps between tiles if desired. This helps protect the cork from moisture and dirt.
When gluing down cork flooring, it is crucial to follow the manufacturer's instructions carefully. These instructions will provide specific details on adhesive selection, application rate, drying time, and other important factors for a successful installation.
Tips for a Successful Gluing Down Cork Flooring Project
In addition to the steps mentioned above, here are some tips to help ensure a successful gluing down cork flooring project:
- Use a moisture barrier: If there is a risk of moisture penetration, consider using a moisture barrier underneath the cork flooring. This will help to protect the cork from water damage.
- Wear protective gear: Always wear protective gear, including gloves, safety glasses, and a dust mask, when working with adhesives and cutting tools.
- Work in a well-ventilated area: Ensure adequate ventilation when working with adhesives, as they can release harmful fumes.
- Let the adhesive cure completely: After installing the cork flooring, allow the adhesive to cure completely before applying any weight or walking on the floor. This will ensure proper adhesion and prevent the tiles from lifting or shifting.
Gluing down cork flooring can be a rewarding project, providing a beautiful, durable, and comfortable floor covering. With proper planning, preparation, and execution, you can successfully install cork flooring that will enhance the aesthetics and functionality of your home for years to come.

Advantages Of A Cork Floating Floor Over Glue Down Tiles Cancork

Advantages Of A Cork Floating Floor Over Glue Down Tiles Cancork

Cork Glue Down Floors Jelinek Group

Wicanders Cork Pure Unfinished Glue Down Flooring In Light

Cork Tiles Or Floating Flooring

Floating Vs Glue Down Cork Flooring Floorswd Ltd

How To Install Wicanders Glue Down Cork Flooring

Complete Guide To Cork Flooring Installation Deerfoot Carpet

How To Install Cork Tile Flooring Diy Bp Carpets And Ltd

Advantages Of A Cork Floating Floor Over Glue Down Tiles Cancork
Related Posts