How To Install Laminate Wood Flooring On Ceiling
Laminate wood flooring, typically associated with floors, can also be utilized as an attractive and unique ceiling covering. Installing laminate on a ceiling presents a visually appealing alternative to traditional options like drywall or textured surfaces. This article provides a comprehensive guide to installing laminate wood flooring on a ceiling, outlining the necessary steps and considerations for a successful project.
Preparing for the installation process is crucial for a professional and lasting outcome. This involves assessing the existing ceiling structure, selecting appropriate materials, and ensuring a safe working environment. Ignoring these preliminary steps can lead to installation challenges and potentially compromise the structural integrity of the finished ceiling.
Assessing the Existing Ceiling and Planning the Layout
The first step involves a thorough assessment of the existing ceiling. Determine its composition (e.g., drywall, plaster, or concrete) and its condition. Check for any signs of water damage, cracks, or sagging. Address any existing issues before proceeding with the laminate installation. Repairing existing problems will ensure a stable and level surface for the laminate, preventing future complications.
Next, plan the layout of the laminate planks. Consider the room's dimensions, light sources, and any existing architectural features. Measure the ceiling accurately to determine the amount of laminate flooring needed, adding an extra 10-15% for waste due to cuts and adjustments. A detailed layout plan will minimize waste and ensure a visually appealing and balanced appearance.
Determine the direction in which the laminate planks will run. Typically, running the planks parallel to the longest wall visually lengthens the room. However, personal preference and the room's specific characteristics should also be considered. Experiment with different layouts using a scaled drawing or a digital design tool to visualize the final result. A well-planned layout enhances the aesthetic appeal of the ceiling and makes the installation process more efficient.
When planning the layout, account for light fixtures and other ceiling-mounted objects. Precisely measure and mark the locations of these objects on the ceiling. These measurements will be used to accurately cut the laminate planks to fit around the fixtures. Precise measurements are critical to avoid gaps or misalignments around these features.
Choosing the Right Materials and Tools
Selecting the appropriate materials is essential for a successful ceiling installation. Choose laminate flooring specifically designed for ceiling applications. These laminates are typically lighter in weight and have enhanced locking mechanisms for secure installation. Standard floor laminates might be too heavy and not suitable for ceiling mounting.
In addition to the laminate flooring, gather the necessary tools and materials. These include:
- A stud finder: To locate ceiling joists for secure fastening.
- A level: To ensure the laminate planks are installed straight and level.
- A measuring tape: For accurate measurements and cuts.
- A pencil: For marking cutting lines.
- A circular saw or jigsaw: For cutting the laminate planks.
- A hammer or rubber mallet: For tapping the laminate planks into place.
- Construction adhesive: For additional bonding to the ceiling.
- Screws or nails: For securing the laminate planks to the ceiling joists.
- Safety glasses: To protect the eyes from debris.
- Dust mask: To avoid inhaling dust particles.
- Ladder or scaffolding: For safe access to the ceiling.
The type of fasteners used (screws or nails) will depend on the existing ceiling structure. Screws generally provide a more secure hold, especially when attaching to ceiling joists. Choose screws or nails that are long enough to penetrate the laminate and securely fasten it to the joists or underlying structure. Using the correct fasteners ensures the laminate remains securely attached to the ceiling over time.
Consider using furring strips to create a level surface for the laminate. Furring strips are thin pieces of wood that are attached to the existing ceiling to provide a stable and even base. This is particularly useful if the existing ceiling is uneven or damaged. Installing furring strips ensures a smooth and consistent surface for the laminate, resulting in a more professional-looking installation.
The Installation Process: A Step-by-Step Guide
Once the preparation is complete, the installation process can begin. This involves attaching furring strips (if needed), installing the first row of laminate planks, and continuing the installation until the entire ceiling is covered. Following these steps carefully will ensure a secure and visually appealing finished product.
If using furring strips, begin by locating the ceiling joists using a stud finder. Attach the furring strips perpendicular to the joists, spacing them approximately 12-16 inches apart. Use screws to securely fasten the furring strips to the joists. Ensure the furring strips are level using a level before attaching them. Level furring strips are crucial for a flat and even laminate ceiling.
Start the laminate installation along one wall of the room. Apply construction adhesive to the back of the first laminate plank and position it against the wall, ensuring it is aligned with the layout plan. Use screws or nails to secure the plank to the furring strips or ceiling joists. The first row is the most critical, as it serves as the foundation for the rest of the installation. Accurate placement of the first row is essential for a straight and even ceiling.
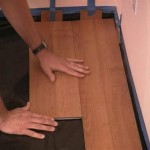
Continue installing the remaining laminate planks, working one row at a time. Engage the locking mechanisms of the planks, tapping them gently into place with a hammer or rubber mallet. Avoid hitting the planks too hard, as this can damage the locking mechanisms. Apply construction adhesive to the back of each plank and secure it with screws or nails. Consistent application of both adhesive and fasteners ensures the laminate is securely attached to the ceiling.
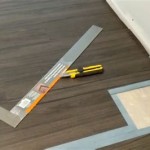
When encountering light fixtures or other ceiling-mounted objects, precisely measure and cut the laminate planks to fit around them. Use a circular saw or jigsaw to make the necessary cuts. Ensure the cuts are clean and accurate to avoid gaps or unsightly edges. Precise cuts demonstrate attention to detail and enhance the overall aesthetic of the finished ceiling.
For the final row of laminate planks, it might be necessary to rip the planks to the required width. Measure the remaining space carefully and use a circular saw or jigsaw to cut the planks to size. Install the final row in the same manner as the previous rows, using construction adhesive and screws or nails. A carefully installed final row completes the installation and provides a polished look.
After the installation is complete, inspect the entire ceiling for any gaps or imperfections. Fill any small gaps with color-matched caulk or wood filler. Clean the ceiling with a damp cloth to remove any dust or debris. Thorough cleaning ensures the finished ceiling is free of blemishes and showcases the laminate's beauty.
Installing laminate wood flooring on a ceiling requires careful planning, preparation, and execution. By following these steps and paying attention to detail, a visually stunning and durable ceiling can be achieved, transforming the room's aesthetic and adding a unique touch.

Diy Ceiling Planks From Laminate Flooring Your Home Renewed

Diy Ceiling Planks From Laminate Flooring Your Home Renewed

Diy Ceiling Planks From Laminate Flooring Your Home Renewed

Laminate Floor Ceiling

Diy Ceiling Planks From Laminate Flooring Your Home Renewed

Diy Ceiling Planks From Laminate Flooring Your Home Renewed

Vaulted Ceiling Beams With Laminate Wood Jenna Sue Design

Vaulted Ceiling Beams With Laminate Wood Jenna Sue Design

Diy Ceiling Planks From Laminate Flooring Your Home Renewed

Vaulted Ceiling Beams With Laminate Wood Jenna Sue Design
Related Posts