Can You Install Vinyl Plank Flooring Over Hardwood? A Comprehensive Guide
The question of whether vinyl plank flooring can be installed over existing hardwood floors is a common one among homeowners considering flooring upgrades. The answer is nuanced and depends on various factors related to the condition of the existing hardwood and the type of vinyl plank flooring being considered. This article will explore the factors to consider, the potential benefits and drawbacks, and the proper methods for installing vinyl plank over hardwood.
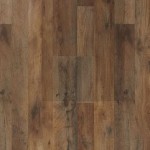
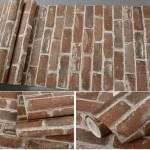
Vinyl plank flooring has gained significant popularity due to its durability, water resistance, ease of installation, and aesthetic versatility. It is available in a wide range of styles that mimic the look of natural wood, stone, and tile. Furthermore, vinyl plank generally offers a cost-effective alternative to hardwood, ceramic tile, or natural stone.
Hardwood flooring, on the other hand, is a classic and desirable flooring option known for its warmth, beauty, and longevity. However, hardwood can be susceptible to moisture damage, scratches, and dents. Installing vinyl plank over hardwood is sometimes considered as a way to protect the existing hardwood, update the aesthetic of a room, or address specific functional needs such as enhanced water resistance in bathrooms or kitchens.
Assessing the Condition of the Existing Hardwood Floor
Before considering installing vinyl plank over hardwood, a thorough assessment of the existing hardwood floor is essential. The success of the installation hinges on the hardwood's structural integrity and condition. Problems with the existing hardwood can lead to problems with the vinyl plank installation.
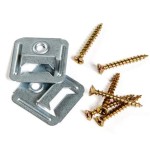
First and foremost, the hardwood floor should be structurally sound. This means that the floorboards should not be loose, warped, or significantly damaged. Individual planks that are loose or popping up will need to be properly secured before proceeding. Replacing damaged planks or repairing the subfloor might be necessary to create a stable base for the vinyl plank.
Moisture is a critical factor. Hardwood is susceptible to damage from excessive moisture, which can cause warping, cupping, and mold growth. Before proceeding with vinyl plank installation, it's imperative to address any existing moisture issues. This may involve identifying and repairing leaks, improving ventilation, or using a dehumidifier. A moisture meter can be used to check the moisture content of the hardwood. Ideally, the moisture content should be within an acceptable range for hardwood flooring, which typically varies depending on the species and geographical location. Consult with a flooring professional for specific recommendations.
The surface of the hardwood floor should be as even as possible. Minor imperfections can often be addressed during the installation process, but significant unevenness will need to be rectified. This might involve sanding down high spots or using a self-leveling compound to fill in low spots. An uneven surface can cause the vinyl plank to flex and potentially separate at the seams over time.
Consider any existing finishes on the hardwood floor. A glossy finish may need to be roughened up to provide a better surface for the vinyl plank adhesive (if using glue-down vinyl plank). Sanding or using a chemical deglosser can help to improve adhesion. If the existing finish is peeling or chipping, it should be removed before installing the vinyl plank.
Finally, ensure the hardwood floor is clean and free of debris. Dirt, dust, and other contaminants can interfere with the adhesion of the vinyl plank and create an uneven surface. Vacuuming, sweeping, and mopping the hardwood floor are essential steps to prepare it for installation.
Choosing the Right Type of Vinyl Plank Flooring
The type of vinyl plank flooring selected also plays a crucial role in the success of the installation over hardwood. Different types of vinyl plank have varying installation requirements and performance characteristics. There are two primary types of vinyl plank to consider: glue-down and click-lock.
Glue-down vinyl plank is adhered directly to the subfloor (in this case, the hardwood floor) using a specialized adhesive. This type of vinyl plank is generally thinner than click-lock vinyl plank and provides a more permanent installation. Glue-down vinyl plank is often preferred in areas with high moisture levels, as the adhesive creates a moisture barrier.
Click-lock vinyl plank, also known as floating vinyl plank, features interlocking edges that snap together, creating a floating floor system. This type of vinyl plank does not require adhesive and can be installed relatively quickly and easily. Click-lock vinyl plank is often preferred for DIY projects and for situations where the option to remove the flooring in the future is desired.
Thickness is another important consideration. Thicker vinyl plank is generally more durable and provides better sound insulation. It can also help to bridge minor imperfections in the subfloor. However, thicker vinyl plank may also raise the overall floor height, which could create issues with doorways or transitions to other flooring surfaces.
Wear layer is the top layer of the vinyl plank that protects it from scratches, dents, and wear. A thicker wear layer provides greater protection and is recommended for high-traffic areas. Consider the wear layer rating when selecting vinyl plank, especially for commercial applications or homes with pets and children.
Substrate material refers to the core of the vinyl plank. Options include rigid core, wood plastic composite (WPC), and stone plastic composite (SPC). Rigid core vinyl plank is known for its dimensional stability and resistance to expansion and contraction. WPC vinyl plank is waterproof and provides cushioning underfoot. SPC vinyl plank is extremely durable and resistant to dents and scratches. The type of substrate material selected will depend on the specific needs of the space and the desired performance characteristics.
Installation Methods and Considerations
The installation method for vinyl plank over hardwood will vary depending on the type of vinyl plank selected and the specific conditions of the existing hardwood floor. Proper preparation and installation techniques are essential for a successful and long-lasting result.
For glue-down vinyl plank, the hardwood floor must be thoroughly cleaned and prepped. Any loose or damaged planks should be repaired or replaced. The surface of the hardwood should be roughened up to provide a better bond for the adhesive. A self-leveling compound may be needed to address any significant unevenness. Apply the adhesive according to the manufacturer's instructions and carefully place the vinyl plank, ensuring proper alignment and spacing. Use a roller to press the vinyl plank firmly into the adhesive.
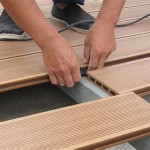
For click-lock vinyl plank, an underlayment is typically recommended. The underlayment provides cushioning, sound insulation, and a moisture barrier. It can also help to bridge minor imperfections in the subfloor. Install the underlayment according to the manufacturer's instructions. Begin installing the vinyl plank in one corner of the room and work your way across, interlocking the edges as you go. Use a tapping block and hammer to ensure a tight and secure fit. Leave a small expansion gap around the perimeter of the room to allow for expansion and contraction.
Proper acclimation is essential for both glue-down and click-lock vinyl plank. Acclimate the vinyl plank in the room where it will be installed for at least 48 hours prior to installation. This allows the vinyl plank to adjust to the temperature and humidity of the room, minimizing the risk of expansion and contraction after installation.
When cutting vinyl plank, use a utility knife or a vinyl plank cutter. A utility knife can be used to score the vinyl plank and then snap it along the scored line. A vinyl plank cutter provides a cleaner and more precise cut. Use a straight edge or T-square to ensure accurate cuts.
Pay attention to transitions between different flooring surfaces. Transition strips can be used to create a smooth and aesthetically pleasing transition between the vinyl plank and other types of flooring, such as carpet, tile, or hardwood. Select transition strips that match the color and style of the vinyl plank.
Consider the direction of the vinyl plank. Installing the vinyl plank parallel to the longest wall of the room can create the illusion of a larger space. Installing the vinyl plank perpendicular to the joists can provide greater structural support.
Finally, be aware of the potential for mold growth. If moisture is trapped between the vinyl plank and the hardwood floor, it can create a breeding ground for mold. Ensure that the hardwood floor is dry and free of moisture before installing the vinyl plank, and consider using a moisture barrier underlayment.

Installing Luxury Vinyl Floors Over Engineered Hardwood Honey Built Home

How To Install Vinyl Flooring Over Hardwood Floors Wood Floor Fitting

Installing Luxury Vinyl Floors Over Engineered Hardwood Honey Built Home

How To Install Vinyl Flooring Over Hardwood Floors Wood Floor Fitting

Hardwood Vs Vinyl Flooring Pros Cons Comparisons And Costs Fixr

How To Install Lvp Over Hardwood Flooring

How To Install Laminate Or Vinyl Plank Flooring Over Old Hardwood

Installing Luxury Vinyl Floors Over Engineered Hardwood Honey Built Home

How To Install Lvp Over Hardwood Flooring

Dos And Don Ts For Installing Vinyl Plank Floors In The Bathroom Advice Homeowners
Related Posts