How to Craft Your Own Hardwood Flooring: A Comprehensive Guide
Creating your own hardwood flooring can be a rewarding and cost-effective endeavor that imparts your home with a touch of timeless elegance and warmth. However, embarking on this project requires meticulous planning, careful selection of materials, and a steadfast commitment to precision. Here's a detailed guide to assist you in creating stunning hardwood flooring that will grace your abode for years to come.
Choosing the Right Wood Species
The choice of wood species hinges upon your personal preferences, intended usage, and the ambiance you aspire to create. Popular options include oak, maple, walnut, and cherry, each boasting unique characteristics in terms of durability, grain patterns, and hues.
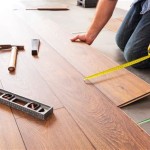
Acquiring the Necessary Tools
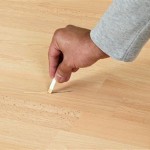
To ensure a successful project, it's imperative to gather the necessary tools: a table saw, miter saw, nail gun, sander, and measuring tape. Additionally, a moisture meter proves invaluable for verifying the moisture content of the wood, ensuring its stability before installation.
Milling the Lumber
Using a table saw, meticulously mill the raw lumber into planks of your desired width and thickness. Precision is crucial here, as uneven planks can compromise the overall integrity of the flooring.
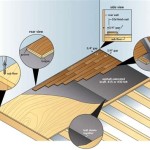
Installing a Subfloor
A solid subfloor forms the foundation of your hardwood flooring. Plywood or OSB (oriented strand board) are commonly employed for this purpose. Secure the subfloor to the joists using screws or nails, ensuring a level and sturdy surface.
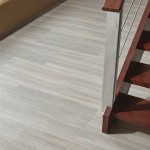
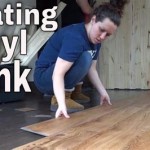
Laying the Hardwood Flooring
Commence by establishing a straight starting line, often along the longest wall. Utilize a nail gun to affix the planks to the subfloor, driving nails at an angle to enhance their holding power. Stagger the joints between adjacent rows for optimal strength.
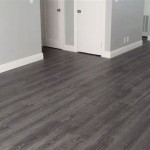
Sanding and Finishing
Once the flooring is laid, it's time for meticulous sanding. Start with coarse sandpaper to remove any imperfections, gradually transitioning to finer grits until the surface is smooth and blemish-free. Apply your chosen finish, such as polyurethane, oil, or wax, to protect and enhance the beauty of the wood.
Additional Tips
- Ensure proper acclimation of the wood to the installation environment before commencing work.
- Leave expansion gaps around the perimeter of the room to accommodate seasonal movement.
- Consider underlayment for additional soundproofing and cushioning.
- Wear appropriate safety gear, including gloves, eye protection, and a dust mask.
- Seek professional assistance if you encounter any significant challenges or lack the requisite experience.
Creating your own hardwood flooring is a worthwhile undertaking that can elevate your living space. With careful planning, attention to detail, and a willingness to engage in the process, you can craft a beautiful and durable floor that will add value and charm to your home for generations to come.

Make Your Own Plank Flooring Using 1 X 12 Lumber Hallstrom Home

Make Your Own Plank Flooring Using 1 X 12 Lumber Hallstrom Home

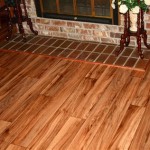
Inexpensive Wood Floor That Looks Like A Million Dollars

Inexpensive Wood Floor That Looks Like A Million Dollars

Inexpensive Wood Floor That Looks Like A Million Dollars

Make Your Own Plank Flooring Using 1 X 12 Lumber Hallstrom Home

Make Your Own Plank Flooring Using 1 X 12 Lumber Hallstrom Home

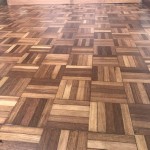
Make Your Own Geometric Wood Flooring Manmadediy

Inexpensive Wood Floor That Looks Like A Million Dollars

How To Install Hardwood Flooring The Home Depot
Related Posts