Coreluxe Vinyl Plank Flooring Installation: An Essential Guide
Coreluxe vinyl plank flooring is a popular choice for homeowners and businesses alike due to its durability, waterproofness, and ease of installation. If you're planning to install Coreluxe vinyl plank flooring, there are a few essential aspects you need to know. Here's a comprehensive guide to help you:
1. Preparation:
Ensure the subfloor is level, smooth, and free of any debris. Remove all existing flooring, baseboards, and quarter rounds. Check the moisture content of the subfloor and make sure it's within the recommended range.
2. Underlayment Installation:
A proper underlayment provides cushioning, moisture protection, and sound absorption. Roll out the underlayment over the entire subfloor and secure it using tape. Overlap the seams slightly and cut away any excess.
3. Acclimation:
Allow the Coreluxe vinyl planks to acclimate to the room temperature for at least 48 hours. This will prevent buckling or warping after installation. Keep the planks flat and in their original packaging during acclimation.
4. Starting Point:
Determine the center point of the room and snap a chalk line perpendicular to the longest wall. This will serve as your starting point. Begin laying the first row of planks along the chalk line, ensuring they're straight and flush with each other.
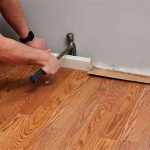
5. Plank Installation:
Connect the planks using the patented locking system. Hold the plank at a 45-degree angle and slide it into the groove of the previous plank. Press down firmly to engage the locking mechanism. Continue laying the planks row by row, alternating the short ends.
6. Cutting and Fitting:
Measure and mark the planks to fit around obstacles such as doorways and corners. Use a sharp utility knife to score and snap the planks to size. Trim around pipes and other obstacles using a jigsaw or oscillating tool.
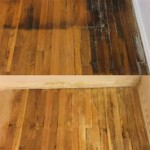
7. Expansion Gap:
Leave a small expansion gap around the perimeter of the room to allow for expansion and contraction. Use spacers to maintain a consistent gap throughout the installation.
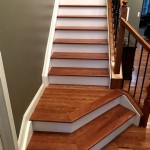
8. Transition Pieces:
Transition pieces are used to connect Coreluxe vinyl plank flooring to other types of flooring or to create a border. Measure and cut the transition pieces to fit and secure them using adhesive or nails.
9. Installation Completion:
After installing all the planks, remove the spacers and install baseboards and quarter rounds to cover the expansion gap and enhance the overall look. Clean the floor with a damp mop to remove any debris or adhesive residue.

Diy How To Corelux Vinyl Installation Tips And Tricks Lumber Liquidators Lvp Plank Flooring Install

How To Install Vinyl Plank Flooring Coreluxe Urban Loft Ash Tips And Tricks

Vinyl Plank Flooring Installation Guide Tap End Ll

Diy How To Corelux Vinyl Installation Tips And Tricks Lumber Liquidators Lvp Plank Flooring Install

Diy Coreluxe Rigid Vinyl Plank Tips

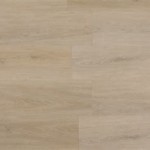
5mm Firefly Pine Evp Coreluxe Lumber Liquidators Vinyl Plank Flooring

Coreluxe 5mm W Pad Milner Pass Oak Waterproof Rigid Vinyl Plank Flooring 5 75 In Wide X 48 Long Ll

Coreluxe Flooring Reviews Is It Worth Floorings

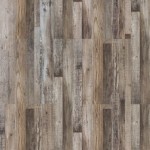
Coreluxe Xd 5mm W Pad Sheffield Oak Rigid Vinyl Plank Waterproof Flooring Floor Ers

Installing Vinyl Plank The Money Pit
Related Posts