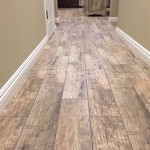
Armstrong LVT Flooring Installation: A Comprehensive Guide
Armstrong Luxury Vinyl Tile (LVT) flooring offers a stylish and durable flooring solution for your home or commercial space. Installing Armstrong LVT flooring requires careful preparation and attention to detail to ensure a professional-looking and long-lasting finish. Here is a comprehensive guide to help you successfully install Armstrong LVT flooring.
1. Preparation
Before installing your Armstrong LVT flooring, it's crucial to prepare your subfloor properly. The subfloor must be level, dry, and free of any imperfections or debris. If necessary, use a level and self-leveling compound to smooth out any uneven areas. The subfloor should also be clean and free of any contaminants such as dirt or grease.
2. Acclimation
Acclimating your Armstrong LVT flooring to the installation environment is essential for ensuring proper expansion and contraction. For best results, store the flooring material in the room where it will be installed for at least 48 hours before installation. This will allow the flooring to adjust to the temperature and humidity levels of the room.
3. Layout and Dry Fit
Plan the layout of your Armstrong LVT flooring before starting the installation. Dry-fitting the tiles will help you visualize the final look and make any necessary adjustments to the layout. Make sure to account for expansion gaps around the perimeter of the room and any obstacles such as doorways or pillars.
4. Application of Adhesive
Use a trowel to apply Armstrong's recommended adhesive evenly to the subfloor. Follow the manufacturer's instructions for the specific adhesive you are using. The adhesive should be applied in the direction of the planks or tiles to ensure proper bonding.
5. Installation
Starting from the center of the room, begin installing the Armstrong LVT flooring by placing the tiles or planks in the desired layout. Gently tap each tile or plank into place using a rubber mallet or tapping block. Make sure to leave expansion gaps around the perimeter of the room.
6. Rolling and Weighting
Once the Armstrong LVT flooring is installed, use a heavy roller to press down on the tiles or planks to ensure they are firmly bonded to the adhesive. You can also place weights on top of the flooring to provide additional pressure overnight.
7. Trimming and Edging
Trim the Armstrong LVT flooring around the perimeter of the room and any obstacles using a sharp utility knife or flooring cutter. Install baseboards or quarter-round molding to cover the expansion gaps and provide a finished look.
8. Cleaning and Maintenance
After installation, clean your Armstrong LVT flooring with a slightly damp mop or cloth. Avoid using abrasive cleaners or harsh chemicals that can damage the flooring. With proper care and maintenance, your Armstrong LVT flooring will provide years of beauty and durability.
Installing Armstrong LVT flooring requires meticulous preparation and following the recommended steps. By carefully following these instructions, you can achieve a professional-looking and long-lasting flooring installation.

Vinyl Plank Flooring Prep Installation Centsational Style

Luxury Vinyl Flooring By Armstrong Dalene Flooringdalene

Luxury Vinyl Flooring By Armstrong Dalene Flooringdalene

Lutea Paradise In Misted Morning Luxury Vinyl Flooring By Armstrong

Lutea Paradise In Tranquil Brown Luxury Vinyl Flooring By Armstrong

Armstrong Flooring Pro Mark Barnwood Blend 6 Mil X In W 36 L Waterproof Glue Down Luxury Vinyl Plank 35 95 Sq Ft Carton The Department At Com

Luxury Vinyl Flooring By Armstrong Dalene Flooringdalene

Lutea Paradise In Restful Ecru Luxury Vinyl Flooring By Armstrong

Lutea Paradise In Composed Brown Luxury Vinyl Flooring By Armstrong

Armstrong Luxury Vinyl Flooring Parallel Usa 12 6 X 48 Savannah Walnut Endearing J5145 The Noble Floors Whole Tampa Bay
Related Posts


