How To Lay Hardwood Flooring On Stairs
Installing hardwood flooring on stairs elevates the aesthetic of a home, providing a durable and elegant transition between levels. While the process demands precision and patience, the end result is a visually appealing and long-lasting finish. This article provides a comprehensive guide on how to successfully lay hardwood flooring on stairs, covering essential preparation, installation techniques, and necessary safety precautions.
Preparation and Planning
Prior to commencing any physical installation, thorough planning and preparation are paramount. This includes assessing the existing staircase structure, selecting appropriate materials, and gathering the necessary tools. Failure to adequately prepare can lead to complications during installation and compromise the final quality and durability of the finished staircase.
The initial step involves carefully examining the existing staircase. Determine the type of construction; are the stairs open or closed stringer? Are they carpeted, tiled, or painted? Identify any existing damage, such as cracks, loose treads, or squeaks. These issues must be addressed before the new hardwood flooring can be installed. Repairing structural deficiencies ensures a stable and level surface for the new flooring.
Accurate measurements are crucial. Measure the width and depth of each tread and riser individually. Note any variations, as staircases are rarely perfectly uniform. These measurements will inform the quantity of hardwood flooring required and the dimensions of the treads and risers that need to be cut. It is advisable to add a waste factor of at least 10% to account for cuts and potential errors.
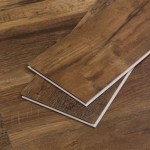
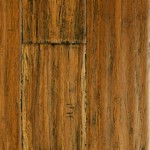
Selecting the appropriate hardwood flooring is equally important. Consider the species of wood, its hardness, and its aesthetic properties. Harder wood species, such as oak, maple, or hickory, are generally more durable and resistant to wear and tear, making them ideal for high-traffic areas like stairs. The color and grain pattern should complement the existing decor and create a cohesive look. Engineered hardwood is often preferred for stairs due to its stability and resistance to warping or cupping, especially in environments with fluctuating humidity levels. Solid hardwood can also be used, but it requires careful acclimatization to the environment and proper installation techniques to prevent movement.
Acclimatization is a critical, often overlooked, step. Hardwood flooring needs to adjust to the temperature and humidity levels of the installation environment before being installed. This process typically takes several days to a week. Stacking the flooring loosely in the room where it will be installed allows it to expand or contract as needed, minimizing the risk of gaps or buckling after installation. Consult the manufacturer's recommendations for specific acclimatization guidelines.
Gather all the necessary tools before beginning the installation process. Essential tools include a measuring tape, a pencil, a circular saw or miter saw, a jigsaw, a level, a square, a hammer, a nail gun or stapler, wood glue, shims, and safety glasses. A stair tread gauge or contour gauge can be particularly helpful for accurately transferring the shape of the treads and risers to the new flooring.
Installation Techniques
The installation process involves multiple steps, each requiring precision and attention to detail. This includes preparing the existing stairs, cutting and fitting the hardwood treads and risers, and securing them in place. The following details provide guidance on each stage.
Begin by removing any existing flooring from the stairs, such as carpet, tile, or vinyl. Use a pry bar or scraper to carefully remove the old materials, taking care not to damage the underlying structure. Remove any staples, nails, or adhesive residue. Inspect the subfloor for any damage or unevenness. Repair any cracks or holes with wood filler and sand the surface smooth. If the subfloor is severely damaged, it may need to be replaced entirely.
Once the subfloor is prepared, measure and cut the new hardwood treads and risers to the appropriate dimensions. Use a stair tread gauge or contour gauge to accurately transfer the shape of the existing treads and risers to the new flooring. This ensures a snug and precise fit. When cutting the flooring, always use a sharp blade and follow safety precautions. Make clean, straight cuts to avoid splintering or ragged edges.
Dry-fit each tread and riser before applying any adhesive or fasteners. This allows you to check the fit and make any necessary adjustments. Use shims to level the treads and risers if needed. Once you are satisfied with the fit, apply a bead of wood glue to the back of the tread or riser and position it on the stair. Secure the tread or riser in place using a nail gun or stapler. Ensure the fasteners are driven in at an angle to provide maximum holding power. If using a hammer and nails, pre-drill pilot holes to prevent the wood from splitting.
For open stringer staircases, the installation process is slightly more complex. The treads must be cut to overhang the stringers, creating a visually appealing and structurally sound design. Use a router to create a rounded edge on the front of the tread for a more finished look. Secure the treads to the stringers using screws and wood glue. Ensure the screws are countersunk and filled with wood filler to create a smooth surface.
When installing hardwood flooring on stairs, it is essential to maintain a consistent pattern and alignment. This creates a cohesive and visually appealing look. Use a level to ensure the treads and risers are perfectly horizontal and vertical. Use shims to make any necessary adjustments. Check progress regularly to ensure uniformity throughout the entire staircase.
Once all the treads and risers are installed, fill any nail holes or gaps with wood filler. Sand the filler smooth and apply a finish to protect the wood and enhance its natural beauty. Use a high-quality polyurethane finish for maximum durability. Apply multiple coats of finish, allowing each coat to dry completely before applying the next. Lightly sand between coats to create a smooth and even surface.
Safety Precautions and Best Practices
Safety is paramount when working with power tools and construction materials. Wear safety glasses to protect your eyes from flying debris. Use hearing protection to reduce noise exposure. Wear gloves to protect your hands from splinters and adhesive. Work in a well-ventilated area to avoid inhaling dust or fumes. Follow all manufacturer's instructions for the use of power tools and adhesives.
When cutting hardwood flooring, use a sharp blade and a stable work surface. Secure the flooring in place with clamps to prevent it from moving during cutting. Use a push stick to keep your hands away from the blade. Never reach over the blade while the saw is running.
When using a nail gun or stapler, always wear safety glasses and follow the manufacturer's instructions. Hold the tool firmly against the wood surface and ensure the fasteners are driven in at an angle. Avoid firing the tool into knots or other imperfections in the wood, as this can cause the wood to split.
Ensure proper ventilation when applying finishes. Many finishes contain volatile organic compounds (VOCs) that can be harmful if inhaled. Open windows and doors to allow fresh air to circulate. Wear a respirator to protect your lungs from fumes. Follow all manufacturer's instructions for the application and disposal of finishes.
Regular maintenance is essential to preserve the beauty and durability of hardwood flooring on stairs. Sweep or vacuum the stairs regularly to remove dirt and debris. Use a damp mop with a mild detergent to clean the flooring. Avoid using excessive water, as this can damage the wood. Apply a coat of wax or polish periodically to protect the finish and enhance its shine.
Inspect the staircase regularly for any signs of damage or wear. Repair any cracks or loose treads promptly to prevent further damage. Replace damaged treads or risers as needed. By following these maintenance tips, the beauty and longevity of the hardwood flooring on stairs can be maintained for many years.
Installing hardwood flooring on stairs can appear daunting, but by adhering to the outlined steps, homeowners can achieve a professionally installed and aesthetically pleasing result. Thorough preparation, accurate measurements, careful cutting and fitting, and adherence to safety precautions are all crucial components of a successful installation. The investment of time and effort will yield a durable and elegant staircase that enhances the value and appeal of the home.

You Want To Install Hardwood On Stairs Reallyfloors America S Est Flooring

How To Convert Carpeted Stairs Hardwood Lowe S

How To Install Laminate On Stairs Follow Our Essential Guide Laying And Costing For

Can You Put Hardwood Flooring On Stairs Ll

How To Install Hardwood On Stairs

How To Install Laminate Flooring On Staircase Step By Guide

How To Install Laminate Flooring On Stairs Direct Wood

Fitting Flooring Around Stair Rail Spindles

Guide To Installing Hardwood On Stairs Bc Best Flooring

How To Install Hardwood Flooring On Stairs Almahdi
Related Posts