Installing Engineered Wood Flooring Floating: A Step-by-Step Guide
Installing engineered wood flooring floating is a popular and relatively easy way to upgrade your home's flooring. Engineered wood is made of a top layer of real wood veneer bonded to a base of plywood or HDF (high-density fiberboard). This construction makes it more stable and durable than solid wood flooring, and it can be installed over existing subfloors, making it a great option for renovations.
Here is a step-by-step guide to help you install engineered wood flooring floating:
1. Prepare the Subfloor
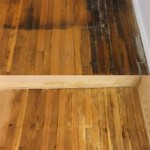
The first step is to prepare the subfloor. It should be clean, level, and dry. If the subfloor is uneven, you may need to level it using a self-leveling compound. You should also check for any moisture issues and address them before installing the flooring.
2. Install an Underlayment
An underlayment is a thin layer of material that goes between the subfloor and the flooring. It helps to protect the flooring from moisture and provides soundproofing. There are many different types of underlayment available, so be sure to choose one that is appropriate for your flooring.
3. Acclimate the Flooring
Before you install the flooring, it's important to acclimate it to the environment in your home. This means leaving the boxes of flooring unopened in the room where it will be installed for at least 24 hours. This will help to prevent the flooring from expanding or contracting after it is installed.
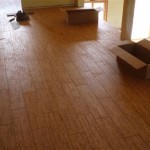
4. Start Installing the Flooring
Start installing the flooring in a corner of the room. Place the first plank along the wall and secure it using a tapping block and a hammer. Continue installing the planks by tapping them together at the edges. Make sure to stagger the joints between the planks to create a more durable floor.
5. Cut the Flooring
You will likely need to cut the last plank in each row to fit. To do this, use a miter saw or a circular saw with a flooring blade. Be sure to measure and mark the plank carefully before cutting.
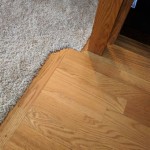
6. Install the Baseboards
Once the flooring is installed, you can install the baseboards. Baseboards help to hide the expansion gap between the flooring and the walls and give the room a finished look. Be sure to caulk the gaps between the baseboards and the walls.
Installing engineered wood flooring floating is a relatively easy project that can be completed in a weekend. By following these steps, you can achieve a beautiful and durable floor that will add value to your home.
How To Install Lock Engineered Hardwood Flooring
How To Install Lock Engineered Hardwood Flooring
How To Install Lock Engineered Hardwood Flooring
Which Method Should I Use To Install My Engineered Wood Floor Tesoro Woods
Flooring Fixing Methods Floating Floors Direct Wood Blog
Floating Engineered Hardwood
How To Lay Engineered Timber Floor Guide Fantastic Handyman Au
What Are Floating Wooden Floors Discount Flooring Depotdiscount Depot Blog
Glue Down Vs Floating Wood Floor Installation Finfloor
Floating Floor Vs Nail Down Slaughterbeck Floors Inc
Related Posts