Essential Aspects of Installing Lifeproof Vinyl Flooring Around a Toilet
Installing Lifeproof vinyl flooring can be a cost-effective and practical way to upgrade your bathroom's appearance. The durable and water-resistant nature of this type of flooring makes it an ideal choice for areas prone to moisture, such as bathrooms. However, installing Lifeproof vinyl flooring around a toilet can present unique challenges. This article will guide you through the essential steps and considerations to ensure a successful installation.
1. Preparation
Before starting the installation, it is crucial to prepare the area around the toilet. This involves removing the old flooring, cleaning the subfloor, and ensuring it is level and smooth. If the subfloor is uneven, leveling compound may be necessary to create a consistent surface for the vinyl flooring to adhere to.
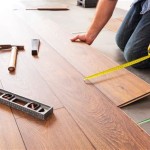
2. Measuring and Cutting
Measure the area around the toilet and cut the Lifeproof vinyl flooring to fit. Use a sharp utility knife and a straightedge or T-square for precise cuts. Ensure a snug fit around the toilet base to prevent water from seeping underneath the flooring.
3. Installing the Flooring
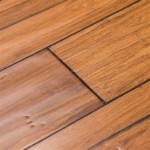
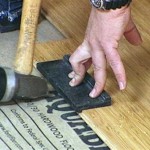
Install the Lifeproof vinyl flooring by following the manufacturer's instructions. Typically, this involves peeling back the backing and pressing the adhesive side onto the subfloor. Use a rolling tool or a heavy object to ensure good adhesion. Stagger the joints between the vinyl planks for a more durable and aesthetically pleasing flooring.
4. Cutting Around the Toilet Base
Once the flooring is installed, carefully cut around the toilet base. Use a utility knife and a sharp blade to score the flooring and cut out the section that fits snugly around the toilet. This will create a clean and finished look.
5. Sealing
To prevent water damage, seal the area around the toilet base with a silicone caulk. Apply the caulk around the edges of the flooring and the toilet base, ensuring a watertight seal. Allow the caulk to cure completely before using the bathroom.
6. Maintenance
Maintaining Lifeproof vinyl flooring around the toilet is relatively easy. Clean the flooring regularly with a mild detergent and damp mop, and avoid using abrasive cleaners or harsh chemicals. Wipe up spills immediately to prevent staining.
Conclusion
Installing Lifeproof vinyl flooring around a toilet requires careful preparation and precision cutting. By following these essential steps and considering the unique challenges, you can achieve a professional-looking and water-resistant flooring in your bathroom. Enjoy the durability and aesthetic appeal of Lifeproof vinyl flooring for years to come.

Lifeproof Vinyl Floor Installation Perfect For Kitchens Bathrooms

How To Install Vinyl Plank Flooring In A Bathroom Fixthisbuildthat

Installing Vinyl Plank Flooring Lifeproof Waterproof Rigid Core Sustain My Craft Habit

How To Install Vinyl Plank Flooring In A Bathroom Fixthisbuildthat

How To Install Vinyl Plank Flooring Around Bathroom Toilet Bowl P Installing Lifeproof

How To Install Vinyl Plank Flooring In A Bathroom Fixthisbuildthat

How To Install Vinyl Plank Flooring In A Bathroom Fixthisbuildthat

Lifeproof Vinyl Floor Installation Perfect For Kitchens Bathrooms

How To Install Vinyl Plank Floors In A Bathroom Over Tile

Lifeproof Vinyl Floor Installation Perfect For Kitchens Bathrooms
Related Posts