How To Install Vinyl Flooring Tiles
Vinyl flooring tiles offer a durable, cost-effective, and aesthetically versatile flooring solution for various areas within a home or commercial space. Their resilience to moisture, ease of maintenance, and wide range of patterns and colors make them a popular choice for kitchens, bathrooms, basements, and laundry rooms. Successfully installing vinyl flooring tiles requires careful preparation, precise execution, and attention to detail, resulting in a long-lasting and visually appealing floor.
This article provides a comprehensive guide to installing vinyl flooring tiles, covering essential preparation steps, outlining the installation process, and addressing common challenges to ensure a professional-looking finish. The information presented aims to equip individuals with the knowledge and confidence to tackle a vinyl tile flooring project effectively.
Preparing the Subfloor
The subfloor is the foundation upon which the vinyl flooring tiles will be laid. The condition and preparation of the subfloor are critical for the successful and long-lasting installation of vinyl tiles. A poorly prepared subfloor can lead to issues such as unevenness, tile lifting, and premature wear. Therefore, thorough preparation is paramount.
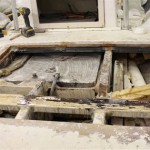
First, the existing flooring needs to be removed. This may involve removing carpeting, linoleum, or existing vinyl tile. The method of removal will vary depending on the type of flooring. For carpet, remove the carpet and tack strips. For sheet vinyl or old vinyl tiles, a scraper and potentially a heat gun can aid in lifting the material. Ensure all adhesive residue is removed as well.
The type of subfloor will dictate the specific preparation steps required. Common subfloor types include:
- Concrete: Concrete subfloors must be level, clean, and dry. Any cracks or imperfections should be filled with a concrete patching compound. Allow the patch to dry completely according to the manufacturer's instructions before proceeding. A self-leveling compound might be necessary for larger uneven areas. Test the concrete for moisture content using a moisture meter. Excessive moisture can cause adhesive failure and tile lifting. If moisture is a concern, a moisture barrier may be required.
- Plywood/OSB: Wood subfloors should be solid and free from movement. Inspect for any signs of damage or rot and repair or replace affected sections. Ensure the subfloor is securely fastened to the joists. Any loose or squeaky areas should be addressed before installing the vinyl tiles. Fill any gaps or imperfections with a wood filler and sand smooth. Make sure the plywood or OSB is rated for flooring applications.
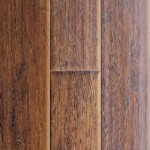
- Existing Vinyl Flooring: In some cases, vinyl tiles can be installed over existing vinyl flooring, but this is only recommended if the existing floor is in excellent condition, firmly adhered, and perfectly level. Any imperfections in the existing floor will telegraph through to the new vinyl tiles. It is generally best practice to remove the existing flooring to ensure a proper installation.
Regardless of the subfloor type, cleaning is essential. Thoroughly sweep or vacuum the subfloor to remove any dust, debris, or dirt. A damp mop can be used to clean the surface, but ensure it is completely dry before proceeding to the next step. A properly prepared subfloor provides a stable and level surface for the vinyl tiles, contributing to a successful and durable installation.
Laying Out the Tiles
Proper layout is crucial to achieving a visually appealing and symmetrical floor. A well-planned layout minimizes the need for small or awkwardly shaped cuts, ensures the tiles are evenly distributed, and helps to avoid any potential issues with alignment or pattern matching.
First, determine the center point of the room. This can be achieved by measuring the length and width of the room and marking the halfway points on each wall. Connect these marks with chalk lines to create intersecting lines that indicate the center of the room. The intersection of these lines is the starting point for the layout.
Next, perform a dry layout. This involves placing the tiles on the floor without adhesive, starting from the center point and working outwards towards the walls. This allows to visualize the tile arrangement and identify any potential issues with the layout, such as small cuts near the walls or inconsistencies in the pattern. It also allows to estimate the quantity of tiles needed, including extra for cuts and potential replacements.
Adjust the layout as needed to ensure the tiles are evenly distributed and the cuts near the walls are as large as possible. Aim for cuts that are at least half the width of a tile. If necessary, adjust the starting point slightly to achieve a more balanced layout. The goal is to create a visually pleasing and symmetrical arrangement that minimizes the need for small or awkward cuts.
Consider the room's focal points, such as doorways or windows, when planning the layout. Arrange the tiles so that the full tiles are prominently displayed in these areas and any cuts are hidden in less conspicuous locations. This will enhance the overall aesthetic appeal of the finished floor.
Once satisfied with the layout, mark the positions of the tiles with chalk lines. These lines will serve as a guide during the actual installation process, ensuring the tiles are properly aligned and the pattern is consistent throughout the room. Pay close attention to the chalk lines to maintain a straight and consistent layout. This meticulous approach to layout ensures a professional and visually appealing finished floor.
Applying Adhesive and Installing Tiles
The application of the adhesive and the subsequent installation of the tiles require precision and attention to detail. Selecting the correct adhesive and following the manufacturer's instructions are crucial for ensuring a strong and durable bond between the tiles and the subfloor. A consistent application of the adhesive and careful placement of the tiles will result in a seamless and professional-looking floor.
Choose an adhesive specifically designed for vinyl flooring tiles. There are various types of adhesives available, including pressure-sensitive adhesives, wet-set adhesives, and peel-and-stick tiles with pre-applied adhesive. The choice of adhesive will depend on the type of vinyl tile being used, the subfloor material, and the specific installation conditions. Consult the tile manufacturer's recommendations to select the appropriate adhesive. For peel-and-stick tiles, ensure the subfloor is exceptionally clean as any dust will compromise adhesion.
Apply the adhesive to the subfloor using a notched trowel. The size and type of notch will depend on the adhesive and the tile being used. Refer to the adhesive manufacturer's instructions for the recommended trowel notch size. Apply the adhesive in small sections, typically no more than a few square feet at a time. This prevents the adhesive from drying out before the tiles are installed. Maintain a consistent thickness of adhesive for uniform adhesion.
Carefully place the tiles onto the adhesive, aligning them with the chalk lines established during the layout process. Press the tiles firmly into the adhesive to ensure a strong bond. Use a hand roller or a flooring roller to apply even pressure across the entire surface of the tile. This will help to eliminate any air pockets and ensure the adhesive makes full contact with the tile. For peel-and-stick tiles, peel off the backing and carefully align the tile before pressing firmly. Be precise, as repositioning peel-and-stick tiles can be difficult or impossible without damaging them.
Work in a systematic manner, installing the tiles row by row. Check the alignment of the tiles frequently to ensure they remain straight and consistent. Use spacers, if recommended by the tile manufacturer, to maintain uniform spacing between the tiles. This will help to create a consistent and professional-looking floor.
When reaching the walls, carefully measure and cut the tiles to fit. Use a utility knife and a straight edge to score the tile and then snap it along the score line. For more intricate cuts, a jigsaw or a tile cutter may be necessary. Ensure the cuts are clean and precise for a seamless fit against the walls. After cutting, smooth any rough edges with sandpaper or a file.
After installing all the tiles, allow the adhesive to cure completely according to the manufacturer's instructions. This is crucial for ensuring a strong and durable bond. Avoid walking on the floor during the curing process. Once the adhesive is cured, remove any excess adhesive from the surface of the tiles using a damp cloth. Inspect the floor for any imperfections or loose tiles and address them as needed. A properly executed installation will result in a beautiful and long-lasting vinyl tile floor.
Cutting Vinyl Tiles
Accurate and clean cuts are essential for a professional-looking vinyl tile floor, especially when fitting tiles around walls, corners, and other obstructions. Proper cutting techniques minimize gaps and ensure a seamless transition between the tiles and the surrounding surfaces. Choosing the right tools and employing the correct methods will result in clean, precise cuts that enhance the overall appearance of the floor.
The most common tool for cutting vinyl tiles is a utility knife. A sharp blade is essential for making clean and precise cuts. Replace the blade frequently to ensure optimal performance. For straight cuts, use a straight edge, such as a metal ruler or a carpenter's square, to guide the knife. Place the straight edge along the desired cut line and score the tile firmly with the utility knife. Repeat the scoring process several times, applying increasing pressure with each pass. Once the tile is scored deeply enough, it can be snapped along the score line.
For more intricate cuts, such as those required for fitting tiles around pipes or corners, a jigsaw or a tile cutter may be necessary. A jigsaw with a fine-toothed blade can be used to cut curved or irregular shapes. A tile cutter, also known as a snap cutter, is a specialized tool for cutting tiles. It uses a scoring wheel and a breaking bar to create clean, straight cuts.
When measuring for cuts, use a tape measure and a pencil to mark the cut line on the tile. Be precise and accurate with the measurements to ensure the tile fits properly. It is often helpful to create a template out of cardboard or paper for complex shapes. Trace the template onto the tile and then cut along the traced line.
When cutting tiles, always wear safety glasses to protect eyes from flying debris. Use a cutting mat or a piece of scrap wood to protect the work surface. After cutting the tiles, smooth any rough edges with sandpaper or a file. This will prevent injury and ensure a seamless fit between the tiles.
For fitting tiles around pipes, use a hole saw or a coping saw to create a circular cutout in the tile. Measure the diameter of the pipe and select a hole saw that is slightly larger than the pipe diameter. Drill a hole in the tile at the appropriate location and then carefully fit the tile around the pipe.
By employing these cutting techniques, individuals can achieve clean, precise cuts that enhance the overall appearance of their vinyl tile floor.
Addressing Common Issues
Even with careful planning and execution, certain issues may arise during the installation of vinyl flooring tiles. Understanding these potential problems and knowing how to address them effectively can prevent costly mistakes and ensure a successful final result. Addressing any issues promptly and appropriately will contribute to the longevity and aesthetic appeal of the vinyl tile floor.
One common issue is unevenness in the subfloor. As previously mentioned, a level subfloor is crucial for a successful installation. If unevenness is detected after the subfloor preparation, a self-leveling compound can be used to create a smooth and level surface. Follow the manufacturer's instructions carefully when applying the self-leveling compound.
Another common issue is adhesive failure. This can occur if the wrong adhesive is used, if the subfloor is not properly prepared, or if the adhesive is not applied correctly. If adhesive failure occurs, carefully remove the affected tiles and clean the subfloor. Reapply the correct adhesive according to the manufacturer's instructions and reinstall the tiles. Ensure adequate pressure is applied to the tiles during installation to promote a strong bond.
Gaps between tiles can also be a problem. This can occur if the tiles are not properly aligned during installation or if the subfloor expands or contracts due to changes in temperature or humidity. To address gaps, carefully remove the affected tiles and reinstall them, ensuring they are properly aligned. If gaps persist, a color-matched caulk or grout can be used to fill them.
Tile lifting is another potential issue. This can be caused by moisture, adhesive failure, or improper installation. If tiles are lifting, identify the cause of the problem and address it accordingly. Remove the affected tiles, clean the subfloor, reapply the adhesive, and reinstall the tiles. Ensure the subfloor is dry and free from moisture before reinstalling the tiles.
Scratches and scuffs can occur on the surface of the tiles during or after installation. To prevent scratches and scuffs, protect the floor with a drop cloth during installation. After installation, use floor protectors under furniture legs to prevent scratching. Minor scratches can often be buffed out with a soft cloth and a mild cleaning solution.
By being aware of these common issues and knowing how to address them effectively, individuals can ensure a successful and long-lasting vinyl tile floor. Early detection and prompt action are key to preventing minor problems from escalating into more serious issues.

How To Install Vinyl Plank Flooring As A Beginner Home Renovation

Vinyl Tile Installation A Comprehensive Guide Gc Flooring Pros

How To Install Vinyl Plank Flooring As A Beginner Home Renovation

How To Install Floating Vinyl Flooring Over Old Floors Simply2moms

How To Install L And Stick Vinyl Plank Flooring The Nifty Nester

How To Install Vinyl Plank Flooring In A Bathroom

Installing Vinyl Plank Flooring How To Fixthisbuildthat

A Complete Guide How To Stagger Vinyl Plank Flooring Whole Cabinet Supply

Luxury Vinyl Tile Installation Diy Family Handyman

How To Install Luxury Vinyl Tile
Related Posts