Installing Wood Tile Flooring On Concrete: A Comprehensive Guide
Wood tile flooring has gained immense popularity due to its versatility, durability, and aesthetic appeal. If you're considering installing wood tile flooring on concrete, it's crucial to follow the proper steps to ensure a long-lasting and beautiful floor.
Materials Required:
* Wood tile flooring * Underlayment * Moisture barrier * Thin-set mortar * Grout * Spacers * Trowel * Notched trowel * Grout float * SpongeStep 1: Prepare the Concrete Surface
* Clean the concrete surface thoroughly to remove any dirt or debris. * Check for moisture using a moisture meter. The moisture content should be below 3%. * Repair any cracks or imperfections in the concrete using a concrete patch.Step 2: Install a Moisture Barrier
* Roll out the moisture barrier over the concrete surface, overlapping the edges by 6 inches. * Tape the edges of the moisture barrier together using duct tape.Step 3: Install the Underlayment
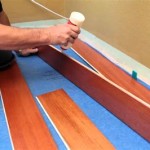
* Unroll the underlayment over the moisture barrier, staggering the seams. * Secure the underlayment using staples or adhesive. * Make sure the underlayment is flat and smooth.Step 4: Apply Thin-Set Mortar
* Spread a thin layer of thin-set mortar over the underlayment using a notched trowel. * Hold the notch side of the trowel at a 45-degree angle to the floor and apply a thin, even layer of mortar.Step 5: Install the Wood Tile
* Place the wood tiles into the thin-set mortar, aligning the edges and using spacers to ensure even spacing. * Press each tile firmly into the mortar. * Continue installing the tiles until the entire floor is covered.Step 6: Allow the Mortar to Cure
* Allow the thin-set mortar to cure completely according to the manufacturer's instructions. This typically takes 24 hours.Step 7: Grout the Tiles
* Mix the grout according to the manufacturer's directions. * Apply the grout to the joints between the tiles using a grout float. * Press the grout into the joints and remove any excess.Step 8: Clean the Tiles
* After the grout has cured, clean the tiles using a sponge and clean water. * Wipe up any excess water and let the tiles dry completely.Tips:
* Use a level to ensure that the tiles are installed evenly. * Stagger the joints between the tiles to create a more natural appearance. * Seal the tiles with a clear sealant after installation to protect them from wear and moisture. * If you have any questions or concerns, consult a professional flooring contractor.:max_bytes(150000):strip_icc()/can-you-install-tile-directly-on-concrete-1822600-04-458f7bb6c78348c1835cf8054ef36553.jpg?strip=all "How To Install Tile Over Concrete")
How To Install Tile Over Concrete

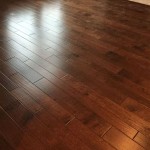
Installing Wood Flooring Over Concrete Diy

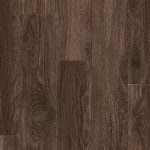
How To Install Wood Floors On Concrete Quora

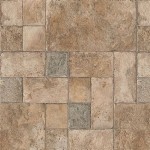
Wood Look Tile Flooring How To Lay That Looks Like

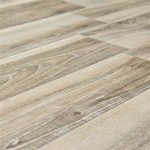
Installing Wood Look Tile Tips From A Pro Brepurposed

Tiling Over Concrete And Wood Floors Today S Homeowner

How To Install A Tile Floor Wood Looking

How To Install Wood Floors On Concrete Quora

How To Prepare A Concrete Floor For Vinyl Flooring Parrys

Tips When Installing Wood Look Tiles
Related Posts