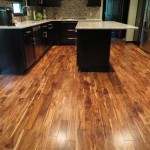
DIY Vinyl Plank Flooring: A Comprehensive Guide
DIY vinyl plank flooring has gained popularity among homeowners due to its affordability, durability, and ease of installation. Whether you're a seasoned DIY enthusiast or a novice looking to upgrade your home's flooring, this comprehensive guide will provide you with the essential aspects to consider for a successful installation.
Preparation: A Crucial Step
Before embarking on the installation process, it's crucial to prepare your subfloor. Ensure the surface is level, clean, dry, and free of any debris or imperfections. If necessary, use a patching compound to repair any cracks or holes. Once the subfloor is ready, determine the layout of your planks and plan the direction you want them to run.
Tools and Materials: Equipping Yourself for Success
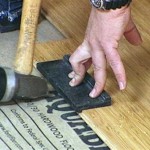
To install vinyl plank flooring, you will require certain tools and materials. These include a utility knife, measuring tape, spacer blocks, a rubber mallet, and a level. Additionally, gather the vinyl planks, underlayment (if required), and a moisture barrier.
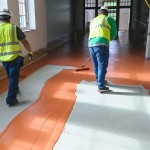
Underlayment: Enhanced Comfort and Insulation
An underlayment serves two primary purposes: enhancing soundproofing and providing extra cushioning underfoot. It also acts as a moisture barrier, preventing moisture from seeping into the subfloor. Choose an underlayment appropriate for your specific flooring and subfloor type.
Installation: Step-by-Step
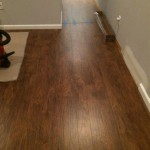
Start by laying the first row of vinyl planks along a straight wall, using spacer blocks to ensure even spacing. Continue adding planks, staggering the joints to create a brick-like pattern for added strength and aesthetics. Tap each plank firmly into place using a rubber mallet until you reach the opposite wall.
Trimming and Finishing Touches
Once you've completed laying the planks, use a utility knife to trim any excess around the edges and around obstacles such as doorways or pipes. Install transition strips to cover the expansion gaps between the flooring and other surfaces like tile or carpet. Finally, add any necessary molding to conceal any exposed edges and enhance the overall appearance.
Maintenance: Keeping Your Floor Looking its Best
Maintaining vinyl plank flooring is relatively straightforward. Sweep or vacuum regularly to remove loose dirt and debris. Use a damp mop for weekly cleaning, avoiding harsh chemicals or abrasive tools that could damage the surface. Periodically, apply a vinyl floor cleaner to restore the shine and extend the life of your flooring.
Conclusion
With careful preparation, the right tools, and a systematic approach, DIY vinyl plank flooring installation can be a rewarding project that enhances the aesthetics and functionality of your home. By following the steps outlined in this guide, you can confidently create a durable, stylish, and cost-effective flooring solution that will last for years to come.

Installing Vinyl Plank Flooring For Beginners Anika S Diy Life

How To Install Vinyl Plank Flooring The Home Depot

10 Beginner Mistakes Installing Vinyl Plank Flooring

Installing Vinyl Floors A Do It Yourself Guide The Honeycomb Home

How To Install Vinyl Plank Flooring As A Beginner Home Renovation

A Beginner S Guide To Installing Vinyl Plank Flooring Dumpsters Com

How To Install Vinyl Plank Flooring The Home Depot

How To Install Vinyl Plank Flooring In A Bathroom Fixthisbuildthat

How To Install Luxury Vinyl Plank For The First Time

How To Install Vinyl Plank Flooring As A Beginner Home Renovation
Related Posts