How To Replace Carpet With Laminate Wood Flooring
Replacing carpet with laminate wood flooring is a popular home improvement project that can significantly enhance the aesthetic appeal and value of a property. Laminate flooring offers durability, ease of maintenance, and a wide range of styles that mimic the look of real hardwood at a more affordable price. This article outlines the necessary steps involved in removing carpet and installing laminate wood flooring, ensuring a successful and professional-looking result.
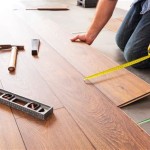
Before commencing the project, careful planning and preparation are essential. This includes accurately measuring the room to determine the amount of laminate flooring required, selecting the desired laminate style and color, and gathering all necessary tools and materials. Proper preparation not only streamlines the installation process but also minimizes potential errors and material waste.
Preparing for the Project: Measurement and Material Acquisition
The initial step in replacing carpet with laminate flooring is precise measurement of the area to be covered. Using a measuring tape, determine the length and width of the room in feet or inches. For irregular shapes or rooms with alcoves, divide the space into smaller, manageable rectangles and measure each section separately. Multiply the length and width of each section to calculate the area in square feet. Add the areas of all sections together to obtain the total square footage of the room.
It is crucial to add an extra 5-10% to the total square footage to account for cuts, waste, and potential errors during installation. This buffer ensures sufficient material to complete the project without running short. Once the total square footage needed is determined, consult with a flooring retailer to select the appropriate amount of laminate flooring.
Laminate flooring is typically sold in boxes, with each box containing a specific square footage of material. Calculate the number of boxes required by dividing the total square footage needed (including the waste allowance) by the square footage per box. Round up to the nearest whole number to ensure adequate material is available. In addition to the laminate flooring itself, other essential materials include:
- Underlayment: A moisture barrier and sound dampening layer placed beneath the laminate flooring. Consult with the flooring retailer to select the appropriate type based on the subfloor material and desired level of sound insulation.
- Spacers: Small plastic or cork wedges used to maintain a consistent expansion gap between the laminate flooring and the walls.
- Transition strips: Used to seamlessly join the laminate flooring to other flooring types or to cover thresholds between rooms.
- Molding and baseboards: Used to conceal the expansion gap along the walls and provide a finished look.
Gathering the necessary tools is also essential before starting the project. Key tools include:
- Utility knife: For cutting the carpet.
- Pry bar: For removing baseboards and tack strips.
- Hammer: For tapping in transition strips.
- Vacuum cleaner: For removing dust and debris from the subfloor.
- Measuring tape: For precise measurements.
- Pencil: For marking cut lines.
- Safety glasses: For eye protection.
- Gloves: For hand protection.
- Knee pads: To minimize strain while working on the floor.
- Laminate flooring cutter or saw: For cutting the laminate planks to size. A laminate flooring cutter provides clean, precise cuts and minimizes dust. A circular saw or jigsaw can also be used, but may require more skill and produce more dust.
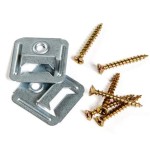
- Tapping block and pull bar: Used to securely lock the laminate planks together.
Once all materials and tools are assembled, allow the laminate flooring to acclimate to the room's temperature and humidity for at least 48 to 72 hours before installation. This step is crucial to prevent expansion or contraction issues after installation. Store the boxes of laminate flooring flat in the room where they will be installed.
Carpet Removal and Subfloor Preparation
The first physical step is the removal of the existing carpet. Begin by using a utility knife to cut the carpet into manageable strips. This makes it easier to handle and dispose of. Start in a corner of the room and cut parallel strips, typically 2-3 feet wide. Wear gloves and safety glasses to protect hands and eyes from dust and debris.
Once the carpet is cut into strips, carefully pull it up from the floor. Roll up each strip and secure it with tape for easier disposal. Dispose of the carpet strips according to local regulations or waste management guidelines. After the carpet is removed, the tack strips along the perimeter of the room will be exposed. These strips are typically nailed or stapled to the subfloor and contain sharp tacks that secure the carpet.
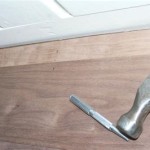
Using a pry bar and hammer, carefully remove the tack strips from the subfloor. Insert the pry bar beneath the tack strip and gently pry it up, working along its length. Be cautious to avoid damaging the subfloor. Once the tack strips are removed, dispose of them properly, taking care to avoid injury from the tacks.
With the carpet and tack strips removed, the subfloor must be thoroughly prepared to ensure a smooth and level surface for the laminate flooring. Use a vacuum cleaner to remove all dust, dirt, and debris from the subfloor. Pay particular attention to corners and edges where dust tends to accumulate.
Inspect the subfloor for any imperfections, such as cracks, holes, or uneven areas. If necessary, repair these imperfections before installing the underlayment. Fill small cracks and holes with a concrete patching compound or wood filler, depending on the subfloor material. Allow the patching compound or wood filler to dry completely according to the manufacturer's instructions.
For larger uneven areas, consider using a self-leveling compound to create a smooth, level surface. Follow the manufacturer's instructions carefully when applying self-leveling compound. Once the subfloor is clean, level, and dry, it is ready for the underlayment.
Laminate Flooring Installation
Before installing the laminate flooring, install the underlayment according to the manufacturer's instructions. Unroll the underlayment and cut it to fit the room's dimensions, leaving a small gap around the perimeter to allow for expansion and contraction. Overlap the seams of the underlayment according to the manufacturer's recommendations and secure them with tape.
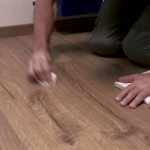
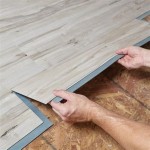
Begin installing the laminate flooring along a straight wall, starting in a corner. Place spacers between the wall and the first row of laminate planks to maintain the expansion gap. Ensure that the tongue or groove of the first plank is facing the wall, depending on the locking system of the laminate flooring.
Align the second plank with the first plank and engage the locking system. This typically involves angling the second plank into the first and then pressing down to lock them together. Use a tapping block and pull bar to ensure a tight, secure fit between the planks. Continue installing the first row of planks, maintaining the expansion gap and using the tapping block and pull bar as needed.
When reaching the end of the first row, measure and cut the last plank to fit, leaving the expansion gap. Use a laminate flooring cutter or saw to make the cut, ensuring a clean, straight edge. Save the cutoff piece to use as the starting plank for the next row, if it is at least 12 inches long. This helps minimize waste and create a staggered pattern in the flooring.
Start the second row with the cutoff piece from the first row or a new plank, depending on the length of the cutoff piece. Stagger the seams between the rows to create a more visually appealing and structurally sound floor. Continue installing the laminate flooring, row by row, ensuring that each plank is securely locked together and the expansion gap is maintained.
When installing around obstacles, such as pipes or door frames, carefully measure and cut the laminate planks to fit. Use a jigsaw or hole saw to create the necessary openings, ensuring a precise fit. When reaching the last row, it may be necessary to rip the planks to width to fit the remaining space. Use a table saw or circular saw to make the rip cuts, ensuring a straight and accurate cut.
Once all the laminate flooring is installed, remove the spacers around the perimeter of the room. Install transition strips at doorways and where the laminate flooring meets other flooring types. Attach the transition strips to the subfloor using nails, screws, or adhesive, depending on the type of transition strip. Install baseboards and molding along the walls to conceal the expansion gap and provide a finished look. Attach the baseboards and molding to the walls using nails or adhesive.
After the baseboards and molding are installed, inspect the floor for any imperfections or gaps. Use a color-matched wood filler to fill any small gaps or imperfections. Clean the laminate flooring with a damp cloth or mop, following the manufacturer's instructions. Avoid using abrasive cleaners or excessive water, as these can damage the finish.
Following these steps ensures a successful replacement of carpet with laminate wood flooring, resulting in a durable, attractive, and long-lasting floor. Regular maintenance, such as sweeping and damp mopping, will help keep the laminate flooring looking its best for years to come.

Replacing Carpet With Waterproof Laminate Flooring The Palette Muse

Laminate Vs Carpet Flooring Major Differences Pros Cons And Costs Forbes Home

How To Remove Carpet And Install Wood Flooring

How To Remove Carpet For Laminate Hardwood Floor Installation Mryoucandoityourself

How Much To Rip Up Carpet And Put Down Laminate In 2024 Angi

How To Replace Carpet With Laminate Flooring Parrys

Replace Carpet With Laminate Flooring Entire Process And Details

Stairway Makeover Swapping Carpet For Laminate The Lilypad Cottage

Replacing Carpet With Hardwood Flooring What You Need To Know The Reno Super

Diy How To Install Should You Laminate Over Carpet
Related Posts