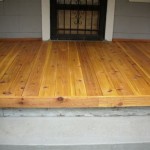
Particle Board Flooring Installation: Essential Aspects for a Perfect Finish
Particle board flooring offers an affordable and versatile alternative to traditional wood flooring. Its durability and ease of installation make it a popular choice for residential and commercial spaces alike. However, achieving a professional-looking finish requires careful planning and execution.
1. Site Preparation
Before beginning the installation, ensure the subfloor is level, flat, and free from moisture. Uneven surfaces can cause the particle board to buckle or warp, compromising its integrity. If necessary, level the subfloor using self-leveling compounds or by sanding down high spots.
2. Moisture Protection
Particle board is susceptible to moisture damage. To prevent this, install a moisture barrier between the subfloor and the particle board. This can be a thin polyethylene sheet or a specialized underlayment designed for this purpose. A moisture barrier will protect the flooring from moisture rising from below.
3. Installing the Underlayment
An underlayment provides additional support and cushioning for the particle board flooring. It can help reduce noise and improve walking comfort. Install the underlayment according to the manufacturer's instructions, typically using adhesive or staples. Ensure the seams are properly aligned and sealed.
4. Laying the Particle Board
Start laying the particle board planks from the center of the room and work your way outward. Stagger the joints between adjacent planks to create a more stable and durable floor. Use a tapping block and hammer to gently tap the planks into place, ensuring a tight fit. Leave a small expansion gap around the perimeter of the room to allow for natural expansion and contraction.
5. Nailing or Screwing Down the Planks
Once the particle board is laid, it must be secured to the subfloor. Use nails or screws specifically designed for particle board flooring. Drive the nails at a 45-degree angle through the tongue and groove of each plank. Space the nails or screws evenly along the length of the planks, checking the manufacturer's recommendations for the appropriate spacing.
6. Trimming and Molding
After installing the particle board flooring, trim any excess material around the edges of the room using a circular saw or jig saw. Install baseboard molding to cover the expansion gap and give the flooring a finished look. Use nails or adhesive to secure the molding.
Tips for a Successful Particle Board Flooring Installation:
- Use a straight edge and chalk line to mark cutting lines for a precise fit.
- Drill pilot holes before nailing or screwing to prevent splitting the particle board.
- Wear safety glasses and gloves while handling and cutting particle board.
- Allow ample time for the glue or adhesive to dry before walking on the new flooring.
- Vacuum or sweep the floor regularly to remove dirt and dust, and occasionally use a damp mop for cleaning.
By following these essential aspects and tips, you can achieve a particle board flooring installation that is durable, aesthetically pleasing, and built to last.

Particle Board As A Flooring Solution

Parquetry Engineered Flooring Installation Method Over Particleboard

Particle Board Flooring Durable Building Material

Engineered Flooring Installation Method Over Particleboard

Solid Hardwood Flooring Installation Method Over Particleboard

Cement Bonded Particle Board Installation Guide

Why Particle Board Subfloors Are Bad Chris Loves Julia

Parquetry Solid Hardwood Flooring Installation Method Over Particleboard

Discover The Versatility Of Particle Board

Particle Board Flooring Floorboard Independent Whole Distribution

