Tips for Installing Prefinished Hardwood Flooring
Prefinished hardwood flooring is a convenient and aesthetically pleasing option for your home. Installing it requires precision and attention to detail, but with the right preparation and techniques, you can achieve professional-looking results. Here are some essential tips to guide your installation process.
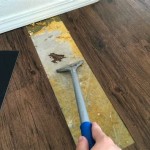
1. Preparation is Key
Before installing prefinished hardwood flooring, it's crucial to prepare your subfloor. Ensure it's level, dry, and free from any imperfections. Use a moisture meter to check moisture levels, as excessive moisture can damage the flooring. If necessary, use a leveling compound or underlayment to create a smooth and stable surface.
2. Determine Flooring Direction
Decide the direction in which you want to install the flooring. Consider the room's layout, natural light, and traffic patterns. Typically, parallel planks create a sense of spaciousness, perpendicular planks emphasize length, and diagonal patterns add visual interest.
3. Expansion Gap
Prefinished hardwood expands and contracts with changes in temperature and humidity. To prevent buckling or cupping, leave an expansion gap of 1/4 inch around the perimeter of the room. Use spacers to maintain the gap while installing.
4. Starting Row Installation
Start the installation by laying the first row of planks along one of the longest walls. Apply flooring adhesive to the subfloor and position the planks perpendicular to the wall. Use a tapping block and hammer to secure the planks into place. Check for level and adjust accordingly.
5. Subsequent Row Installation
For subsequent rows, apply adhesive to the subfloor and the tongue of the installed row. Position the new plank at a 45-degree angle to the previous row and align the tongue with the groove. Tap the plank into place using a tapping block and hammer.
6. Staggered Joints
For a more natural appearance, stagger the end joints of adjacent rows by at least 8 inches. Alternate left and right starting points for each row to create an offset pattern.
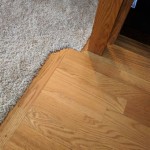
7. Trim and Moldings
Once the flooring is installed, finish the edges with baseboards, quarter rounds, or other moldings. These elements conceal any gaps and provide a polished look.
8. Proper Acclimation
Prefinished hardwood flooring requires acclimation to the environment where it will be installed. Store the flooring in its unopened boxes in the room for at least 48 hours before installation. This allows the wood to adjust to temperature and humidity variations.
Installing prefinished hardwood flooring can be a rewarding project that adds value and beauty to your home. By following these tips and paying attention to detail, you can create a durable, elegant floor that will last for years to come.

Tips For Installing An Engineered Hardwood Floor From The Forest Llc

How To Install Lock Engineered Hardwood Flooring

How To Install Lock Engineered Hardwood Flooring

How To Install Hardwood Flooring For Beginners

5 Common Hardwood Flooring Installation Mistakes And How To Avoid Them

How To Install Hardwood Flooring The Home Depot

How To Lay Engineered Timber Floor Guide Fantastic Handyman Au

How To Install Hardwood Flooring Step By Forbes Home

How To Install Engineered Hardwood Floors 4 Easy Installation Options

Engineered Hardwood Floor Install Top Pro Tips
Related Posts