Uniclic Vinyl Flooring Installation: A Step-by-Step Guide
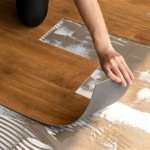
Uniclic vinyl flooring has become a popular choice for homeowners due to its durability, water resistance, and ease of installation. The unique Uniclic locking system allows for a seamless installation without the need for glue or adhesives, making it a DIY-friendly option for many. This article will guide you through the steps of installing Uniclic vinyl flooring, providing a comprehensive overview and helpful tips for a successful project.
Preparing the Subfloor
Before beginning the installation, ensure the subfloor is properly prepared. This crucial step will ensure the longevity and stability of the vinyl flooring. The subfloor should be:
- Level: Any significant dips or bumps can cause unevenness in the flooring. Use a leveling compound or self-leveling concrete to address any irregularities.
- Clean and Dry: Remove dust, dirt, and debris from the subfloor. It should also be completely dry to prevent moisture issues.
- Solid: Ensure the subfloor is strong enough to support the weight of the flooring and any furniture placed on top. If the subfloor is weak, consider reinforcing it with plywood.
Once the subfloor is prepared, you can proceed with the installation process.
Installing the Uniclic Vinyl Flooring
The Uniclic system allows for a simple and efficient installation process. Here's how to install your Uniclic vinyl flooring:
- Layout and Cutting: Begin by laying out the first row of planks along the longest wall of the room, ensuring that the planks are aligned properly with the wall. It's important to leave an expansion gap of about 1/4 inch around the perimeter of the room. Use a saw or a utility knife to cut the planks to size, if needed.
- Clicking the Planks Together: To connect two planks, align the edges and use a slight angling motion to click them together. The click should align with the locking mechanism, ensuring a secure fit. Work your way across the room, creating a solid and even first row.
- Installing Subsequent Rows: When laying the second row, start with a plank cut to half the width of a full plank, creating a staggered pattern. This helps to minimize the appearance of seams and adds strength to the flooring. Continue clicking the planks together, maintaining the expansion gap around the perimeter of the room.
- Installing Around Obstacles: When installing around obstacles like door frames or pipes, measure carefully and cut the planks accordingly. Use a jigsaw or a special tool for cutting intricate shapes. Remember to leave the expansion gap around the obstacle.
- Finishing Touches: Once the flooring is installed, use a trim to cover the expansion gap around the perimeter of the room. You can also install transition strips for seamless transitions between the flooring and other surfaces.
Essential Tools and Materials
To successfully install Uniclic vinyl flooring, you will need the following tools and materials:
- Measuring tape: To measure the room and cut the planks accurately.
- Utility knife or saw: For cutting the planks to size.
- Rubber mallet: To tap the planks together and ensure a tight fit.
- Floor leveling compound or self-leveling concrete: To level the subfloor.
- Uniclic vinyl flooring planks: Choose the desired style and quantity.
- Trim or transition strips: To finish the edges and transitions.
- Safety gear: Including gloves, safety glasses, and dust mask.
With the necessary tools and materials, you can begin the installation process.
Uniclic vinyl flooring installation is a relatively straightforward process that can be completed with a little patience and careful attention to detail. By following these steps and tips, you can achieve a professional and durable floor that will enhance the beauty and functionality of your home.

Uniclic Flooring Onflooring

Easily Installation With Uniclic And Multifit

B Design By Bauhaus Uniclic Vinyl Floor Installation

Uniclic Installation Torlys

Uniclic Flooring Installation Process Expert Guide 2024

Floating Floor Installation Instructions Onflooring

How To Install Laminate Flooring Using The Uniclic System

Luxury Vinyl Plank Flooring Installation System 3c China Rigid Core Pvc Sheeet Manufacturer

Uniclic Vinyl Flooring Explained Wood And Beyond Blog

Luxury Vinyl Plank Flooring Installation System 3c China Rigid Core Pvc Sheeet Manufacturer
Related Posts


