How to Install Tongue and Groove Flooring on Concrete
Tongue and groove flooring is a popular choice for concrete subfloors because it is durable, easy to maintain, and can be installed relatively quickly. Here are the steps on how to install tongue and groove flooring on concrete:
1. Prepare the concrete subfloor
The concrete subfloor must be level, smooth, and clean. Any imperfections in the subfloor will telegraph through the flooring, so it is important to take the time to properly prepare it. Start by removing any existing flooring or carpeting. Then, sweep and vacuum the subfloor to remove any dirt or debris. Next, check the subfloor for any cracks or holes. If you find any, fill them with a concrete patching compound.
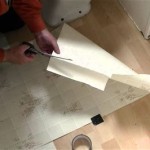
2. Install a vapor barrier
A vapor barrier will help to prevent moisture from migrating from the concrete subfloor into the flooring. Cut the vapor barrier to fit the subfloor and then roll it out. Overlap the seams by at least 6 inches and tape them together with duct tape.
3. Install a layer of underlayment
Underlayment will help to insulate the flooring and reduce noise. Cut the underlayment to fit the subfloor and then roll it out. Overlap the seams by at least 6 inches and tape them together with duct tape.
4. Install the tongue and groove flooring
Start by installing the first row of flooring along one of the walls in the room. Insert the tongue of the first plank into the groove of the vapor barrier. Then, tap the plank into place using a tapping block and a hammer. Continue installing the first row of flooring, leaving a 1/2-inch gap between the last plank and the wall. This gap will allow the flooring to expand and contract.
5. Install the second row of flooring
To install the second row of flooring, insert the tongue of the first plank into the groove of the last plank in the first row. Then, tap the plank into place using a tapping block and a hammer. Continue installing the second row of flooring, leaving a 1/2-inch gap between the last plank and the wall.
6. Continue installing the flooring
Continue installing the flooring, alternating the direction of the planks in each row. When you reach a doorway or other obstruction, cut the flooring to fit using a circular saw or a jigsaw. Once you have installed all of the flooring, trim the excess from around the edges of the room using a utility knife.
7. Finish the flooring
You can finish the flooring by applying a sealant or a polyurethane finish. This will help to protect the flooring from wear and tear.

Installing Wood Flooring Over Concrete Diy

Installing Hardwood Floors On Concrete Subfloors

Installing Engineered Hardwood On Concrete Twenty Oak

Junckers Laying A Floor Over Batons

Q A Solid Wood Floors Over Concrete Slabs Jlc

Installing Engineered Hardwood On Concrete Twenty Oak

5 Essential Tips For Tongue And Groove Flooring District Floor Depot

Hardwood Over Concrete Auten Wideplank Flooring

How To Install Tongue And Groove Flooring Blog

Tongue Groove Flooring Installation On Underlay Start To Finish
Related Posts