Install Vinyl Tile Flooring in Your Bathroom: A Comprehensive Guide
Transforming your bathroom with the elegance and practicality of vinyl tile flooring is a worthwhile project. Vinyl tiles offer numerous benefits, including durability, water resistance, and ease of installation. With a little planning and the right tools, you can create a stunning and long-lasting bathroom floor.
1. Preparation and Measurements
Before you begin, ensure your subfloor is level and clean. Remove any existing flooring, baseboards, and trim. Measure the length and width of your bathroom and calculate the square footage, including any cutouts for fixtures. Allow for approximately 10% additional tiles for cuts and waste.
2. Choosing Vinyl Tiles
Select vinyl tiles that complement your bathroom's style and are suitable for wet environments. Consider the texture, pattern, and thickness you prefer. Choose tiles with a water-resistant backing to prevent moisture penetration.
3. Installation
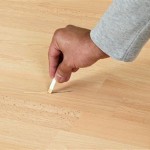
Before laying the tiles, spread a layer of underlayment over the subfloor. This will provide added comfort and reduce noise. Start laying the tiles from the center of the room, working outwards. Use a straight edge and a utility knife to trim the tiles as needed. Apply adhesive to the back of each tile and firmly press it into place.
4. Grouting
Once the tiles are installed, you can grout the joints to seal them and create a seamless appearance. Use a grout float and apply the grout according to the manufacturer's instructions. Remove excess grout with a damp sponge and allow it to dry completely.
5. Finishing Touches
After the grout is dry, you can seal the floor to protect it from moisture and wear. Use a high-quality silicone sealant around the perimeter of the room, where the floor meets the walls and fixtures. Replace the baseboards and trim, and add any decorative elements to complete the look.
Tips for Successful Installation
- Use a chalk line to ensure the tiles are straight and level.
- Allow the tiles to acclimate to room temperature for at least 24 hours before installation.
- Wear work gloves and eye protection.
- Clean up any excess adhesive or grout spills immediately.
- Protect the floor from heavy traffic until the grout is fully cured.

How To Install Vinyl Plank Flooring In A Bathroom Fixthisbuildthat

How To Install Vinyl Plank Flooring In A Bathroom

How To Install Vinyl Plank Flooring In A Bathroom Fixthisbuildthat

How To Install Sheet Vinyl Floor Decor Adventures

How To Install Vinyl Plank Flooring In A Bathroom

Dos And Don Ts For Installing Vinyl Plank Floors In The Bathroom Advice Homeowners

Installing Vinyl Plank Flooring Lifeproof Waterproof Rigid Core Sustain My Craft Habit

Vinyl Planks In Bathrooms Residential Inspiration Flooring

How To Install Vinyl Plank Floors In A Bathroom Over Tile

How We Installed Our Press And Stick Vinyl Floor Tiles
Related Posts