Tongue and Groove Flooring Installation: A Step-by-Step Guide to a Perfect Finish
Tongue and groove flooring has gained immense popularity due to its durability and timeless appeal. Its interlocking mechanism offers a seamless and sturdy surface, making it an excellent choice for high-traffic areas. Whether you're a seasoned DIY enthusiast or a first-time installer, understanding the essential aspects of tongue and groove flooring installation is crucial for a flawless outcome.
Planning and Preparation
Before commencing installation, meticulous planning is paramount. Determine the required amount of flooring, considering the room size, shape, and any obstacles. Accurately measure the room and account for door openings, built-ins, and irregular angles. Purchase 10-15% extra flooring to accommodate cuts, waste, and future repairs.
Subfloor Preparation
The subfloor serves as the foundation for your tongue and groove flooring. It must be level, dry, and free from any imperfections. Inspect the subfloor for any damage, unevenness, or moisture issues. Address any concerns promptly by leveling, replacing damaged areas, or installing a moisture barrier.
Installing the First Row
The first row sets the tone for the entire floor. Measure and mark the starting point, ensuring it is perpendicular to the longest wall. Use a spacer to maintain a consistent gap from the wall. Install the first board by securing the groove side with nails or screws. Drive the fasteners at an angle to ensure optimal holding power.
Installing Subsequent Rows
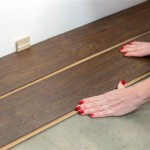
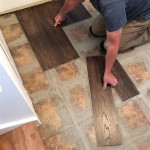
With the first row in place, the subsequent rows become easier to install. Align the tongue of the new board with the groove of the previous row and gently tap it into place. Use a tapping block and mallet to avoid damaging the boards. Stagger the joints between the rows for added strength.
Trimming and Fitting
For the perimeter boards, measurements and meticulous trimming are crucial. Measure the distance between the wall and the last full board and transfer the measurement to a new board. Mark and cut the board to fit perfectly, ensuring a snug fit against the wall. Secure the perimeter boards with nails or screws, setting them at an angle as with the first row.
Finishing Touches
Once the flooring is installed, it's time for the finishing touches. Fill any gaps or nail holes with wood filler and allow it to dry completely. Sand down the filler to create a smooth surface. Apply a sealant or finish of your choice to protect and enhance the beauty of the floor. Urethane, polyurethane, or wax are popular options that offer varying degrees of protection.
Tips for Success
- Use a level and straightedge to ensure the subfloor and flooring are flat.
- Use a tapping block to avoid damaging the boards during installation.
- Stagger the joints between the rows to increase strength.
- Leave a small gap around the perimeter of the room for expansion.
- Allow the finish to cure completely before walking on the floor.
Conclusion
With careful planning, proper technique, and attention to detail, tongue and groove flooring installation can be a rewarding DIY project. By following these essential steps, you can achieve a professional-looking floor that will enhance the beauty and functionality of your space for years to come.

5 Essential Tips For Tongue And Groove Flooring District Floor Depot

All You Need To Know About Tongue And Groove Flooring Installation Reallyfloors America S Est Hardwood

How To Install Tongue And Groove Flooring Blog

Tongue Or Groove Which To Install First

Home Owners Guide To Installing Tongue And Groove Flooring

Should You Install Tongue And Groove Laminate Flooring Ozburn Hessey

Ins And Outs Of Tongue Groove Flooring

All You Need To Know About Tongue And Groove Flooring Installation Reallyfloors America S Est Hardwood

How To Install Hardwood Flooring Step By Forbes Home

Thinking About Installing Tongue And Groove Flooring Here S What You Need To Know Veneer
Related Posts


