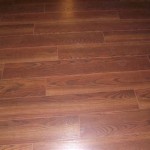
Installing Prefinished Hardwood Flooring: A Comprehensive Guide
Transforming your home with the timeless elegance of prefinished hardwood flooring is an exciting endeavor. To ensure a flawless installation, it's essential to follow a systematic approach. This comprehensive guide will provide you with step-by-step instructions, essential materials, and practical tips to achieve a professional-looking result.
1. Preparation: The Key to a Solid Foundation
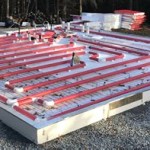
Before beginning the installation, it's crucial to prepare the subfloor. Inspect for any unevenness, cracks, or damage. If necessary, level the subfloor using a self-leveling compound. Ensure the subfloor is dry, clean, and free from debris. Lastly, install an underlayment to provide cushioning and sound reduction.
2. Acclimation: Allowing the Flooring to Adapt
Prefinished hardwood flooring requires proper acclimation to prevent expansion or contraction issues. Bring the flooring material into the installation area and open the packaging at least 72 hours before installation. This allows the flooring to adjust to the temperature and humidity of the room.
3. Layout: Planning the Design
Plan the layout to determine the direction and pattern of the flooring. Stagger the joints of adjacent planks randomly to create a natural look. Use chalk lines to mark the starting point and a straight line for the first row. Leave a gap of 1/4 inch around the perimeter for expansion.
4. Installation: One Plank at a Time
Start installing the prefinished hardwood flooring by tapping the tongue of the first plank into the groove of the second plank. Use a tapping block and a hammer to avoid damaging the planks. Continue this process, row by row, alternating the direction of the planks for a staggered pattern.
5. Trimming and Fitting: Precision Cuts for Perfect Fit
To accommodate obstacles such as door frames and walls, you'll need to make precise cuts. Measure carefully and use a miter saw or a circular saw with a fine-tooth blade. For tight spaces, utilize a jigsaw or a multi-tool. Test the cut pieces before securing them to ensure a snug fit.
6. Secure Installation: Adhesion and Nails
To ensure the stability of the prefinished hardwood flooring, apply construction adhesive to the subfloor before placing the planks. Use a pneumatic nailer with 1 1/2-inch flooring nails to secure the planks firmly. Countersink the nails slightly below the surface using a nail set.
7. Finishing Touches: Sealing and Protecting
After the flooring is installed, apply a sealant or polyurethane finish to protect it from wear and tear. Choose the finish based on the desired level of durability and sheen. Allow the finish to cure according to the manufacturer's instructions before placing furniture or walking on the floor.
8. Maintenance: Preserve the Beauty
Regular cleaning and maintenance are essential to preserve the beauty and longevity of prefinished hardwood flooring. Sweep or vacuum regularly to remove dirt and debris. Use a damp mop with a hardwood floor cleaner to clean the surface. Avoid excessive moisture and harsh chemicals.

How To Install Prefinished Hardwood Floors Ll Flooring

How To Install Prefinished Hardwood Flooring

How To Install Prefinished Hardwood Floor Glue Down Technique Diy Mryoucandoityourself

3 Facts You Didn T Know About Prefinished Hardwood Flooring Installation Reallyfloors America S Est

Install A Pre Finished Hardwood Floor

Prefinished Vs Unfinished Hardwood Floors Svb Wood

How To Install Pre Finished Engineered Flooring This Old House

Preparing Your Home For New Flooring Svb Wood Floors

Installing Prefinished Hardwood Floors Extreme How To

Hardwood Floor Installations
Related Posts