How to Install Wood Flooring Over Concrete: A Comprehensive Guide
Installing wood flooring over concrete is a great way to elevate the look and feel of your home while increasing its durability. Whether you're a seasoned DIYer or a novice, understanding the essential steps involved is crucial for a successful installation. Here's a comprehensive guide to help you navigate the process:
1. Prepare the Concrete Surface
Before laying the wood flooring, the concrete surface must be properly prepared. This involves removing any debris, leveling the surface, and ensuring it's moisture-free. Use a concrete leveler to smooth out any uneven areas, and a moisture barrier to prevent moisture from seeping into the flooring.
2. Install an Underlayment
An underlayment provides a cushion between the concrete and the wood flooring, enhancing comfort and reducing noise. Choose an underlayment that is compatible with your flooring and provides the desired level of sound dampening and insulation.
3. Choose and Install Vapor Barrier
A vapor barrier is crucial to prevent moisture from damaging the wood flooring. Install a heavy-duty polyethylene vapor barrier over the underlayment, sealing the seams with tape. This barrier will protect your flooring from moisture rising from the concrete slab.
4. Determine the Starting Point
The starting point for installing the wood flooring should be carefully determined. Measure and mark the center of the room, then snap a chalk line down the center to guide the installation. This ensures that the flooring is symmetrical and visually appealing.
5. Install the First Row
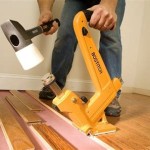
The first row of wood flooring is critical for setting the tone for the rest of the installation. Apply construction adhesive along the edges of the concrete and underlayment. Then, carefully place the first plank in the center of the starting point, aligning it with the chalk line. Use a tapping block and hammer to secure the planks together firmly.
6. Continue Laying the Wood Flooring
Once the first row is complete, continue laying the wood flooring in rows parallel to the starting point. Use the tongue-and-groove system to connect the planks, and apply adhesive as needed to ensure a strong bond. Stagger the joints of adjacent rows to enhance the stability of the flooring.
7. Cut and Fit Planks
As you approach walls or obstacles, it will be necessary to cut planks to fit. Use a miter saw or circular saw for precise cuts. Measure the length carefully and make sure the cuts are clean and square. To fit the planks around pipes or other obstacles, cut out the necessary sections and use a jigsaw to create a custom fit.
8. Install Trim and Accessories
After the wood flooring is installed, trim and accessories can be added to enhance the finished look. Baseboards, quarter rounds, and transition strips help to cover expansion gaps, protect the edges of the flooring, and provide a seamless transition to other surfaces.

Installing Wood Flooring Over Concrete Diy

How To Install A Wood Subfloor Over Concrete Rona

Q A Solid Wood Floors Over Concrete Slabs Jlc

Installing Hardwood Floors On Concrete Subfloors

How Do I Install A Hardwood Floor On Concrete Slab The Carpet Guys

Installing Engineered Hardwood On Concrete Twenty Oak

Ask Fred How Do I Install Wood Floor Below Grade Schedule

Installing A Hardwood Floor Over Concrete Slab American Information Center

How To Install A Wood Subfloor Over Concrete Rona

How To Install Wood Floors On Concrete Quora
Related Posts

