How To Lay Wood Flooring In An L-Shaped Hallway
Laying wood flooring in an L-shaped hallway presents a unique challenge, requiring careful planning and execution to achieve a seamless and visually appealing result. While the process itself is similar to laying wood flooring in other areas, the shape of the hallway necessitates additional considerations to ensure a successful installation. This comprehensive guide will provide a step-by-step approach, highlighting key points to consider when tackling this project.
1. Planning and Preparation
Before embarking on your wood flooring installation, meticulous planning is crucial. This involves measuring the hallway accurately to determine the required amount of flooring and materials. Consider the overall design and layout, including the L-shape, and decide on the direction of the planks for a visually pleasing effect. It's generally recommended to run the planks parallel to the longest side of the L, creating a sense of flow and continuity.
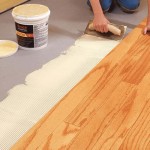
Next, prepare the subfloor to ensure a smooth and level surface. This may involve patching any cracks or uneven areas, sanding down high spots, and ensuring adequate moisture control. Remember to check the subfloor for any squeaks or movement, addressing these issues before continuing. Once the subfloor is prepped, install a moisture barrier, which will prevent moisture damage and make the subfloor more suitable for wood flooring.
2. Laying the Flooring
Begin laying the wood flooring from the most prominent point of the L-shape, typically the corner. This method allows you to work your way around the hallway in a logical sequence, ensuring that any cuts or transitions are made with precision. When laying the planks, ensure that the tongue-and-groove system is properly engaged for a tight fit. Tap the planks into place using a tapping block and rubber mallet, avoiding too much force that could damage the wood.
The L-shape in your hallway presents a key challenge: creating a seamless transition between the two sides of the L. To achieve this, use a piece of wood flooring known as a "transition strip." Cut this strip to fit the angle of the L, carefully aligning it with the existing floor planks on both sides. Secure the transition strip to the subfloor, ensuring a smooth transition between the two sections of flooring.
3. Dealing with Obstacles
Obstacles such as doorways, heating vents, and other fixtures require careful planning and execution. When laying flooring around doorways, ensure that the planks are cut to allow for the door to open and close without obstruction. For heating vents and other fixtures, carefully measure the area around the obstacle and cut the flooring planks accordingly.
Install expansion gaps around the perimeter of the hallway, allowing space for the wood flooring to expand and contract due to changes in temperature and humidity. This helps prevent warping and buckling, crucial for maintaining the integrity of the floor.
4. Finishing Touches
Once the wood flooring is installed, the final step is to apply a finish, typically a polyurethane sealant. This protects the flooring from scratches, stains, and wear, enhancing its longevity and beauty. Apply the sealant according to the manufacturer's instructions, ensuring even coverage and proper drying time before walking on the floor.
Maintaining your newly installed wood flooring is crucial for its long-term appearance and durability. Regular sweeping and vacuuming will remove dust and debris, minimizing potential scratches. It's also recommended to apply a coat of sealant every few years to maintain its protective layer and enhance its shine. With proper care and maintenance, your L-shaped hallway will showcase the beauty of wood flooring for years to come.

Pin By All My Stars Designs On Home Remodel Hardwood Installation Hallway Flooring Hall

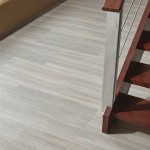
Sidmouth L Shaped Hallway Devon Wood Floors

How To Cut Vinyl Plank Flooring L Shaped

Sidmouth L Shaped Hallway Devon Wood Floors

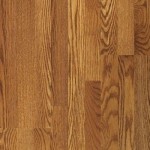
Result For L Shaped Hallway Hardwood Floors Installing Laminate Flooring

Installing Laminate Flooring In Hallways Do It Yourself

Floating Floor Installation Wood Floors Wide Plank

How To Lay Laminate Flooring In An L Shaped Hallway 8 Steps

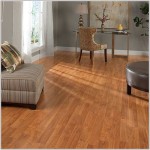
The Best Direction To Lay Your Wood Flooring Forté

Installing Laminate Flooring In Hallways Do It Yourself
Related Posts