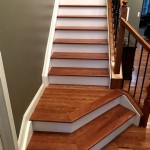
How to Install Laminate Wood Flooring With Attached Pad
Laminate wood flooring with attached pad is a popular and easy-to-install flooring option that can give your home a beautiful, updated look. Here are the essential steps on how to install laminate wood flooring with attached pad:Materials:
- Laminate wood flooring with attached pad - Underlayment (optional) - Moisture barrier (optional) - Expansion spacers - Measuring tape - Pencil - Utility knife - Circular saw or jigsaw - Hammer or nail gun - Tapping block - Pry barInstructions:
1. Prepare the subfloor:
The subfloor should be level, dry, and free of debris. If the subfloor is not level, you may need to use a self-leveling compound to level it. If the subfloor is not dry, you may need to install a moisture barrier.2. Install the underlayment (optional):
Underlayment can help to reduce sound and provide a more comfortable walking surface. If you are installing underlayment, roll it out over the subfloor and secure it with tape or staples.3. Install the moisture barrier (optional):
A moisture barrier can help to protect the laminate flooring from moisture damage. If you are installing a moisture barrier, roll it out over the underlayment and secure it with tape or staples.4. Measure and cut the flooring:
Measure the length and width of the room and cut the laminate flooring to size using a circular saw or jigsaw. Be sure to leave a 1/4-inch gap around the perimeter of the room for expansion.5. Install the first row of flooring:
Start by installing the first row of flooring along one wall of the room. Use expansion spacers to create a 1/4-inch gap between the flooring and the wall. Tap the flooring into place using a tapping block and a hammer or nail gun.6. Continue installing the flooring:
Continue installing the flooring by working your way across the room. Stagger the joints between the rows of flooring to create a more natural look. Tap the flooring into place using a tapping block and a hammer or nail gun.7. Install the last row of flooring:
The last row of flooring may need to be cut to fit. Measure the length of the last row and cut the flooring to size. Tap the flooring into place using a tapping block and a hammer or nail gun.8. Remove the expansion spacers:
Once the flooring is installed, remove the expansion spacers around the perimeter of the room.9. Install the baseboards:
Install the baseboards around the perimeter of the room to cover the gap between the flooring and the wall.
Installation Of Duoloc Laminate With Attached Pad English

How To Install Laminate Flooring The Home Depot

Laminate Flooring With Attached Pad Shortens The Laying Process

How To Install Laminate Flooring Buildipedia

How To Install Laminate Flooring Buildipedia

Laminate Flooring With Attached Underlayment Pros And Cons Mp Global S Llc

Laminate Flooring With Attached Underlayment

Drop Lock Tips Problems Fixed Featuring A Landmark Laminate Floor

How To Choose Laminate Flooring Underlay Tile Merchant

Installing Laminate Flooring For The First Time Crafted Work
Related Posts


