Essential Tips and Tricks for Flawless Hardwood Flooring Installation
Hardwood flooring adds timeless beauty and value to any home. While professional installation is recommended, it's possible to tackle the project yourself with proper preparation and these essential tips:
1. Planning and Preparation
Before starting, determine the direction of installation, measure the room accurately, and allow the hardwood to acclimate to the room's temperature and humidity for several days.
2. Subfloor Preparation
Ensure the subfloor is level, dry, and clean. Remove any carpet, padding, or adhesive residue. Install a moisture barrier over plywood subfloors to prevent moisture damage.
3. Install Underlayment
Underlayment provides cushioning, reduces noise, and protects the hardwood from moisture. Choose a premium underlayment that matches the recommended type for your chosen hardwood.
4. Choose the Right Nails or Staples
Use nails or staples specifically designed for hardwood flooring. Select the correct length and gauge for the thickness of your flooring.
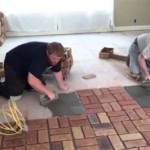
5. Secure the First Row
Start installation along a straight wall. Use a spacer to maintain a uniform gap between the wall and the hardwood. Ensure the first row is perfectly straight, as it will set the tone for the rest of the installation.
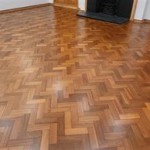
6. Stagger Planks
Avoid aligning end joints in adjacent rows. Instead, stagger them randomly to create a more natural look and enhance the strength of the flooring.
7. Use a Tapping Block or Floor Roller
To securely seat each plank, use a tapping block with a hammer or a floor roller. Apply pressure evenly to ensure a flush fit.
8. Allow for Expansion Gaps
Leave a small gap around the perimeter of the room to allow for seasonal expansion and contraction. Use spacers to maintain a consistent gap.
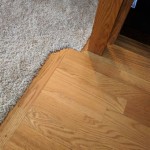
9. Cutting and Shaping
When reaching obstacles or corners, use a circular saw or jigsaw to cut planks to fit. For curved cuts, use a template or a freehand saw.
10. Finish and Protect
After installation, sand any uneven edges or transitions. Apply a suitable finish, such as polyurethane or stain, to protect and enhance the appearance of the hardwood.
Conclusion
By following these tips and tricks, you can achieve a professional-looking hardwood flooring installation. Remember to use quality materials, take your time, and pay attention to detail. With proper care and maintenance, your hardwood flooring will last for decades, adding beauty and value to your home.
:strip_icc()/101206836-29035ec5a7c34a12a4c00cd5101818d4.jpg?strip=all "How To Install Hardwood Floors")
How To Install Hardwood Floors

Flooring Installation Tips Tricks Door Jamb Last Row Cut Rip

How To Install Hardwood Flooring For Beginners

5 Common Hardwood Flooring Installation Mistakes And How To Avoid Them

How To Install Laminate Flooring For Beginners

Diy Engineered Hardwood Floor Installation Guide Four Generations One Roof Blog

Laminate Flooring Installation Tips And Tricks Bvg

How To Install Laminate Flooring Diy Tips And Tricks

Everything You Need To Know About Replacing Carpet With Hardwood Floors

Sub Flooring Installation Tips When Using Hardwood West Fraser Integrated Forestry Company
Related Posts