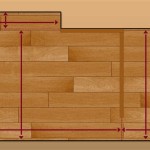
How To Install Engineered Wood Flooring On Subfloor
Installing engineered wood flooring on a subfloor can be a relatively straightforward process if you have the right tools and materials. Here are the essential steps to guide you through the installation:
Step 1: Prepare the Subfloor
Ensure that the subfloor is level, flat, and free of any debris or imperfections. If necessary, use a level to check for any uneven areas and sand or plane the surface to create a smooth base. Additionally, make sure the subfloor is dry and free of moisture to prevent warping or buckling of the flooring.
Step 2: Install an Underlayment
An underlayment provides cushioning and sound reduction beneath the engineered wood flooring. Roll out the underlayment over the prepared subfloor, ensuring it is taut and free of wrinkles. Use tape to secure the seams and prevent the underlayment from shifting during installation.
Step 3: Determine the Starting Point
Choose a starting point for the flooring installation, typically a corner or wall. Measure and mark a straight line parallel to the wall to serve as a guide for laying the first row of planks.
Step 4: Install the First Row
Start by placing a spacer along the guide line and installing the first plank. Use a tapping block and a hammer or mallet to gently tap the plank into place, ensuring it is flush with the wall and the adjacent plank. Continue installing the first row, using spacers to maintain equal spacing between the planks.
Step 5: Continue Installing the Flooring
Work your way across the subfloor, installing each row of planks in the same manner as the first row. Stagger the joints between the planks for added strength and stability. Use spacers to ensure consistent spacing throughout the installation.
Step 6: Cut and Fit Planks
As you reach obstacles such as walls, doorways, or corners, you may need to cut and fit the planks to fit. Measure the space carefully and use a saw to cut the planks to the desired length. Tap the cut planks into place, using spacers as needed.
Step 7: Install the Last Row
The last row of planks may require cutting to fit the remaining space. Measure and cut the planks accordingly, leaving a small gap between the flooring and the wall to allow for expansion.
Step 8: Secure the Flooring
Once all the planks are installed, secure the flooring to the subfloor using nails or staples. Use a nailer or stapler specifically designed for engineered wood flooring. Ensure the nails or staples are driven in at a slight angle to prevent the flooring from buckling.
Step 9: Finish the Installation
Once the flooring is secured, remove the spacers and install baseboards or moldings around the perimeter of the room to conceal the edges of the flooring and provide a finished look.

How To Install An Engineered Hardwood Floor

How To Install Lock Engineered Hardwood Flooring

How To Install Engineered Hardwood Floors 4 Easy Installation Options

How To Install Lock Engineered Hardwood Flooring

Which Method Should I Use To Install My Engineered Wood Floor Tesoro Woods

Installing Engineered Hardwood On Concrete Twenty Oak

Installing Engineered Wood Flooring On Underfloor Heating 5 Simple Steps Flooringhub Co Home Hub Elevate Your Space With Expert Tips Exclusive Offers

Engineered Wood Floor Installation In London Homes At Mr Sander

Which Method Should I Use To Install My Engineered Wood Floor Tesoro Woods

A Comprehensive Guide On Engineered Wood Flooring Installation Mersey
Related Posts


