How To Install Laminate Flooring On Stair Risers
Installing laminate flooring on stair risers can significantly enhance the aesthetic appeal of a staircase, providing a sleek and modern look. While often overlooked, the risers present an excellent opportunity to complement the existing flooring or create a striking contrast. This article provides a comprehensive guide to installing laminate flooring on stair risers, covering necessary tools, preparation steps, installation techniques, and essential considerations for a professional finish.
Before commencing any installation project, thorough preparation is paramount. This stage involves gathering the required tools and materials, assessing the existing stair structure, and preparing the surfaces for optimal adhesion. Neglecting these initial steps can lead to complications during installation and compromise the longevity of the finished product.
Gathering Tools and Materials
The first stage of any successful project involves acquiring the appropriate tools and materials. Using the correct tools ensures accuracy, efficiency, and a higher quality finish. For laminate flooring installation on stair risers, the following items are recommended:
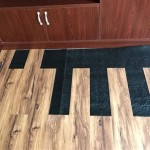
Laminate Flooring: Choose laminate planks or sheets that match or complement the existing flooring. Ensure that the thickness is appropriate for stair riser application, typically between 8mm and 12mm. It is essential to purchase sufficient material, accounting for waste from cuts and potential errors. An extra 10-15% is advisable.
Measuring Tape: A reliable measuring tape is crucial for accurate measurements of the stair risers. Precision in measurement is essential to prevent gaps and ensure a seamless fit.
Pencil: Used for marking cut lines on the laminate flooring. A sharp pencil ensures clear and accurate markings.
Square: A square helps to ensure that cut lines are perpendicular, which is particularly important for the corners of the stair risers. A combination square or a speed square can be used.
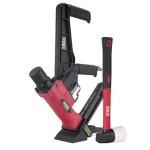
Saw: A saw is needed to cut the laminate flooring to the required dimensions. A circular saw, jigsaw, or hand saw can be used, depending on preference and the complexity of the cuts. If using a power saw, ensure it has a fine-tooth blade to minimize chipping.
Construction Adhesive: A strong construction adhesive is necessary to securely bond the laminate flooring to the stair risers. Choose an adhesive specifically designed for use with laminate and wood surfaces. Ensure the adhesive is compatible with the substrate material of the stair riser.
Caulk Gun: A caulk gun is required for applying the construction adhesive. The gun allows for controlled and even application of the adhesive.
Safety Glasses: Safety glasses are essential to protect eyes from dust and debris during cutting and installation.
Dust Mask: A dust mask protects the respiratory system from inhaling dust particles generated during cutting and sanding.
Level: A level is used to check that the stair risers are plumb and the laminate flooring is installed straight. Any discrepancies need to be corrected before installation.
Clamps or Painter's Tape: Clamps or painter's tape can be used to hold the laminate flooring in place while the adhesive dries. This ensures a secure bond and prevents movement.
Sandpaper or Sanding Block: Sandpaper (medium grit) or a sanding block might be needed to smooth uneven surfaces on the stair risers before installation.
Putty Knife or Scraper: A putty knife or scraper is used for removing old adhesive or debris from the stair risers.
Vacuum Cleaner or Shop Vac: A vacuum cleaner or shop vac is necessary for cleaning the stair risers before and after installation, ensuring a clean surface for adhesion.
Preparing the Stair Risers
Proper preparation of the stair risers is essential for achieving a professional and long-lasting installation. This involves cleaning, sanding, and ensuring the surface is structurally sound and level. Inadequate preparation can lead to adhesion problems and uneven surfaces.
Cleaning: Thoroughly clean the stair risers to remove any dust, dirt, debris, or old adhesive. Use a putty knife or scraper to remove any loose paint or adhesive residue. Vacuum the entire surface to ensure it is free of particles.
Sanding: Inspect the stair risers for any uneven surfaces, bumps, or imperfections. Use sandpaper or a sanding block to smooth out these areas. Sanding provides a more even surface for the laminate flooring to adhere to, improving the overall finish.
Leveling: Check the stair risers for plumb using a level. If the risers are not plumb, shimming may be necessary to create a level surface. Use wood shims to fill any gaps or correct any angles, ensuring the laminate flooring will be installed straight.
Priming (Optional): In some cases, applying a primer to the stair risers can improve adhesion, especially if the surface is porous or painted. Choose a primer that is compatible with both the stair riser material and the construction adhesive. Allow the primer to dry completely before proceeding with the installation.
Measuring and Cutting: Accurately measure each stair riser to determine the dimensions of the laminate flooring pieces. It's crucial to measure each riser individually, as they may not all be exactly the same size. Transfer the measurements to the laminate flooring and use a square to ensure accurate cut lines. Cut the laminate flooring to the measured dimensions using a saw. Test fit each piece to ensure it fits properly before applying adhesive.
Installing the Laminate Flooring
The installation stage involves applying adhesive and securing the laminate flooring to the stair risers. Proper technique and attention to detail are crucial to ensure a secure bond and a visually appealing finish.
Applying Adhesive: Apply construction adhesive to the back of the laminate flooring pieces using a caulk gun. Apply the adhesive in a consistent pattern, such as vertical or horizontal lines, ensuring full coverage. Avoid applying too much adhesive, as this can cause it to squeeze out around the edges during installation.
Positioning and Securing: Carefully position the laminate flooring piece onto the stair riser, aligning it with the top and side edges. Press the laminate flooring firmly against the riser to ensure full contact with the adhesive. Use clamps or painter's tape to hold the laminate flooring in place while the adhesive dries. Clamps are particularly useful for larger pieces, while painter's tape can be used for smaller pieces or to secure edges.
Repeat the Process: Repeat the process of measuring, cutting, applying adhesive, and securing the laminate flooring for each stair riser. Work systematically, moving from one riser to the next. Regularly check the alignment and level of the laminate flooring to ensure a consistent finish.
Cleaning Up: Once the adhesive has dried, remove the clamps or painter's tape. Clean up any excess adhesive that has squeezed out around the edges using a damp cloth or a solvent recommended by the adhesive manufacturer. Inspect the installed laminate flooring for any imperfections or gaps. Fill any small gaps with caulk that matches the color of the laminate flooring.
Adding Finishing Touches: Consider adding trim or molding to the top and side edges of the laminate flooring to provide a finished look and protect the edges from wear. Choose trim or molding that complements the laminate flooring and the overall aesthetic of the staircase. Install the trim or molding using adhesive or small nails, ensuring it is securely attached.
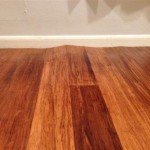
Installing laminate flooring on stair risers is a manageable project that can significantly enhance the appearance of a staircase. By carefully following these steps, any individual can achieve a professional and visually appealing result.

How To Install Laminate Flooring On Staircase Step By Guide

Installing Stair Risers Diy Laminate On Stairs

How To Install Laminate Flooring On Stairs Direct Wood

Laminate Stairs Installation How To Install Stair Tread Riser Overlap Nose Tips Mryoucandoityourself

How To Install Laminate Flooring On Stairs Direct Wood

How To Install Vinyl Plank Flooring On Stairs In 6 Steps Inc

How To Install Laminate On Stairs Follow Our Essential Guide Laying And Costing For

Laminate On Stairs With Bad Installation

Laminate On Stairs How To

How To Install Vinyl Plank Flooring On Stairs In 6 Steps Inc
Related Posts